Happy New Year 2017!!!
This is part 6 of the Sitecore DevOp series. Previously, we have installed a local instance of the Sitecore site, configured VS project, configured TDS, configured Sitecore Glass and added our project to source control. In this post we will install blank Sitecore site on QA server and setup QA website’s Web Deploy publish profile with our VS project. The blog series is aimed at newer audience and developers who are setting up CI for the first time.
Assumptions
I am assuming that you have RDP access to at least 3 Windows based server within your local network/organization. From the diagram below, the QA server will host CM and CD part of the website (qa.myproject.local). The DB server will host SQL server and MongoDB databases. The CI server will host the TeamCity server (teamcity.myproject.local). The blog series is based upon Sitecore version 8.2

This is only a QA setup diagram, for staging and production environments, it is strongly recommended to add separate CD and CM servers.
Step 1 : Configure DB Server
The first step will be to configure the DB Server.
- Download and install SQL express
- Download and install MongoDB
For compatibility purposes of SQL and MongoDB versions with your version of Sitecore, please check the KB page https://kb.sitecore.net/articles/087164
Setup MongDB to run as Window Service and open the relevant ports from the windows firewall utility on the DB server for incoming and outgoing connections.
Alternatively, if you are new to MongoDB and not sure how to configure and install MongoDB, you can also use mlab free Sandbox environment which gives 500 MB of free storage. You can setup your MongoDB servers following this post and just update the connection strings for the QA server config file.
Step 2 : Install Sitecore Databases
RDP to the DB server and install Sitecore using the official installer. During the wizard steps, select the ‘New Instance‘ option and then select ‘Database Only‘ option:
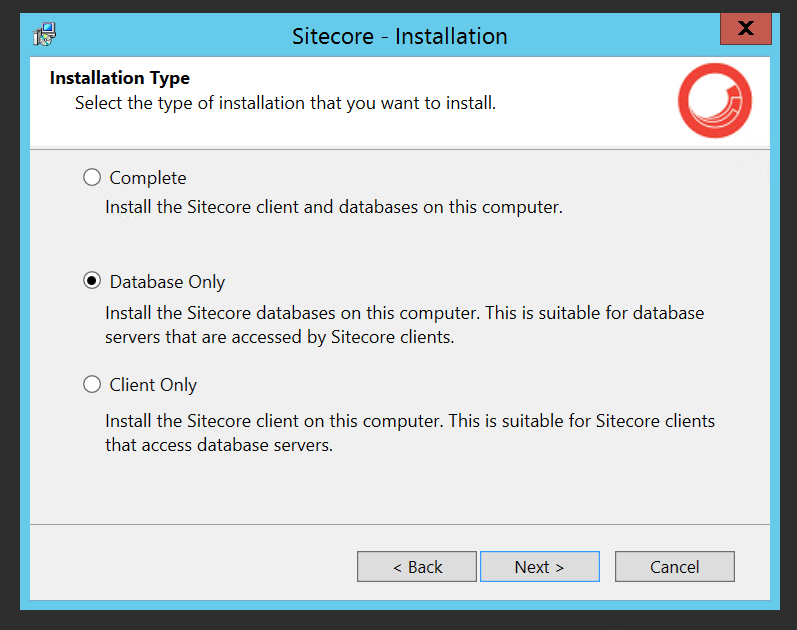
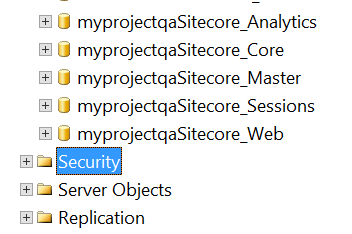
Follow the installation wizard as per the installation guide and complete it.At the end, you should have the following 5 SQL databases:
Core, Master, Web, Analytics and Session
Step 3 : Configure QA Server
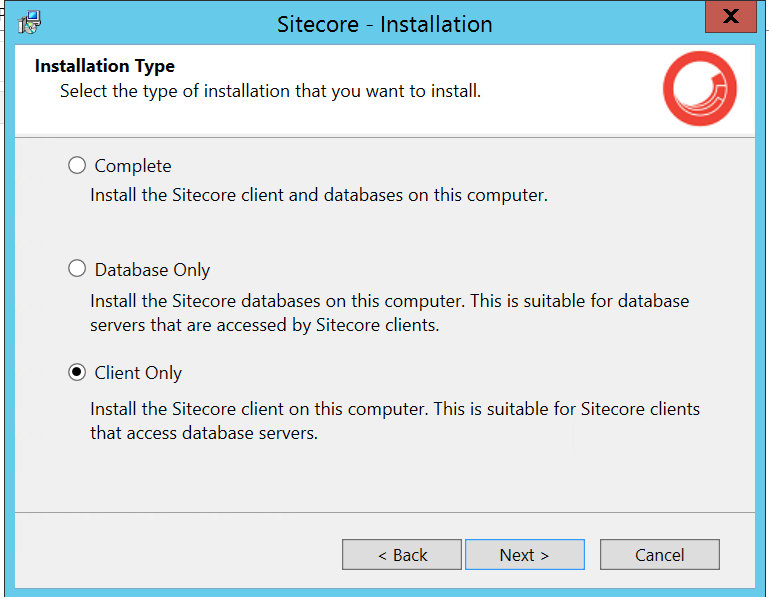
RDP to the QA server and using the official installer, select ‘New Instance’ and ‘Client Only’ option:
Follow the installation wizard and complete all steps. Update your local DNS server or your own hostfile so that http://qa.myproject.local point towards the QA server. Login via the CMS interface using default admin credentials and complete the post-deploy steps from the installation guide.
Step 4: Configure Web Deploy on QA Server
Web Deploy is an IIS extension/utility that provides ability to deploy new updates on the website using IIS only. If your server does not have this utility for IIS, install it via standard installer.
Once installed complete the following steps:
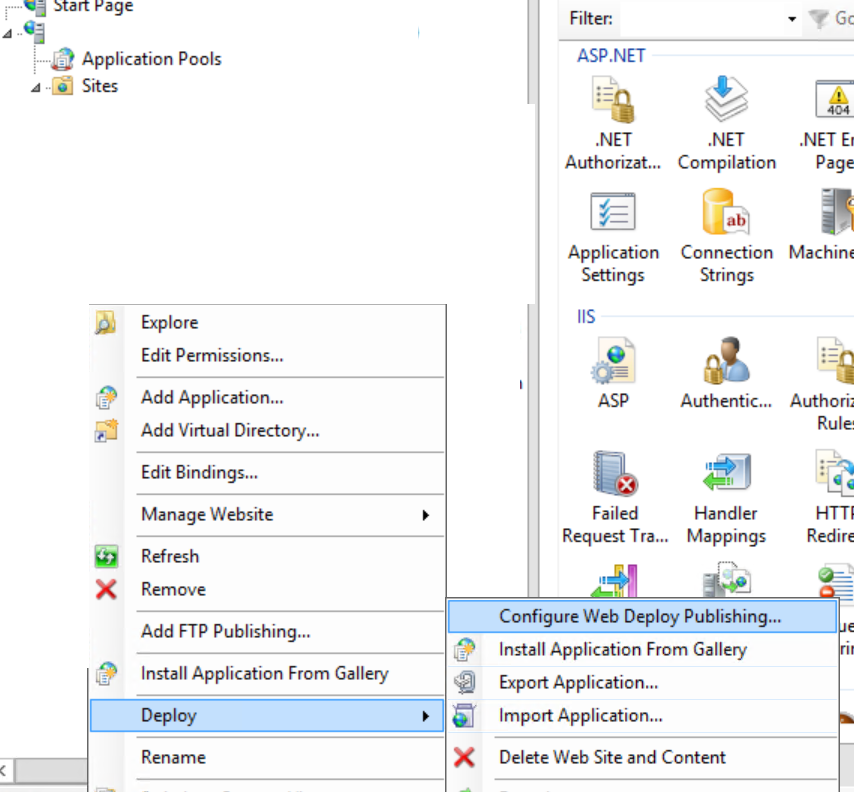
- Open IIS, navigate to the website which corresponds to http://qa.myproject.local
- Right-Click on the website and generate WebDeploy Publish Profile
- Select a local computer user like (machinename\WDeployAdmin) and give this user admin rights by making it of the local admin groups.
- Save the publish profile as a file on the desktop and copy it to your local machine.
As a reference, follow the installation guide.
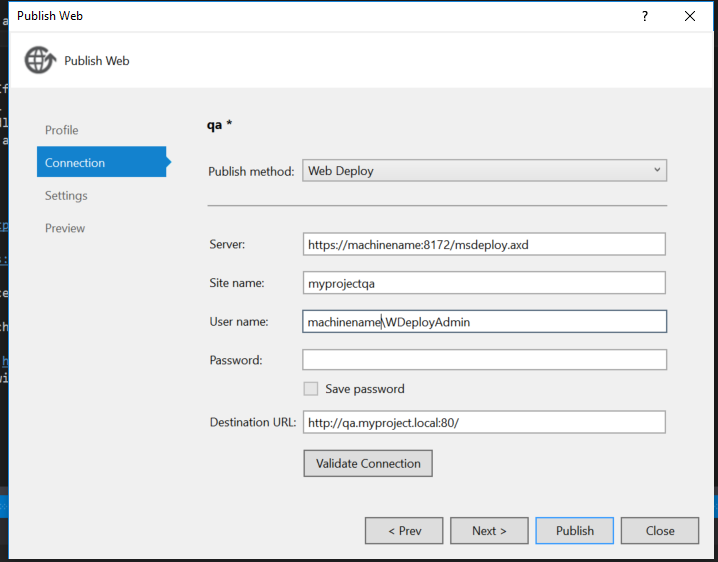
Publish Profile for QA server
Open the VS project and import the profile for the QA site. You can open the publish profile using notepad and re-name the profile name. Make sure you can validate the connection for the publish profile. If you are getting errors, please resolve them using this post before proceeding further:
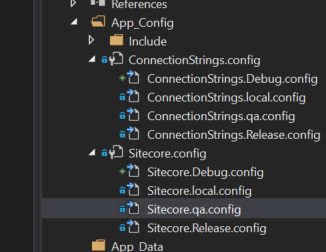
XML transform files for QA profile
Add XML transform files for the new ‘qa‘ publish profile. As a minimum, add transforms for ConnectionStrings.config and Sitecore.config. You will be required to update values for connection strings and dataFolder:

Try to publish to the QA server via VS project, if everything has been done correctly, you should see the successful message. Navigate to http://qa.myproject.local and ensure everything is correct. If there are errors, resolve them before proceeding further.
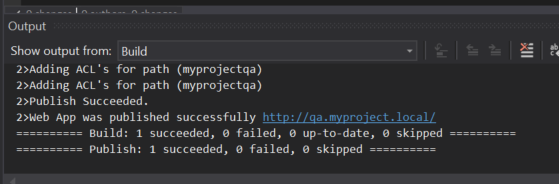
This ensures that Web Deploy is configured correctly and there are no permissions or network issues. This is only the initial part, what we really want to build and deploy from our CI server and not from a local machine of a developer.
Step 5: Setup CI server (TeamCity and Plug-ins)
Assuming it is a brand new Windows server with nothing installed, you need to download and install the following the TeamCity server
- TeamCity latest stable version
- Visual Studio Community Edition
- Team Development Server for Sitecore (TDS)
- Chocolaty
- Git
All of the above tools have a standard Windows base installer and they follow ‘Click Next’ type wizard to complete. Once all these utilities are installed, we will begin setting up the CI server in next blog post.
Stay tuned.
Thanks
Related Blogs
- Part 1 – Continuous Integration – Why your Sitecore project deployments must be automated ?
- Part 2 – Setup and Configure Visual Studio Sitecore Project
- Part 3 – Setup and Configure TDS
- Part 4 – Setup Sitecore Glass
- Part 5 – Setup Source Control (Git)
- Part 6 – Setup QA Server, DB server and CI server
- Part 7 – Setup Continuous Integration using Team City
- Part 8 – Setup Slack Notifications with TeamCity and Bitbucket
