The latest release of Sitecore CMS 9.1 (initial release) ships with number of improvements and enhancements to the core platform. One of the key feature is introduction of the Sitecore CortexTM across the platform. Sitecore Cortex is a very broad topic and not the intent for the blog post, but in very short and non-tech words, Sitecore CortexTM can be described as the brain of Sitecore CMS that can analyze data and produce intelligent insights about the content.

One of the cool things that you can do right now with Sitecore CortexTM is auto-tagging. The integration with Open Calais API is out of the box, although you can integrate with any other provider by writing custom code. This post will show you to set up auto-tagging with Open Calais API provider.
What is Open Calais?
Open Calais analyzes the semantic content of input content using a combination of statistical, machine-learning, and custom pattern-based methods. The algorithms developed by the Text Metadata Services (TMS) group at Thomson Reuters output highly accurate and detailed metadata. For more detailed information, see the official Open Calais documentation FAQ.
Auto-Tagging Setup
Pre-requisites : You should have Sitecore 9.1 installed on your local machine or in Azure PaaS.
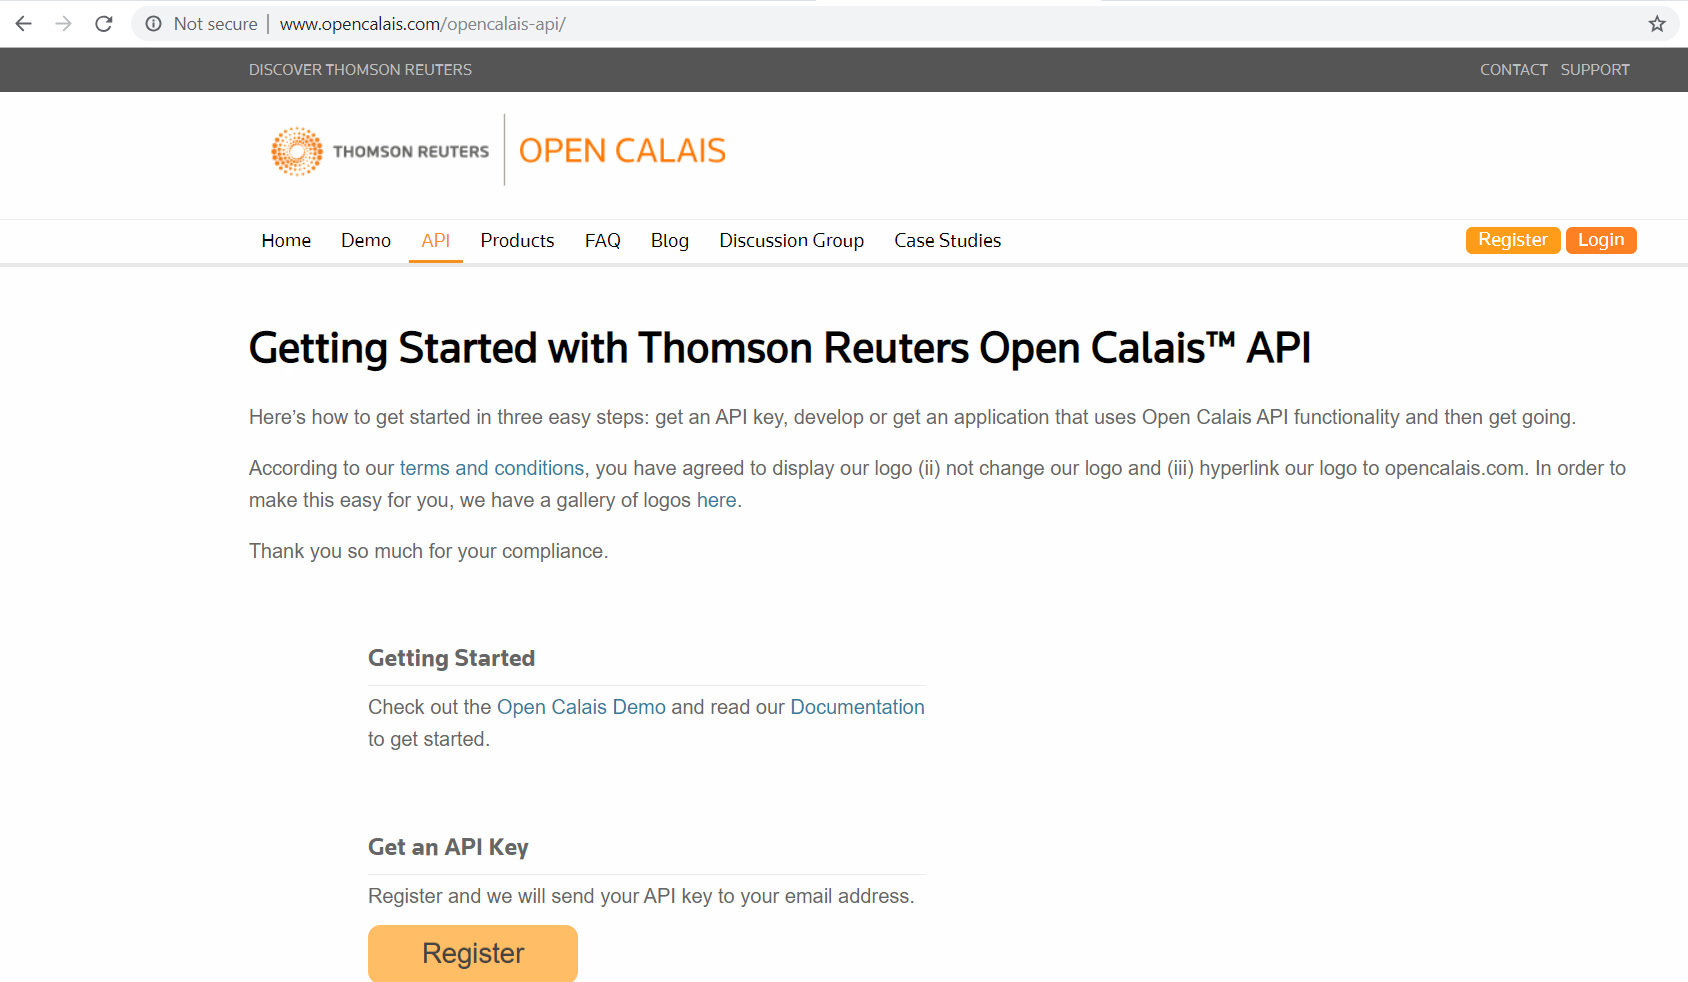
Step1 : Register a free account with Open Calais
Go to http://www.opencalais.com/opencalais-api/ and create a free account:
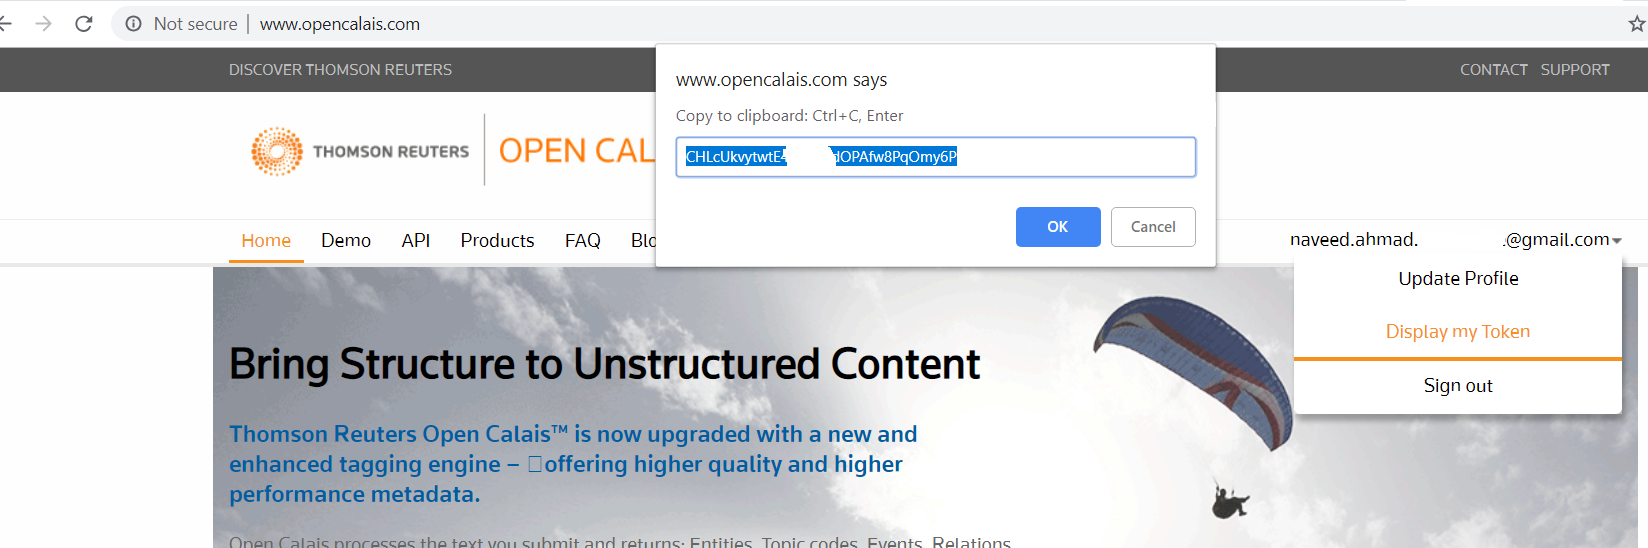
Step 2: Get your secret API Key
Click on the profile button and get your secret key. (Perm ID)
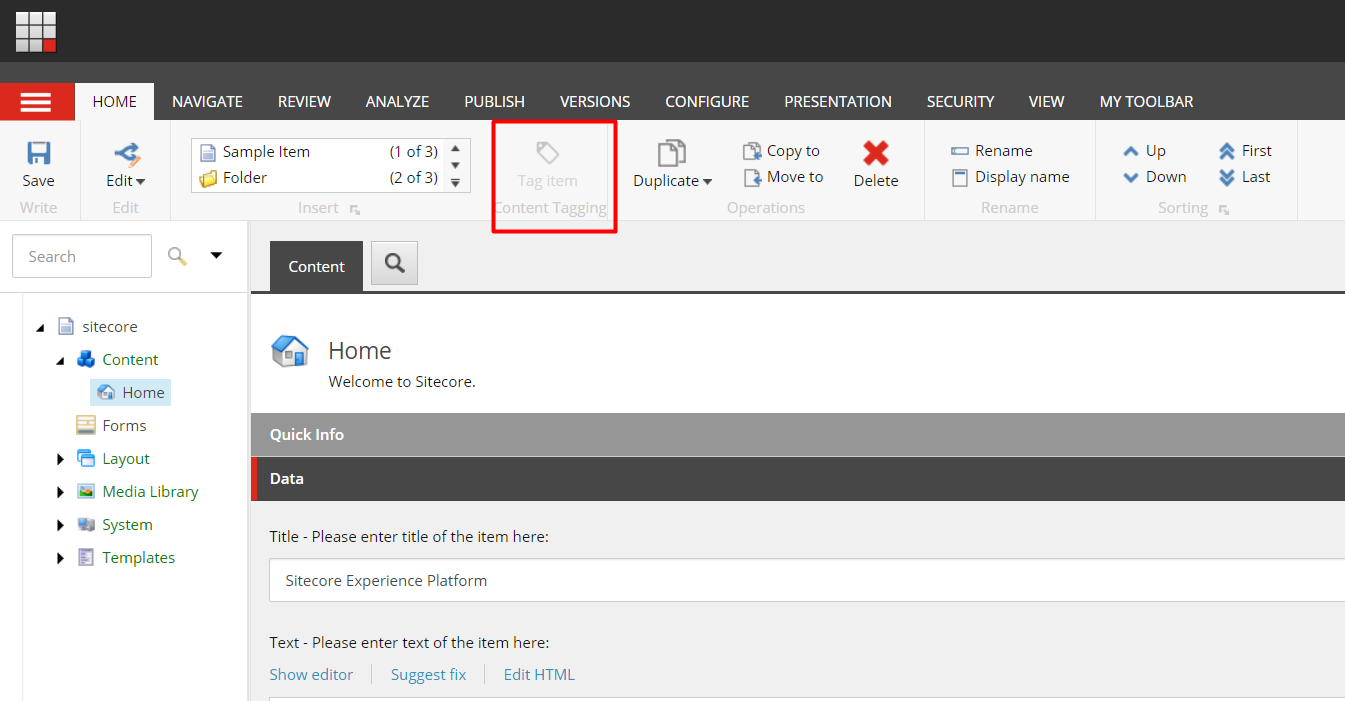
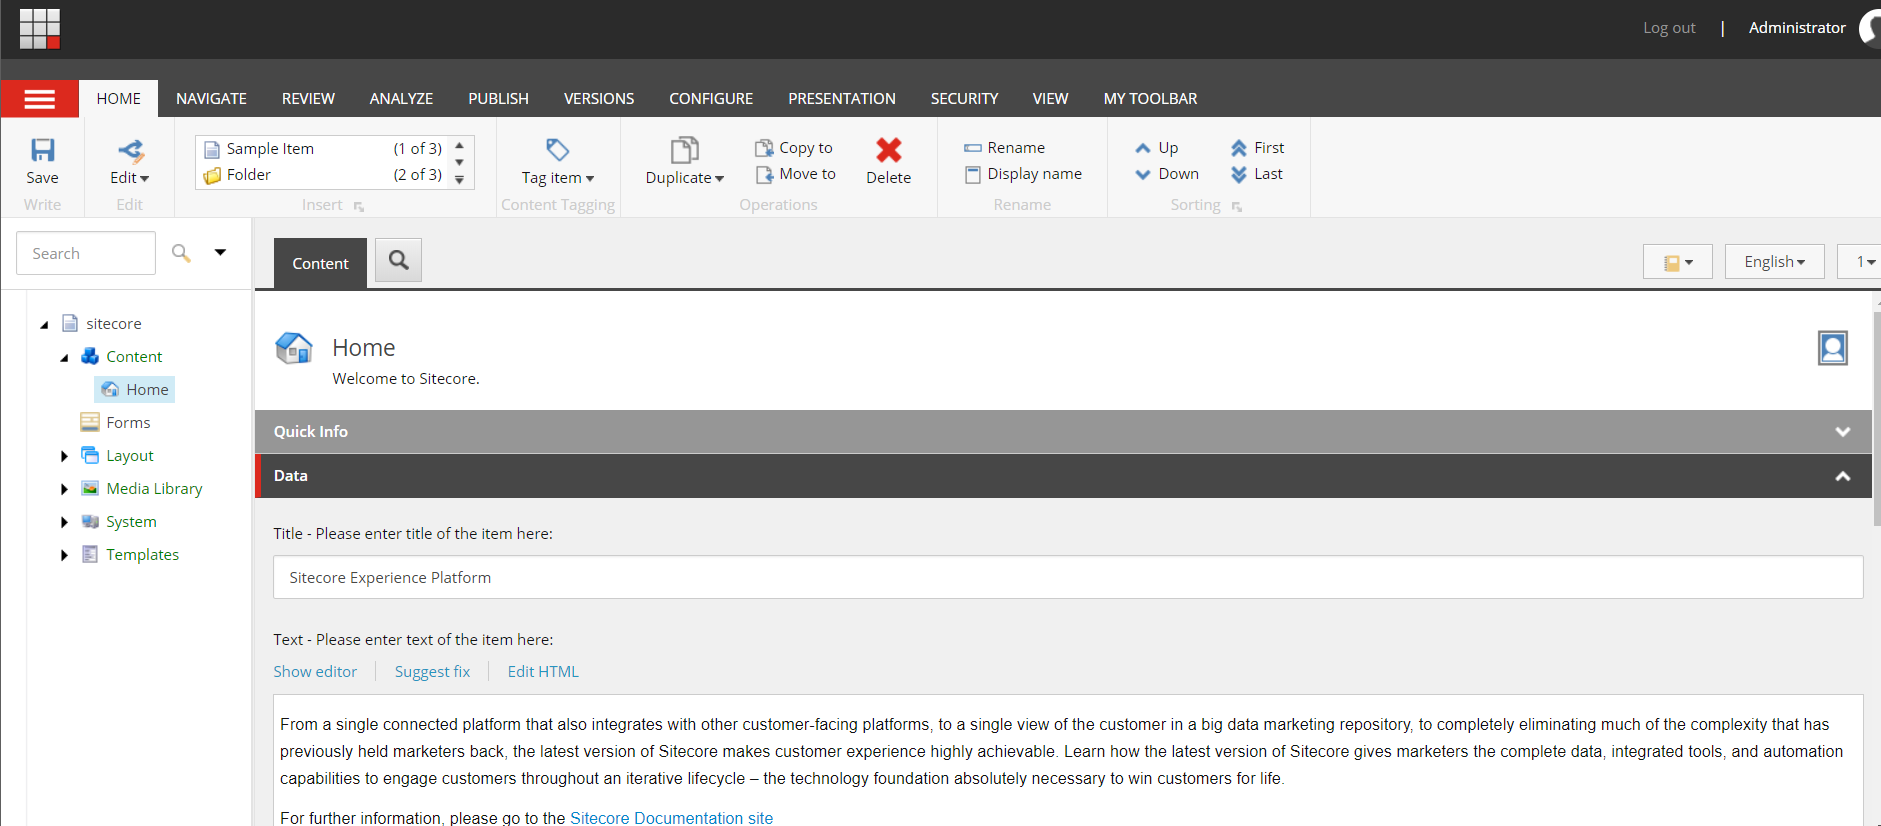
Step 3: The new Content Tagging Option
When you log-in to Sitecore 9.1, under the Home Tab, you will see a new Content Tagging option:
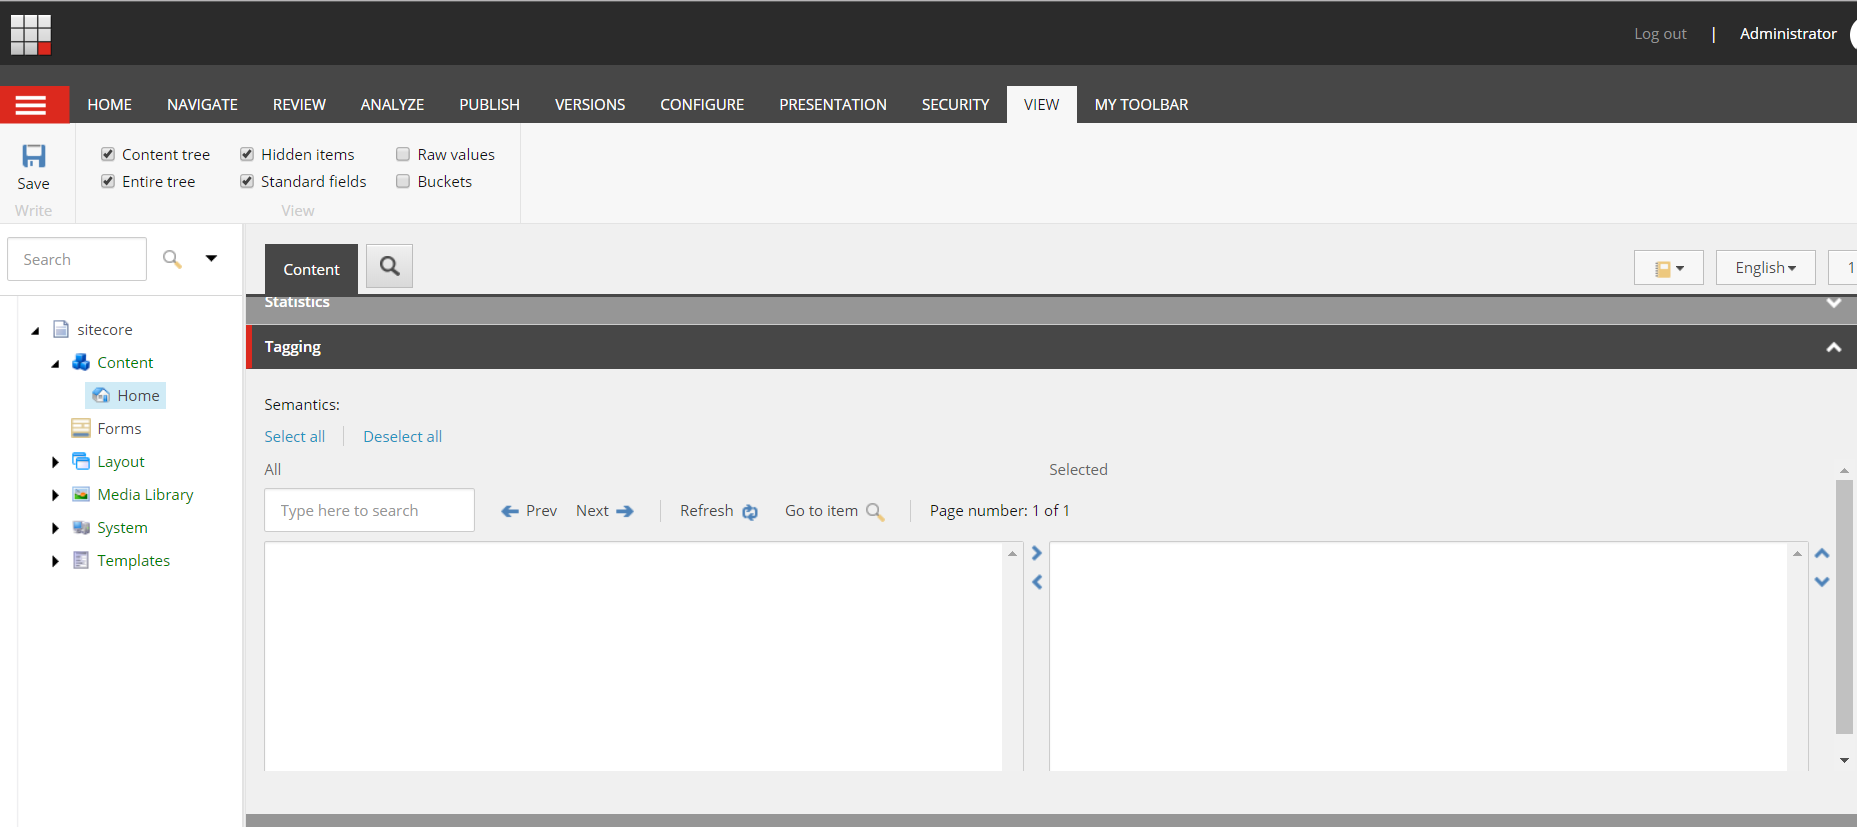
Step 4: Verify the initial tag field
Scroll down to the system defined Tagging section and verify there are no tags:
Step 5: Create a config patch
On your deployed folder, under location /site/App_Config/Sitecore/ContentTagging you will find files related to Open Calais settings. You can update the Sitecore.ContentTagging.OpenCalais.config file or a better option is to create a patch file as below and upload it to the /App_Config/Include folder location:
This file contains hidden or bidirectional Unicode text that may be interpreted or compiled differently than what appears below. To review, open the file in an editor that reveals hidden Unicode characters.
Learn more about bidirectional Unicode characters
| <?xml version="1.0" encoding="utf-8"?> | |
| <configuration xmlns:patch="http://www.sitecore.net/xmlconfig/"> | |
| <sitecore> | |
| <settings> | |
| <setting name="Sitecore.ContentTagging.OpenCalais.CalaisEndpoint" value="https://api.thomsonreuters.com/permid/calais" /> | |
| <setting name="Sitecore.ContentTagging.OpenCalais.CalaisAccessToken" value="[UpdateThisWithYourOwnKey]" /> | |
| <setting name="Sitecore.ContentTagging.OpenCalais.CalaisLanguage" value="English" /> | |
| </settings> | |
| </sitecore> | |
| </configuration> |
Step 6: Check the Tagging Tab
After you upload the file, you can go back to the content editor and check the ‘Content Tagging’ tab, it will be enabled
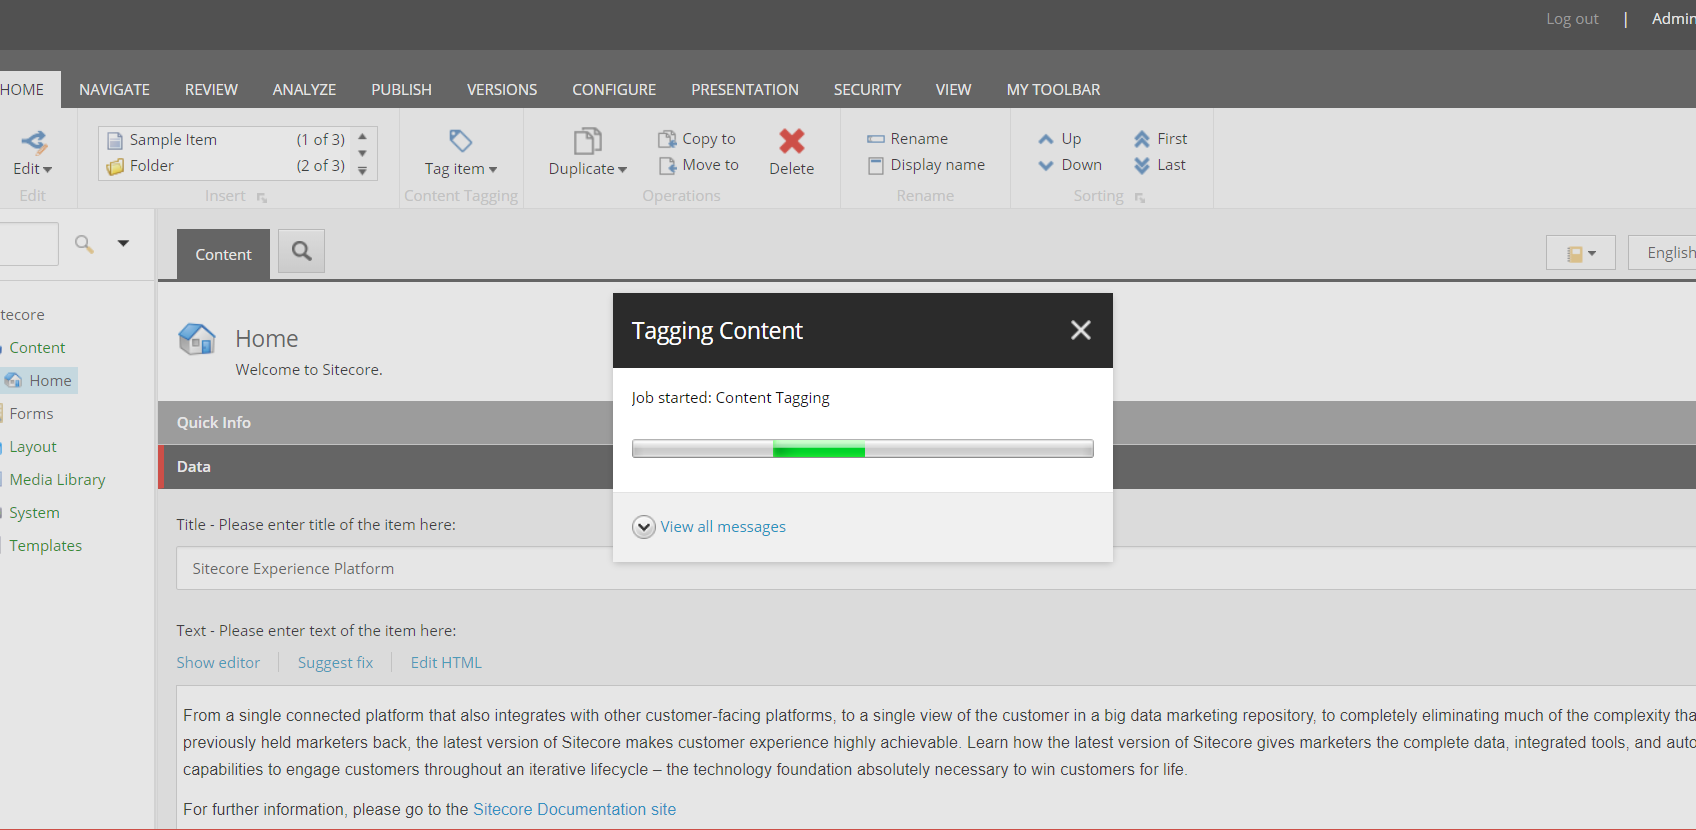
Step 7: Start Tagging
Click on the ‘Tag Item’ button and it will start tagging your content
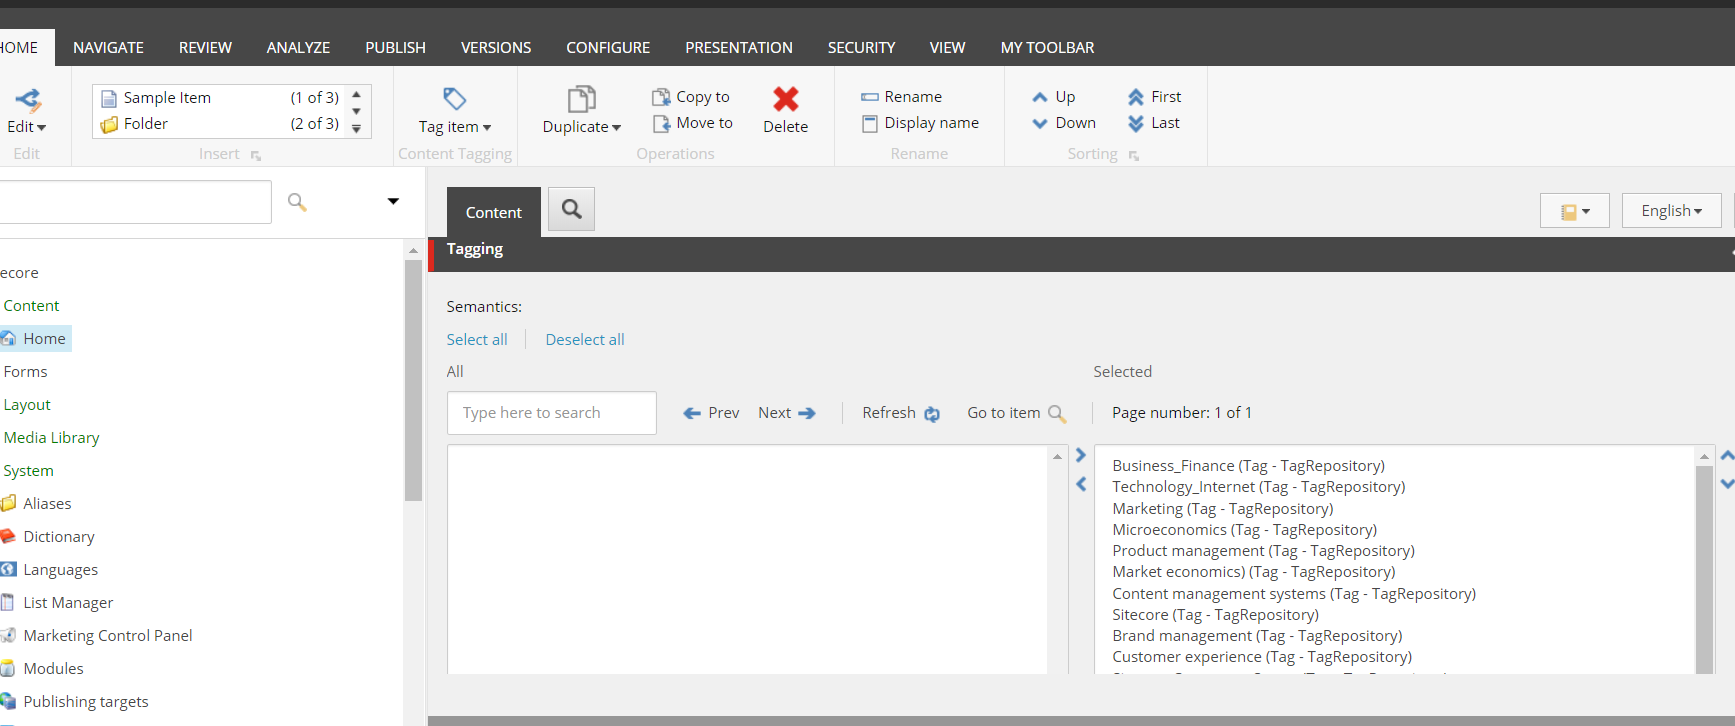
Step 8: Review Tag Field
Once the tagging process is finished, if you review the tagging field again, it will be populated with the tags.
(You may need to click on another item and then click back on the item to see the tags)
That’s it, you are all configured to do auto-tagging.