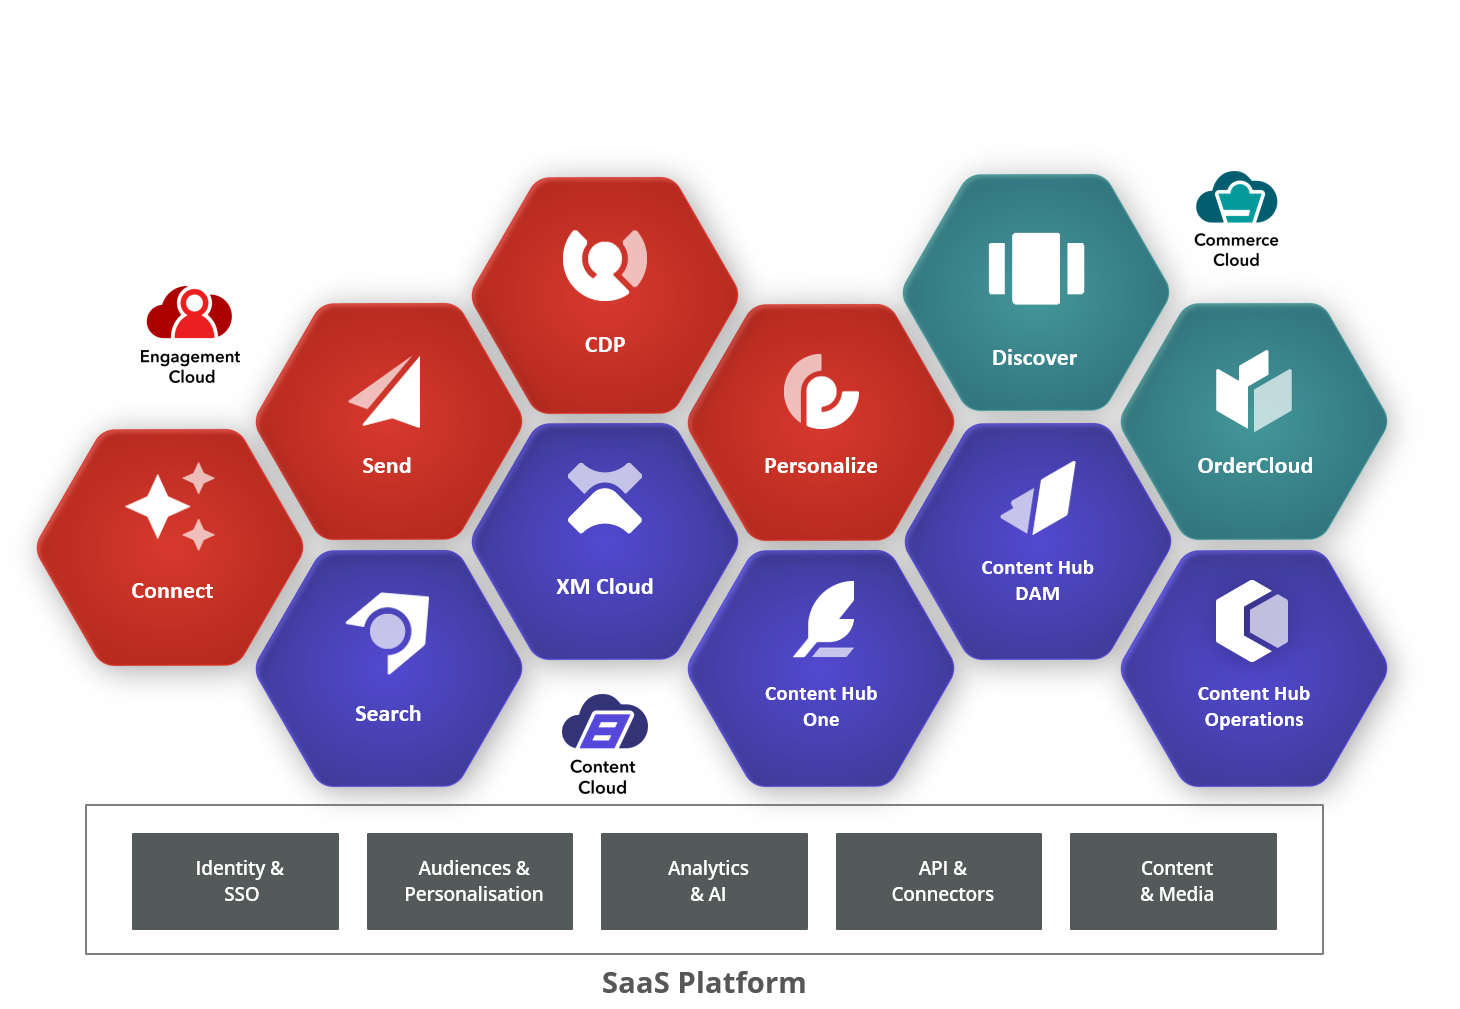
Sitecore’s suite of composable DXP products enables step-by-step modifications and enhancement to your existing digital ecosystem. Sitecore Commerce Cloud consists of two composable DXP products: Sitecore OrderCloud and Sitecore Discover.
Sitecore OrderCloud offers flexible architecture supporting everything from straightforward commerce for local D2C brands to complex global B2B2X marketplaces. Its MACH-oriented structure ensures enterprise-level preparedness, scalability, dependability, and top-tier performance for its users.
Sitecore Discover ensures fast and hyper-relevant search results and recommendations throughout all your product listings. It offers AI-powered features such as “recommended products”, “trending products”, or “customers also bought this product” through dynamic components.
Sitecore Connect is an integration platform that lets you connect your Sitecore DXP products with other applications in your ecosystem. It is built on top of Workato and helps you create integrations with a no-code or low-code approach.
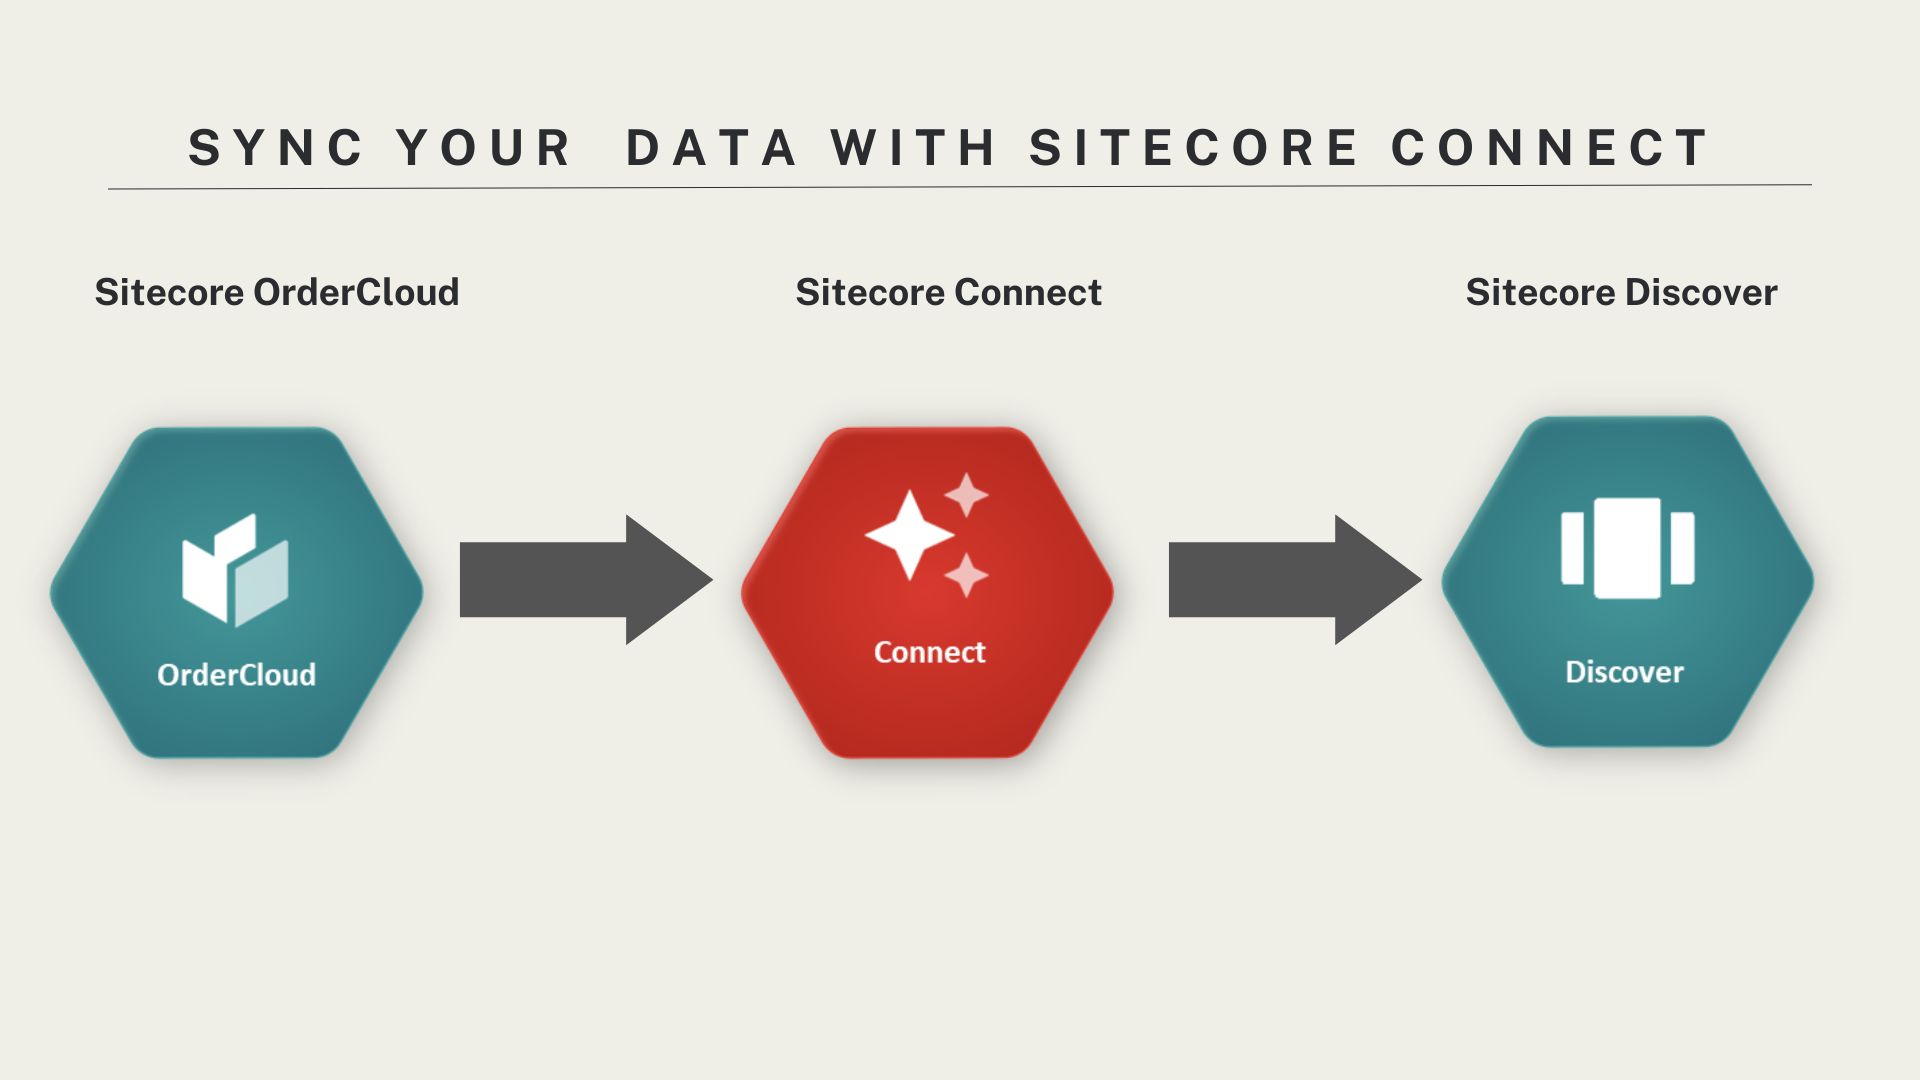
This blog will explore how we can send data from Sitecore OrderCloud to Sitecore Discover via Sitecore Connect using a low-code approach.
Assumptions
- Your commerce product data is in Sitecore OrderCloud.
- You have access to Sitecore Discover’s CEC portal.
- You have uploaded the initial product catalog as per the product feed specifications.
- Your commerce website is configured to display Sitecore Discover’s widgets like Trending Products with product prices.
Use Case
- As a product admin, when I update any product price in Sitecore OrderCloud, I want that price change to be reflected in real-time in Sitecore Discover as well.
Implementation Strategy
The implementation strategy will look like this:
- Implement a ‘Webhook‘ in Sitecore OrderCloud for price update API call.
- Enable and use the Sitecore Discover’s incremental feed API call to receive the data.
- Build a Sitecore Connect low-code recipe to capture the webhook and push the update.
Let’s do this!
1-Implement a Webhook in Sitecore Discover
The OrderCloud API allows users to set up custom HTTP callbacks, commonly called webhooks. You can easily set up these webhooks for your entire marketplace or specifically for an individual application. Only OrderCloud endpoints that make changes to the database (such as POST, PUT, PATCH, DELETE) can activate these webhooks.
OrderCloud offers two kinds of webhooks:
Post-Hook: This is best suited for mirroring state alterations to a different database (like analytics) or initiating other actions, for instance, sending a text alert to a user.
Pre-Hook: This is primarily used to verify incoming requests, like checking the validity of an address that’s being added or modified.
We will register a “Post-Hook” for our use case as we want to report that a product’s price has been changed.
Registering a Webhook
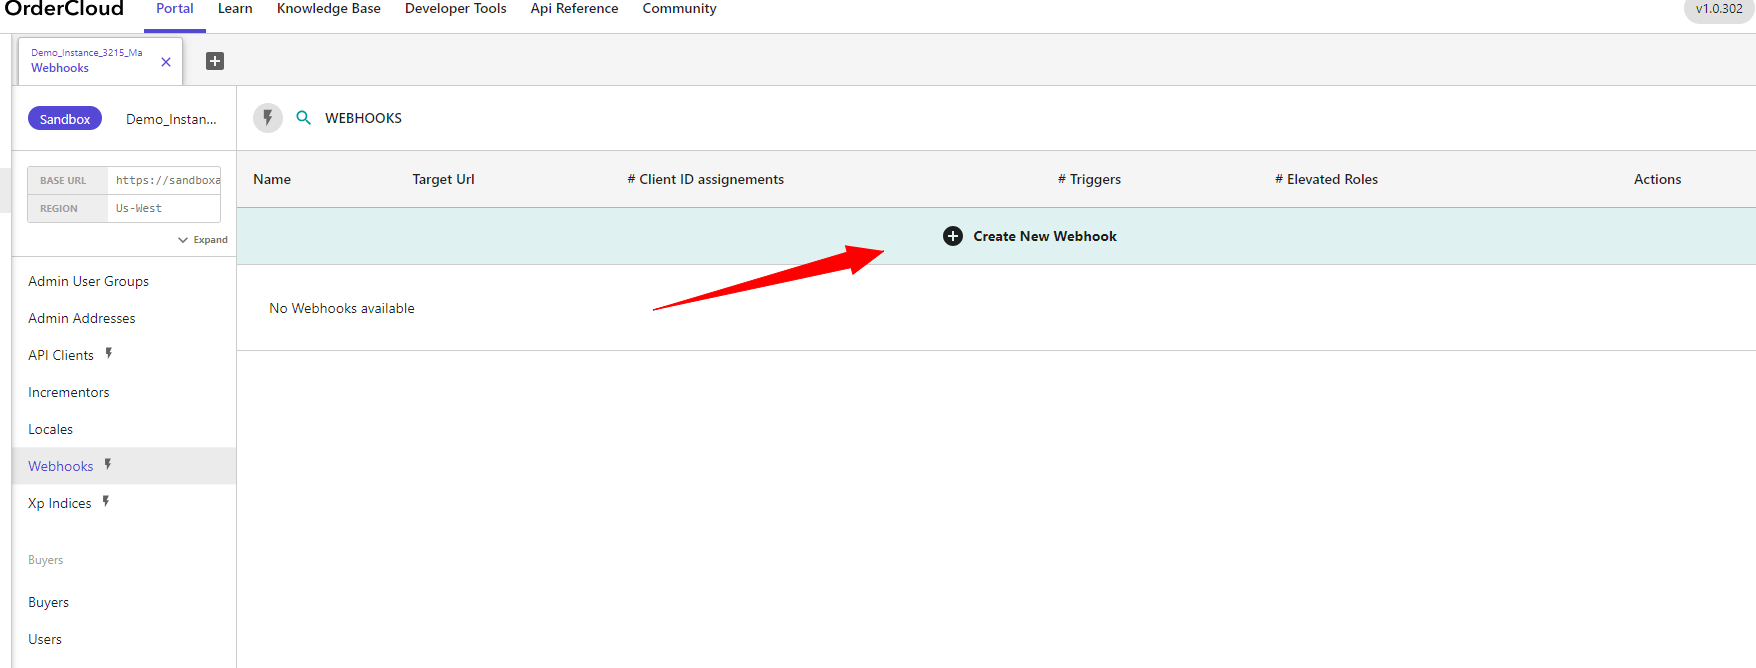
In the Sitecore OrderCloud portal, navigate to the ‘Webhook’ resource endpoint and click on ‘Create New Webhook’ as shown below:
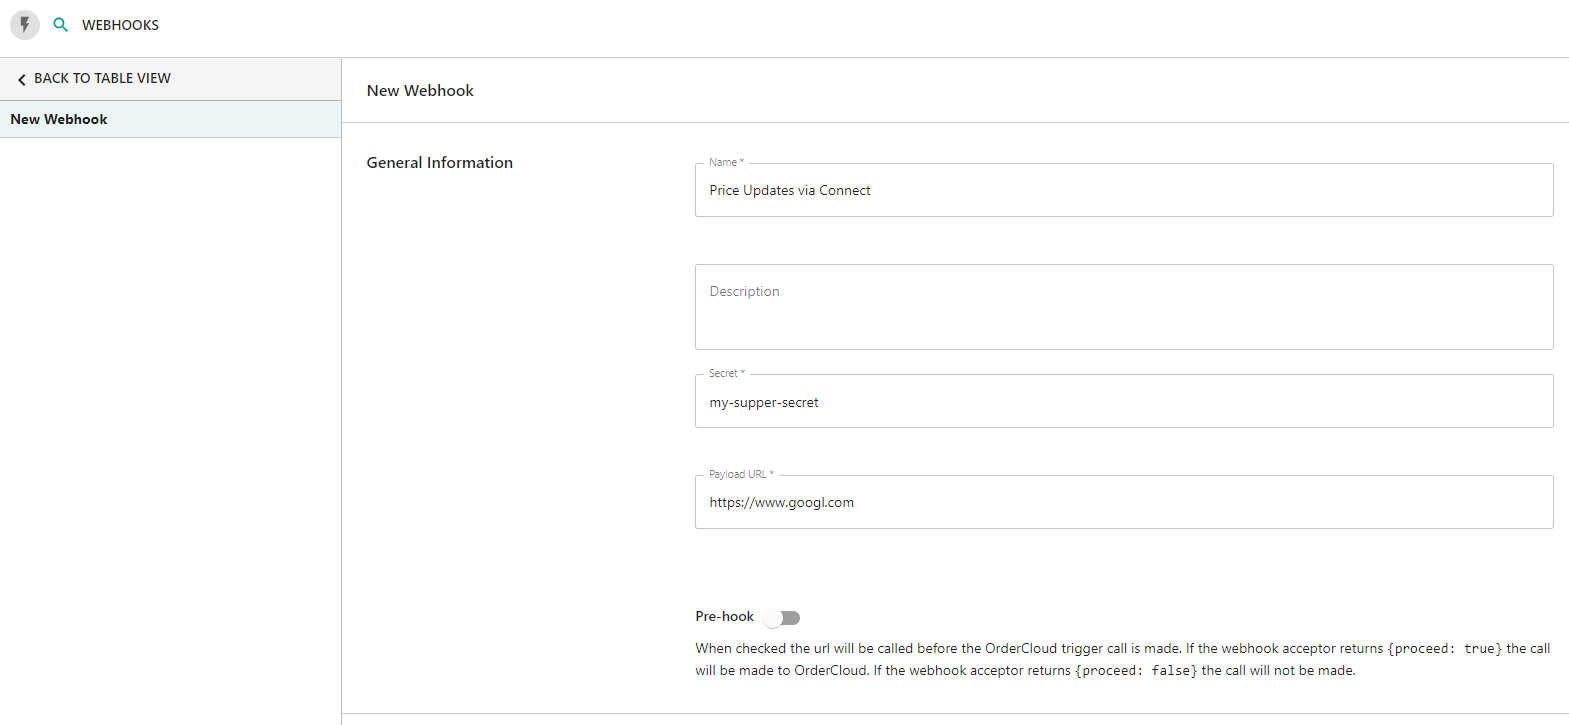
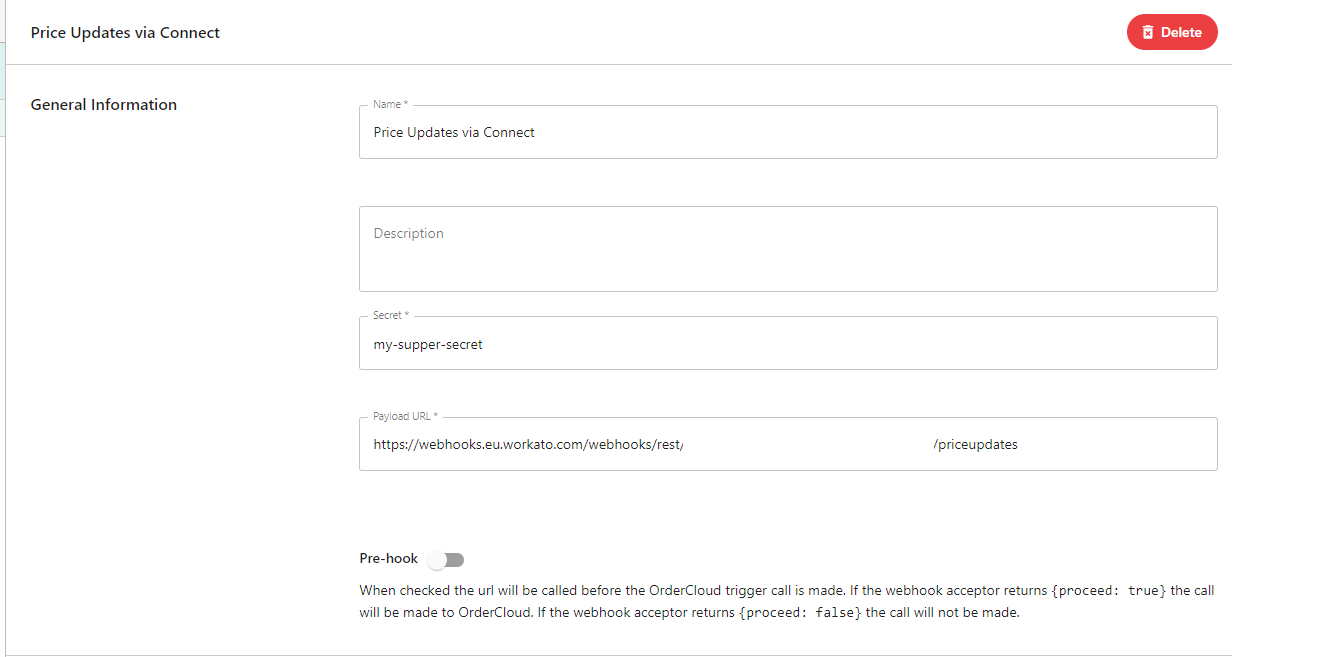
In the General Information section, enter the following information:
- Name: Price Updates via Connect (or you can choose something else)
- Secret: “my-super-secret” (or you can choose something else)
- Payload URL: https://www.google.com (a temporary URL, that will be replaced later)
In addition, select the information as follows:
API Client Assignments: Select a ‘Seller’ or ‘Middleware Integrations’
Trigger Events: Price Schedules / PATCH (Partially update a price schedule)
Elevated Roles: Full Access
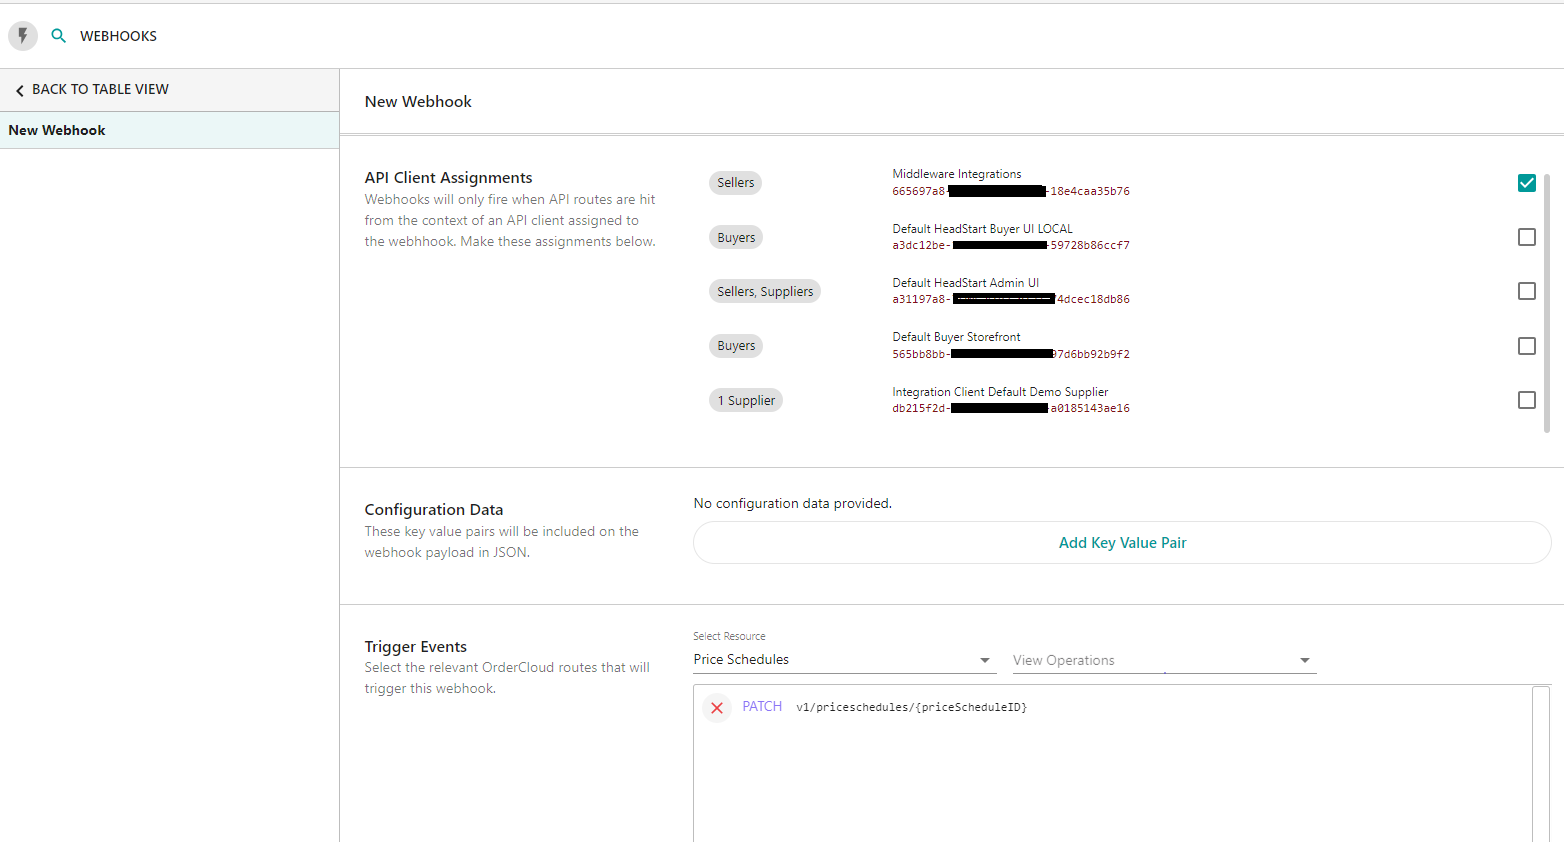
And then, at the end, click the ‘Create New Webhook‘ button.

If you prefer JSON format to register this webhook, you may use the following (replace the middleware integration API client ID with your one) with the POST call
{

	"Name": "Price Updates via Connect",
	"Url": "https://www.google.com",
	"HashKey": "my-supper-secret",
	"ElevatedRoles": [
		"FullAccess"
	],
	"ConfigData": [],
	"BeforeProcessRequest": false,
	"ApiClientIDs": [
		"665697a8-XXXXX-YYYYYY-18e4caa35b76"
	],
	"WebhookRoutes": [
		{
			"Route": "v1/priceschedules/{priceScheduleID}",
			"Verb": "PATCH"
		}
	]
}
That’s it, and your webhook is registered. We will come back to it once we have the exact payload URL. You can find more information about webhooks here.
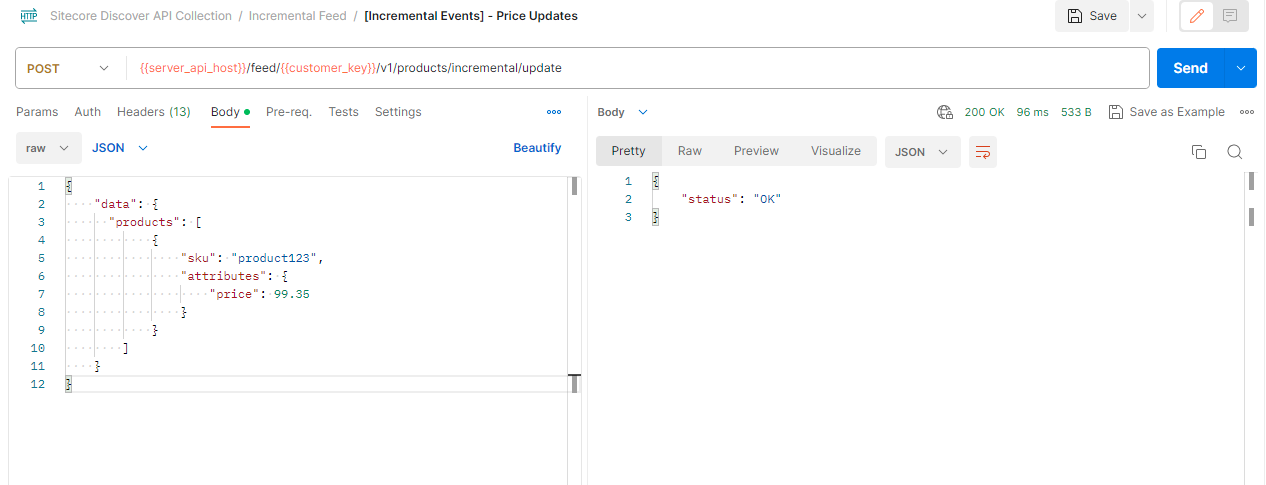
2-Enable Sitecore Discover Incremental Feed API
Next, we must ensure that our Sitecore Discover incremental feed API works as expected, with no errors. Please follow one of my previous posts if you are enabling it for the first time and validate it. I typically use Postman to test API calls before building them in an application. I can verify the results that Sitecore Discover’s API is configured correctly.
3 – Create a Sitecore Connect Recipe
Now, the fun begins! I built a custom Sitecore Connect recipe following these simple steps:
1 – Start the job
2 – Receive the HTTP webhook
3 – Execute a JS code to send data
4 – Send an email confirmation
5 – Stop the job

The rest of the blog is about how to set up this recipe from scratch, followed by a video demo of end to end testing!
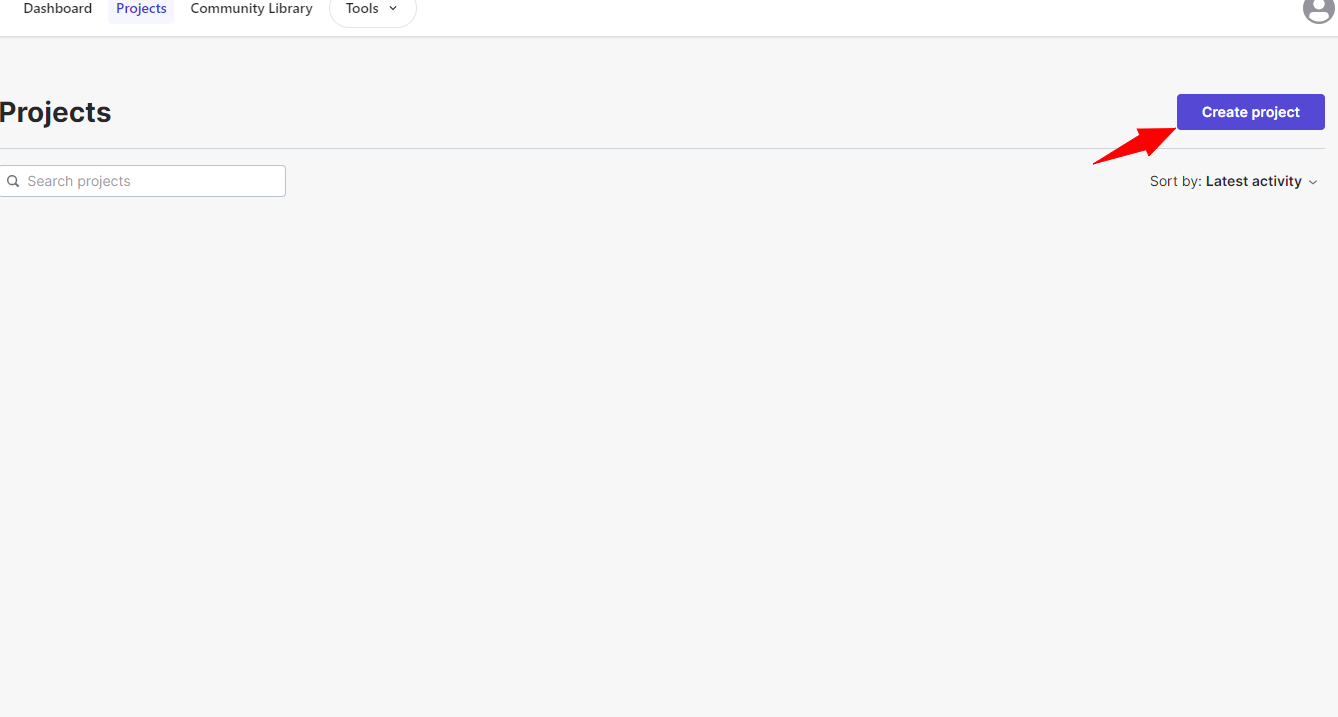
3.1 – Setup Project
Login to Sitecore Connect portal and navigate to the ‘Project‘ tab, click on ‘Create Project‘
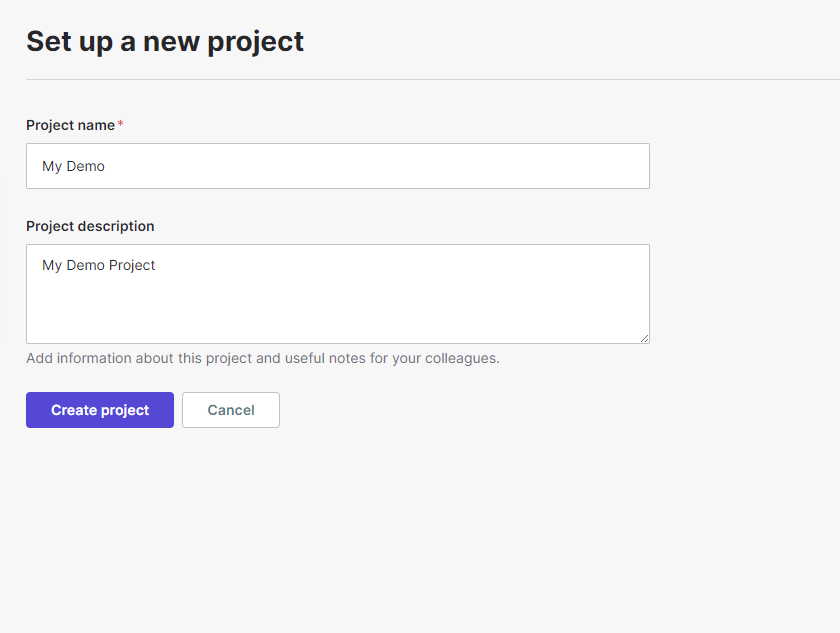
On the next screen, enter a project name, let’s call it ‘My Demo‘ and click the ‘Create Project‘ button:
3.2 – Create Recipe
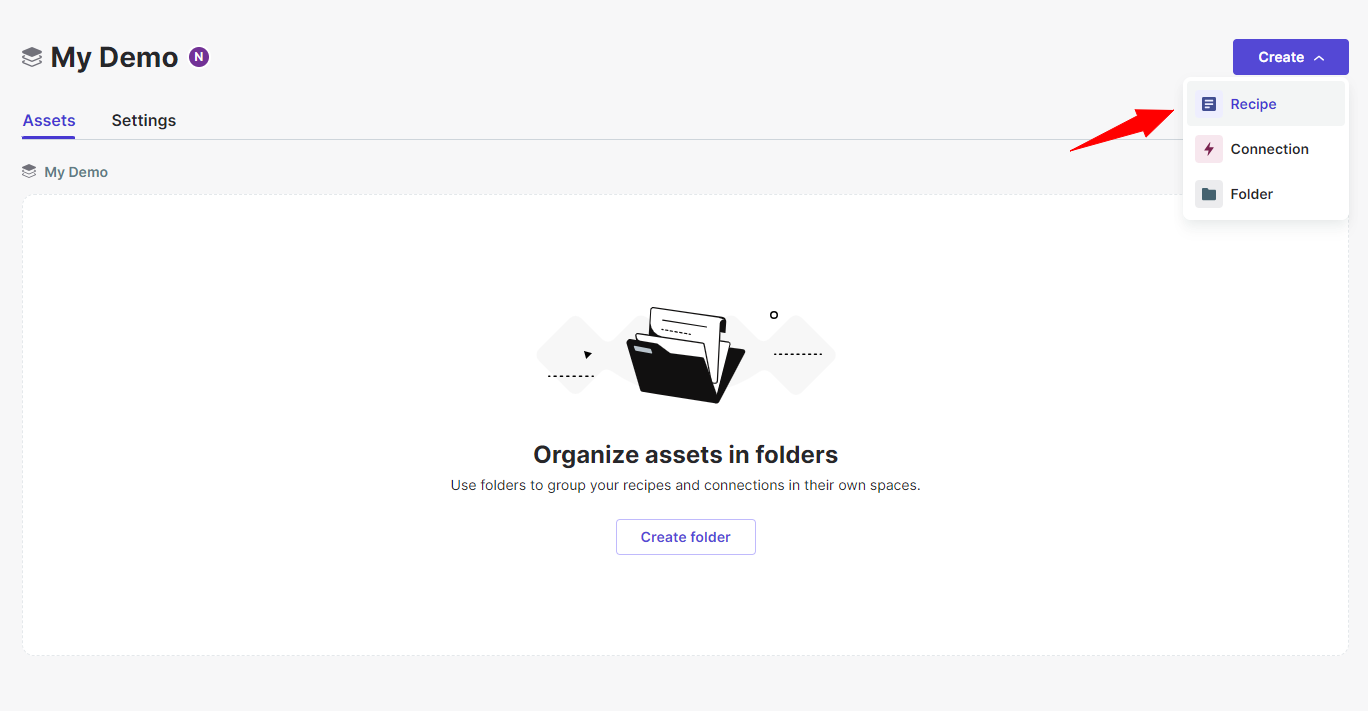
On the next screen, select ‘Recipe‘ from the drop-down menu as shown below:
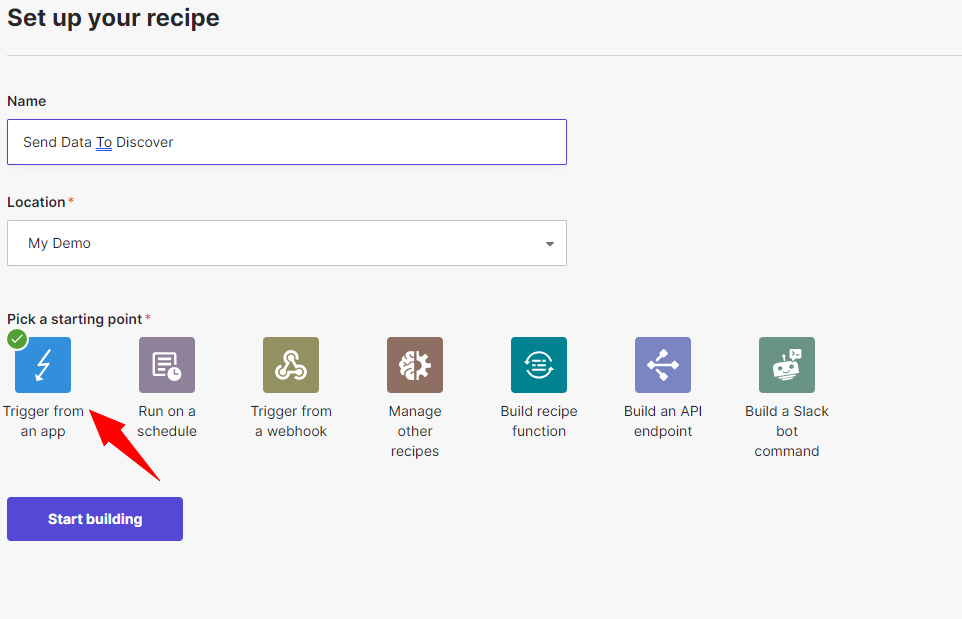
You will be presented with numerous options, select ‘Trigger from an app‘, enter a name as appropriate and click on ‘Start Building‘ as shown below:
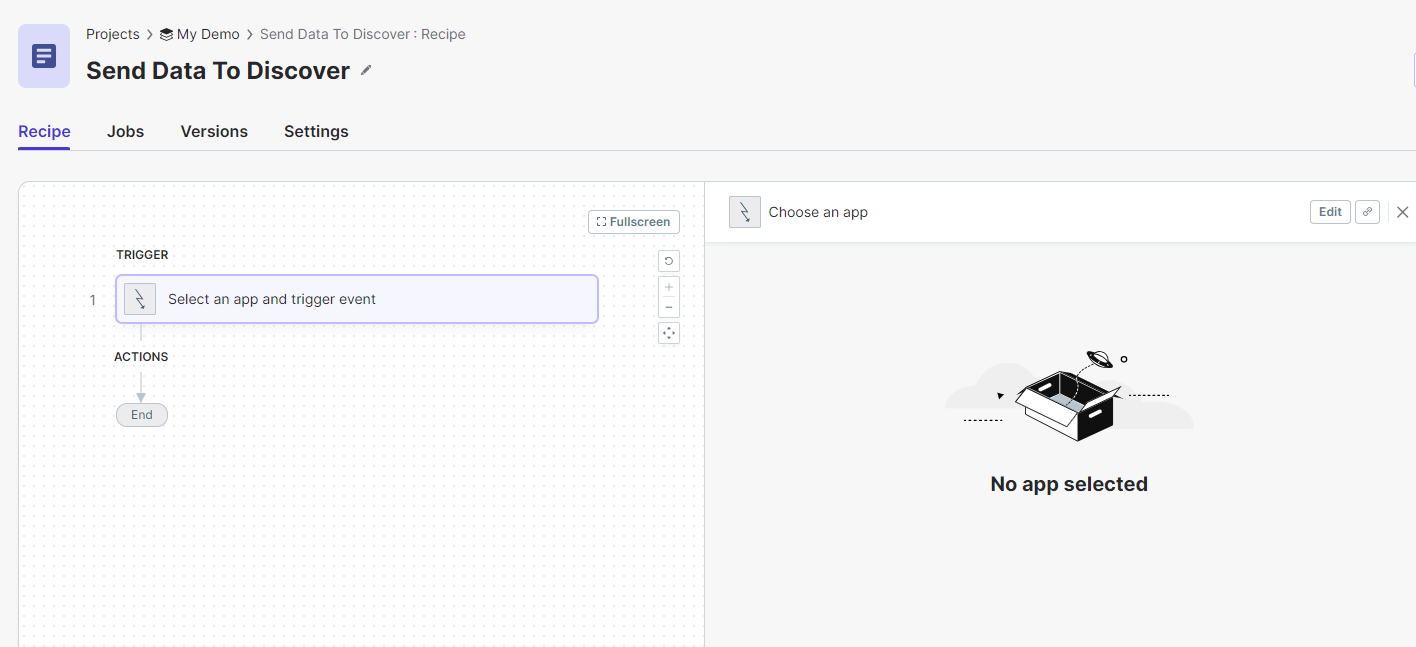
On the next screen, you will be presented with a blank canvas, where you can build your recipe:
3.3 – Select HTTP Webhook
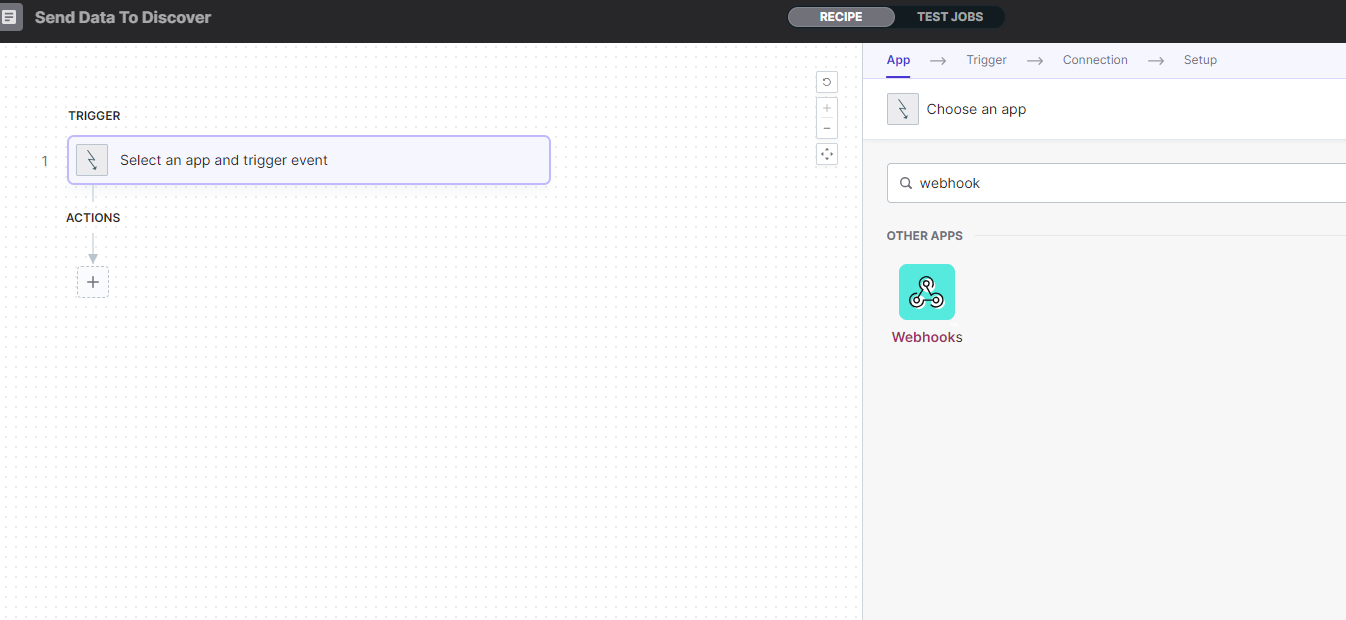
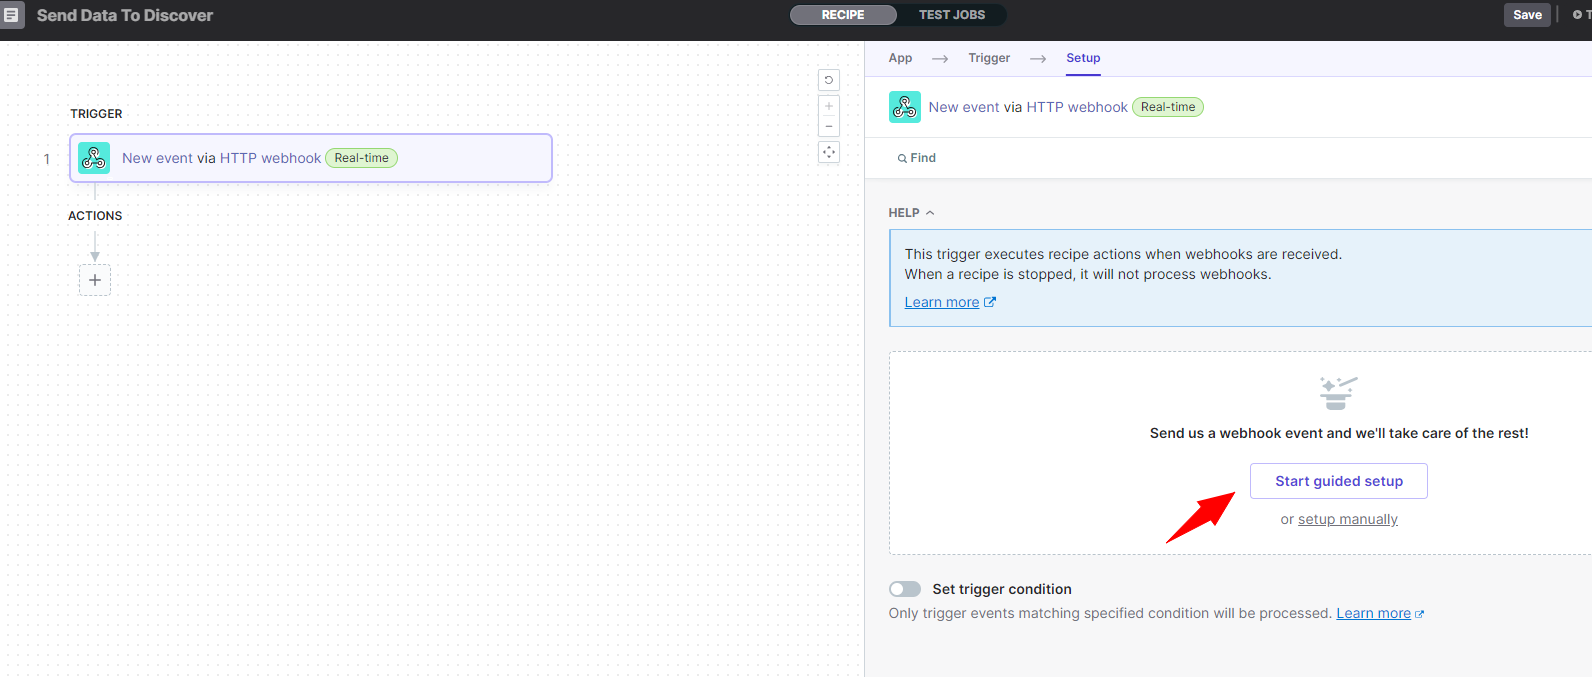
Click on the ‘Select an app and trigger event‘ and enter ‘webhook‘ in the search bar, select the webhook under the ‘other apps‘ section as shown below:
On the next screen, click on ‘start guided setup‘ as shown below:
Enter an “Event Name“, I will call it “priceupdates” and copy the URL:
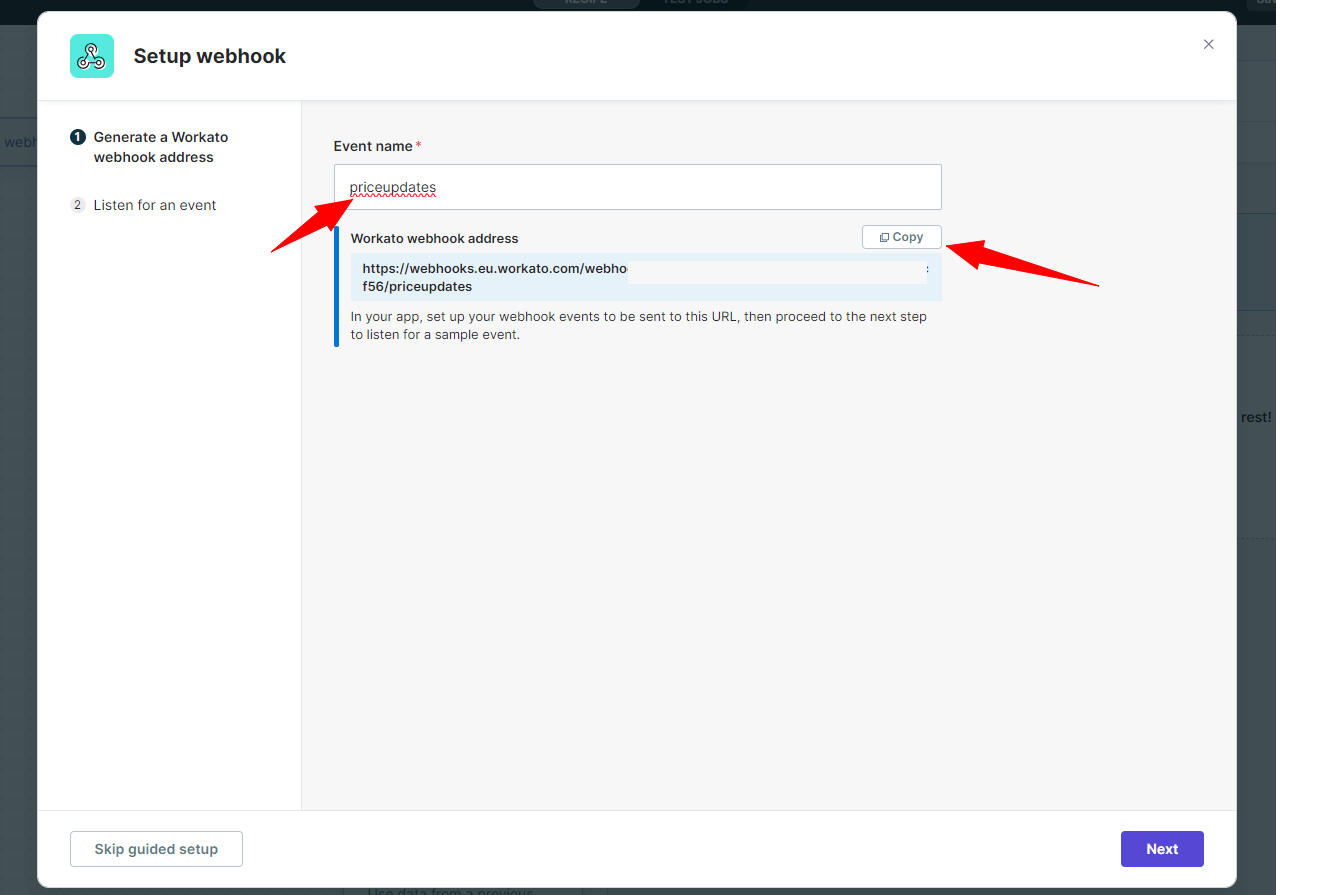
you will paste this URL into Sitecore OrderCloud’s webhook that we created in section 1 (update the temporary https://www.google.com URL) and click Save
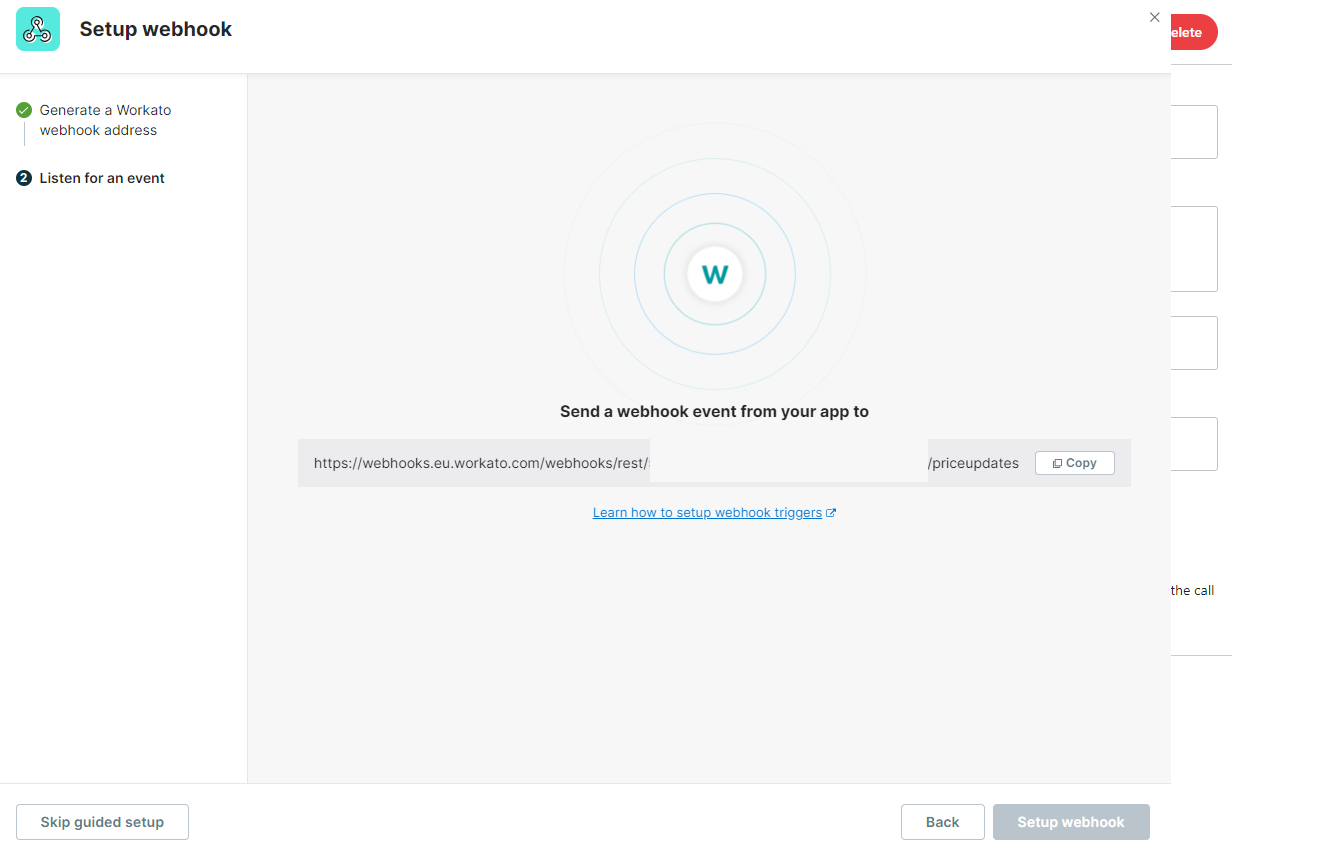
Back in the Sitecore Connect portal, click next and start listening for the webhook event.
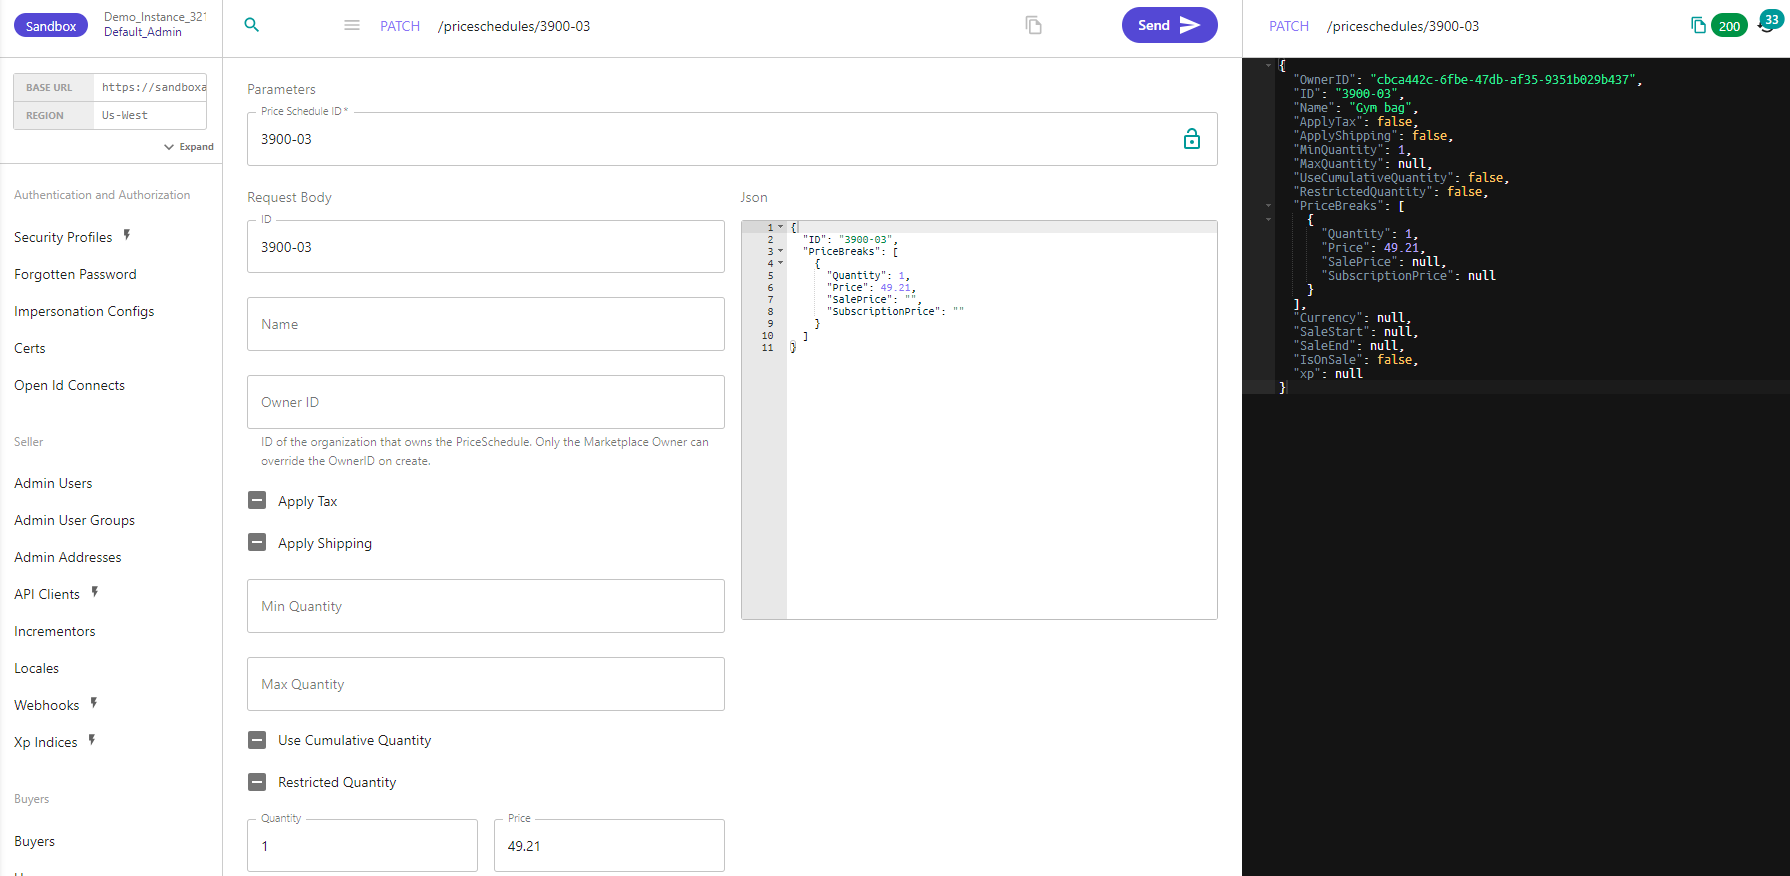
Navigate to the “Price Schedule” resource in the Sitecore OrderCloud portal and switch to impersonate as ‘Default_Admin‘. We are doing this as we assigned the ‘Middleware Integrations‘ API client to have access to our webhook.
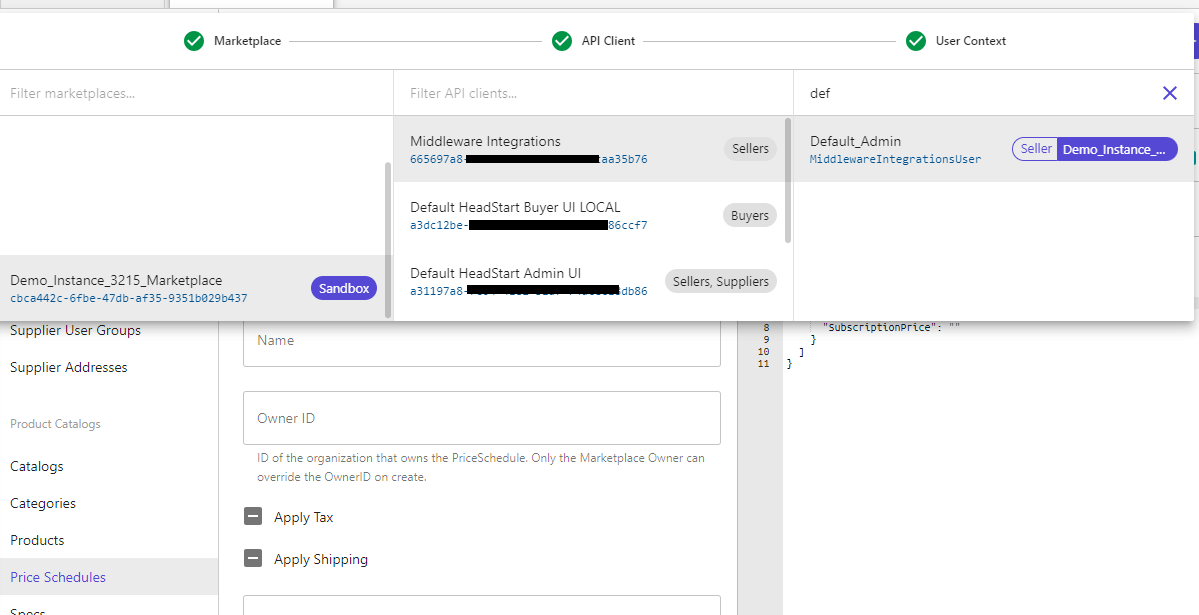
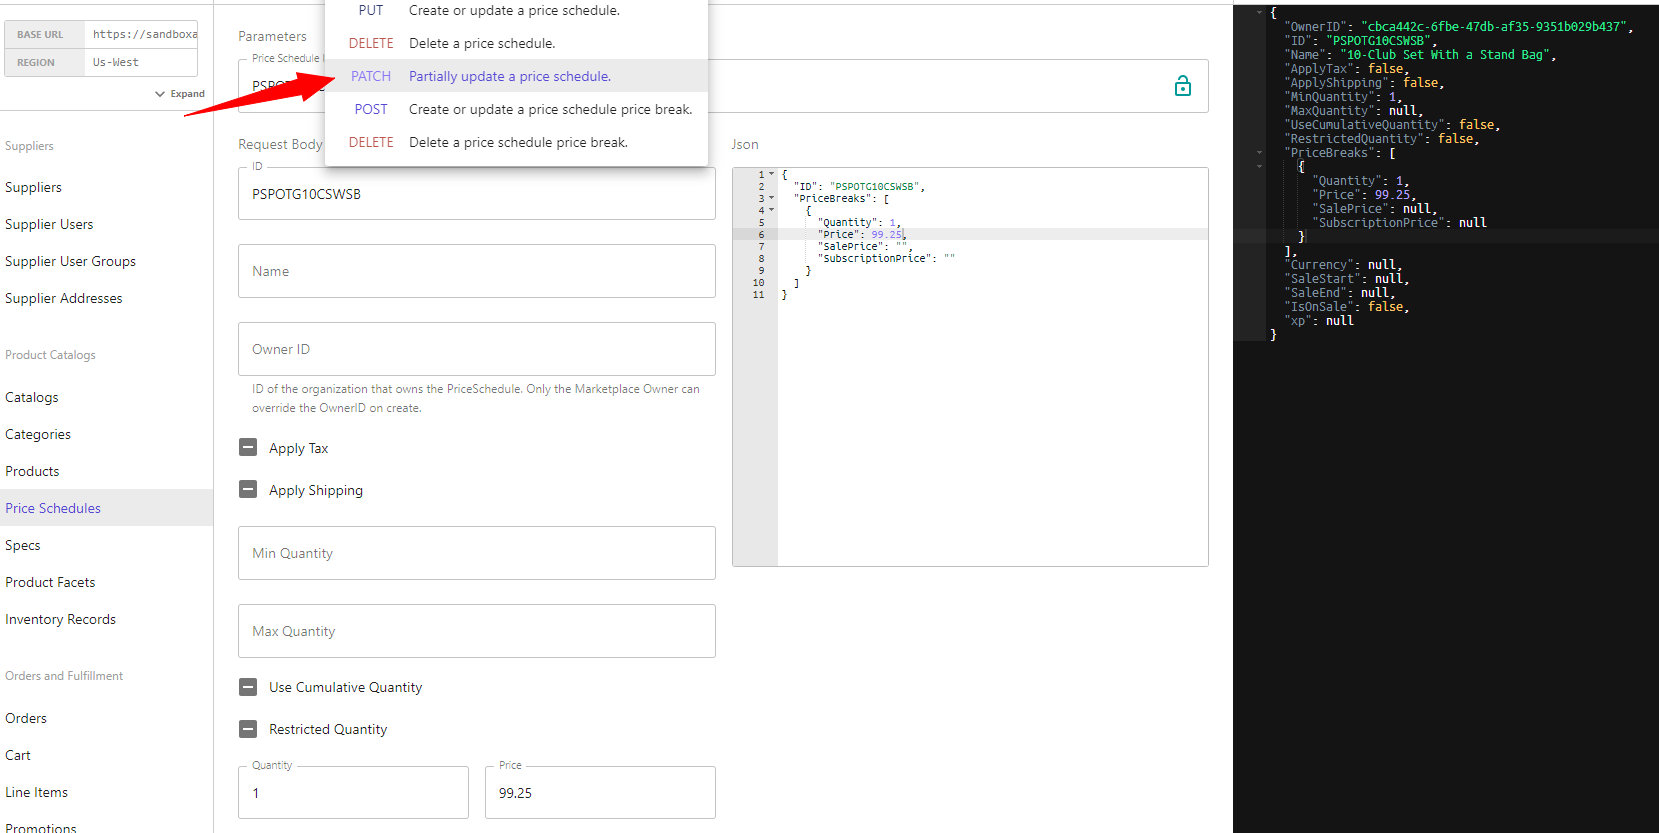
Select PATCH Partially update a price schedule from the command menu and setup a product with ID and Price Break and click Send. (Here, we assume that the price schedule ID is the same as the product ID; if it is not the same, you can pass the product ID as XP value to this call and capture it.)
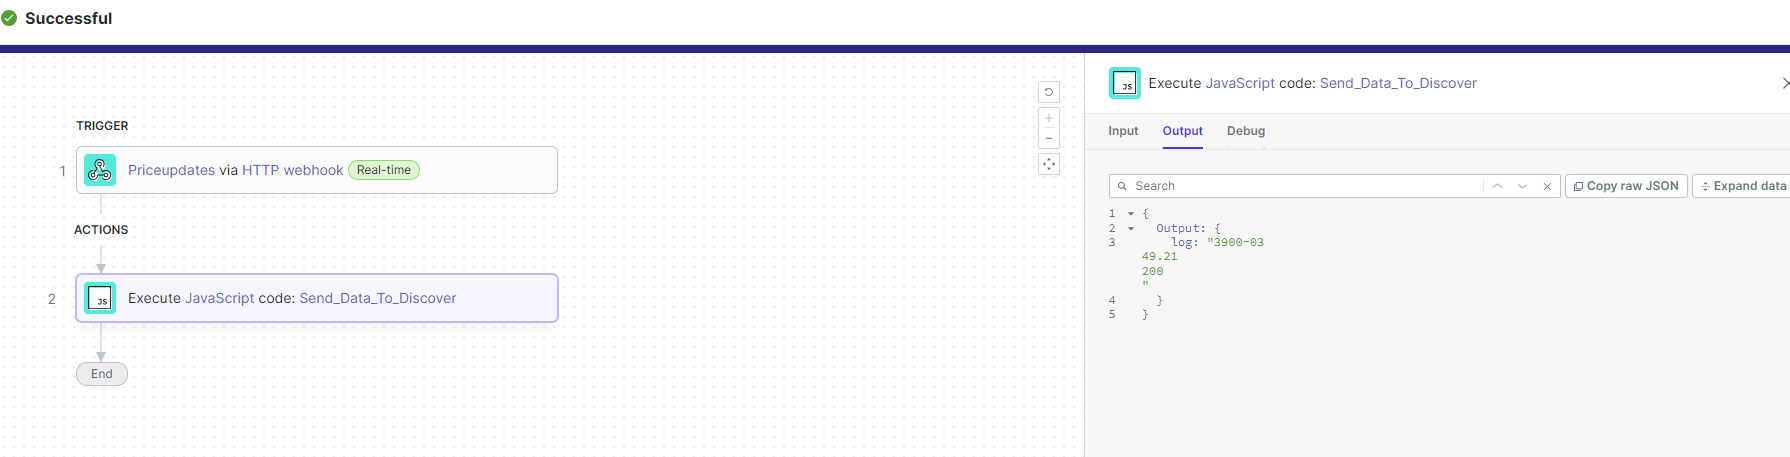
If everything works as expected, you will see results in the Sitecore Connect portal as below:
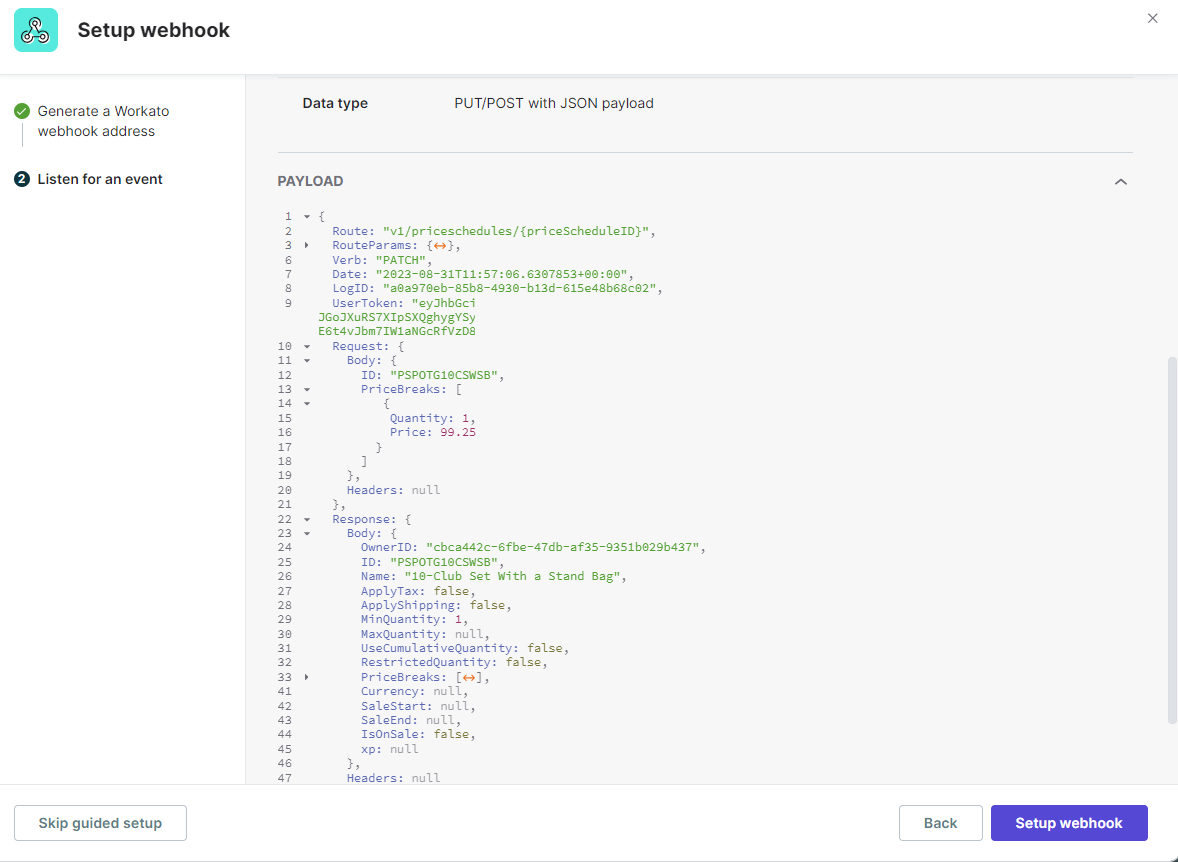
click on the ‘Setup webhook‘ to complete this process.
3.4 – Setup JavaScript code
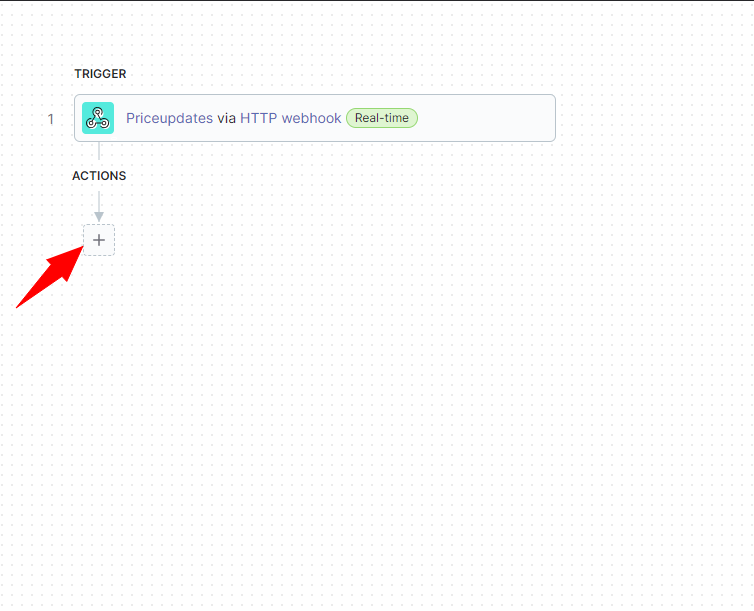
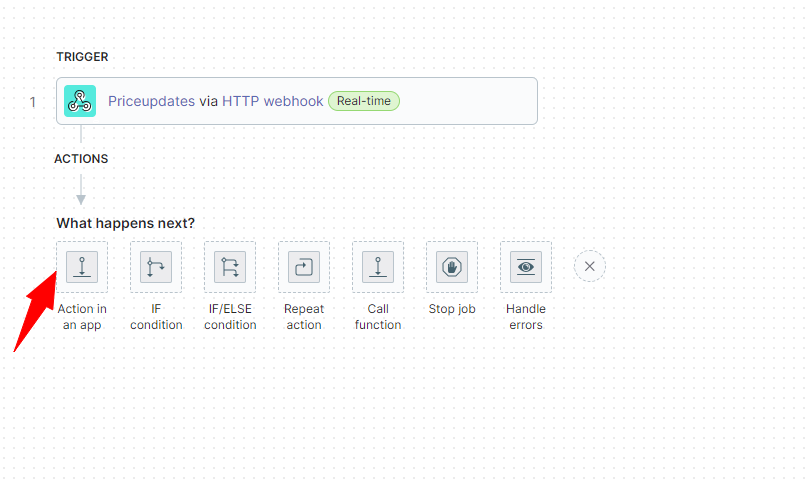
From the recipe canvas, click on the + sign to continue building the recipe:
From the options below, select ‘Action in an app‘:
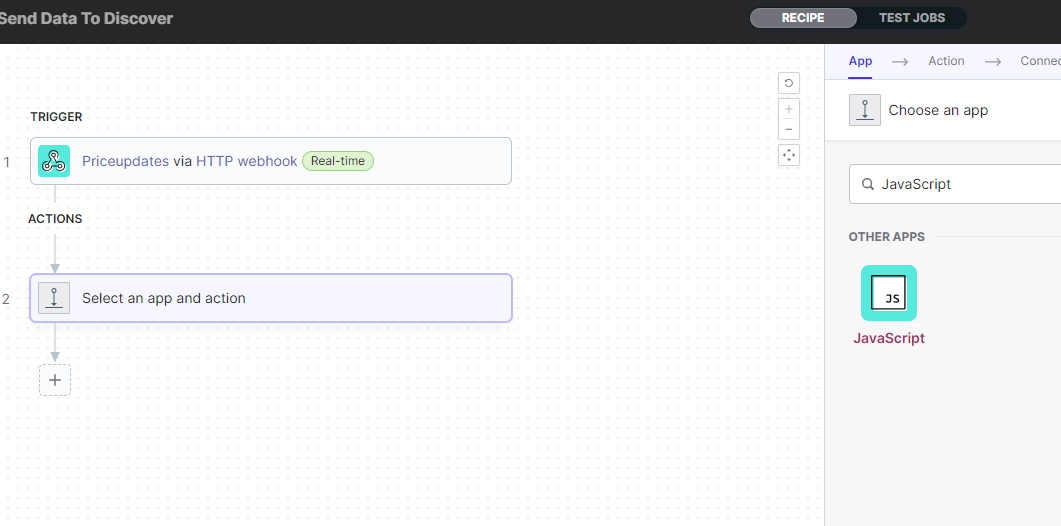
In the search bar on the right side, enter JavaScript and select the action as shown below:
3.5 – Data mapping
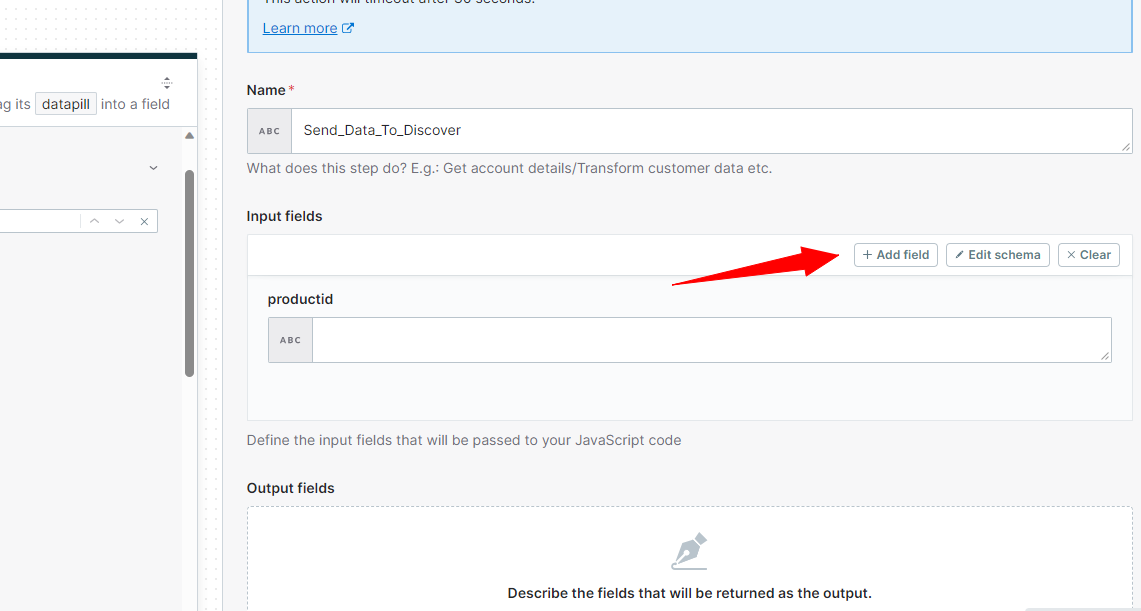
Before we can write our JavaScript code, we want to extract and use ID and Price fields from the request object. After selecting the JavaScript action, click ‘Add field’ as shown below:

Enter ‘productid’ as the label and ‘String’ as the data type and click the Add field button.

Click on ‘Add field’ again as shown below:
Enter ‘price’ as the attribute and ‘Number’ as the data type and click on the ‘Add field’ button to finish.

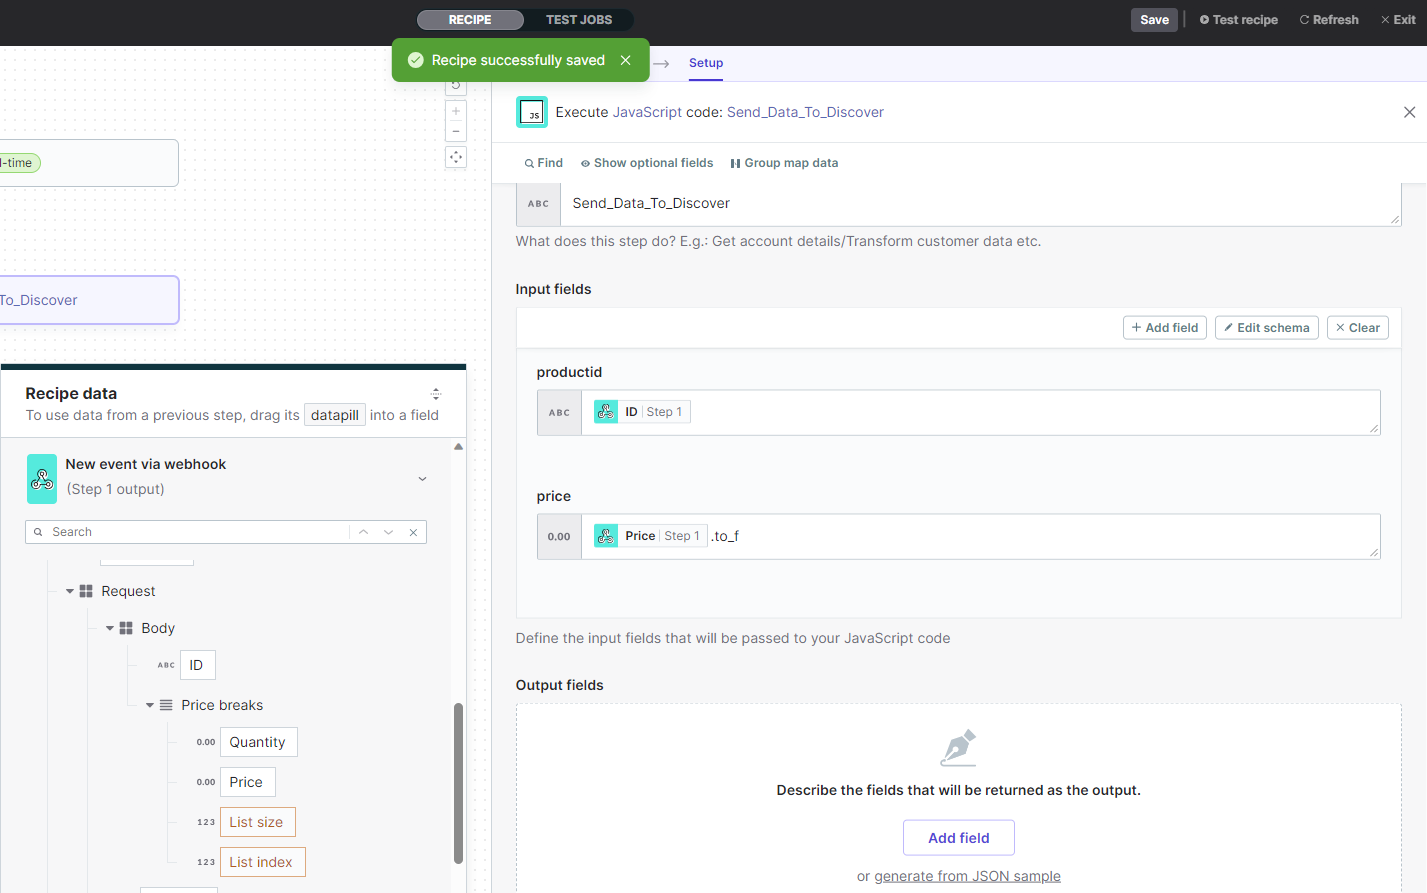
Expand the request object from the recipe data modal and select ID and Price values. Place the cursor in one of the input fields and click the corresponding field in the request object. This will map the fields to our action, and we can use them dynamically for our incremental feed API call.
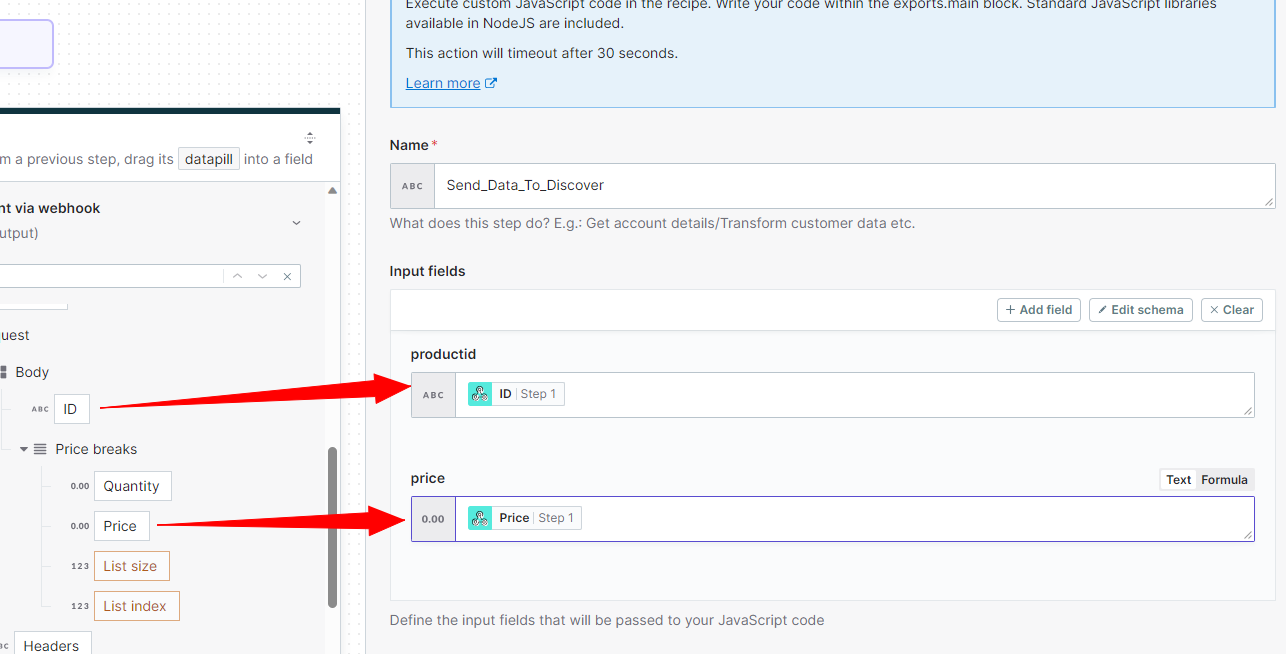
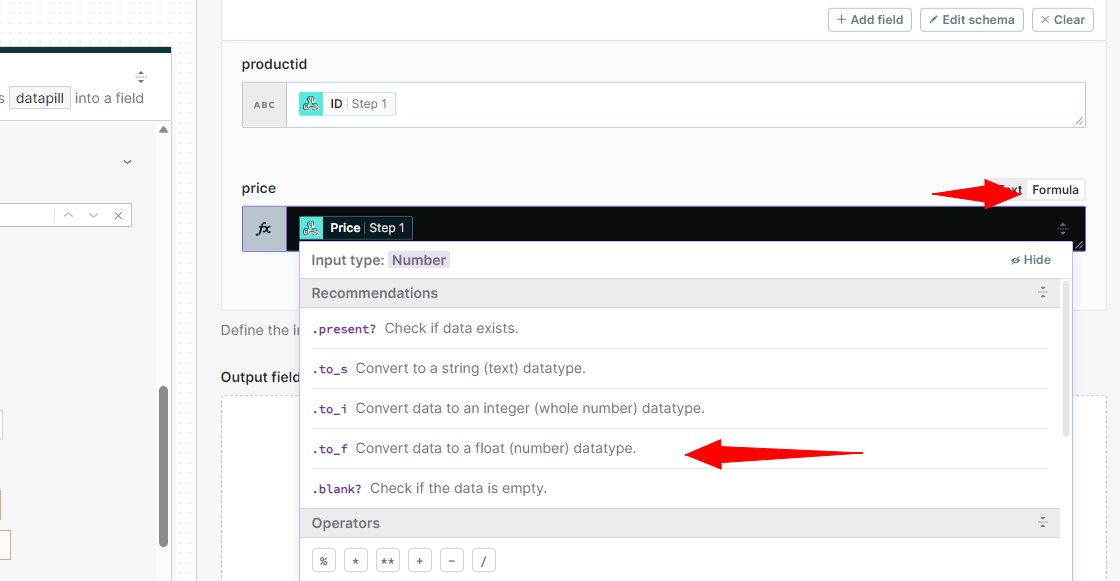
The ‘price’ field was setup as a number type, and the Sitecore Discover API call expects this to be a float type. Click in the ‘price’ field and then click ‘Formula‘ from the top right, then select ‘.to_f‘ to convert our number to float type.
Click on the ‘Save‘ button on the top menu and review the setup:
3.6 – JavaScript Code
Last thing to do in this action is to add some JavaScript code. Scroll down in the right-hand hand-pane and enter the following code: (Replace with the correct customer key and API key values from Sitecore Discover CEC portal).
const fetch = require("node-fetch")

exports.main = async ({ productid, price }) => {

  let url = 'https://api.rfksrv.com/feed/YOUR-CUSTOMER-NUMBER/v1/products/incremental/update';
  let data = {
    "data": {
      "products": [
        {
          "sku": productid,
          "attributes": {
            "price": price
          }
        }
      ]
    }
  };
  let headerOptions = {
    "Authorization": "01-YOUR-INCREMENTAL-FEED-API-KEY",
    "Content-Type": "application/json",
    "Accept-Encoding": "gzip, deflate",
    "Accept": "*/*"
  };

  try {
    const response = await fetch(url, {
      method: 'POST',
      headers: headerOptions,
      body: JSON.stringify(data),
    });

    if (!response.ok) {
      throw new Error('Network response was not ok');
    }
    console.log(response.status);

  } catch (error) {
    console.error('Error:', error);
  }
}
The code block should look like as following:
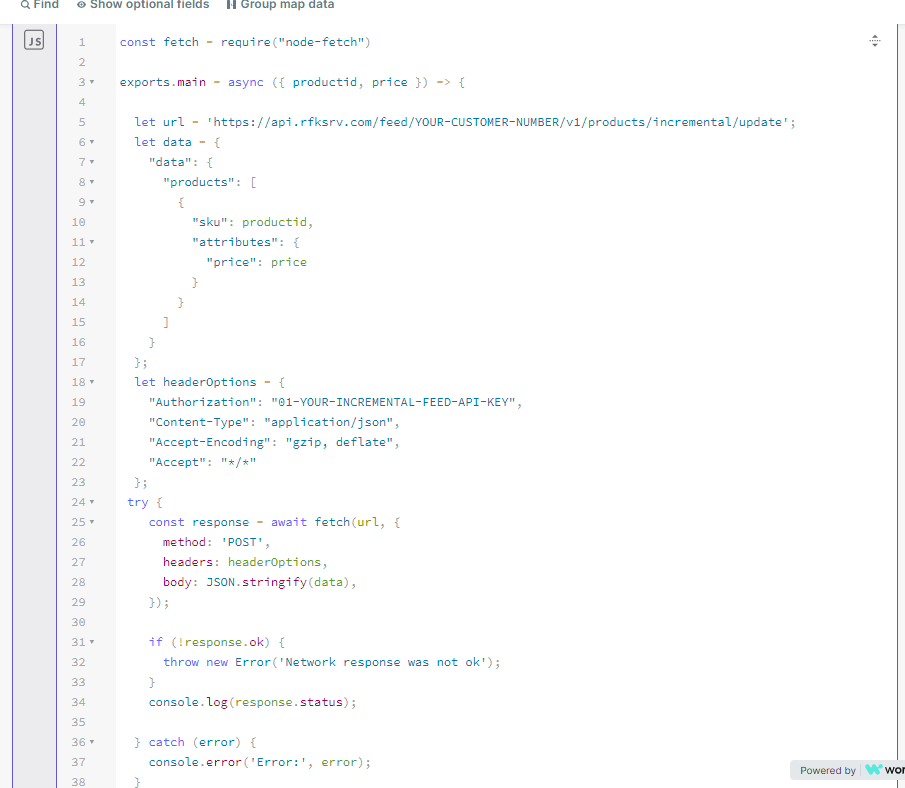
The code above is self-explanatory:
- On line 3, we are getting product ID and price as input parameters from the webhook.
- On lines 5-23, we formulate a dynamic HTTP request as per incremental feed API.
- On lines 24-37, we send the request to Sitecore Discover and wait for response/errors.
Click on Save again, and we are now ready to test. Click on the Test recipe.
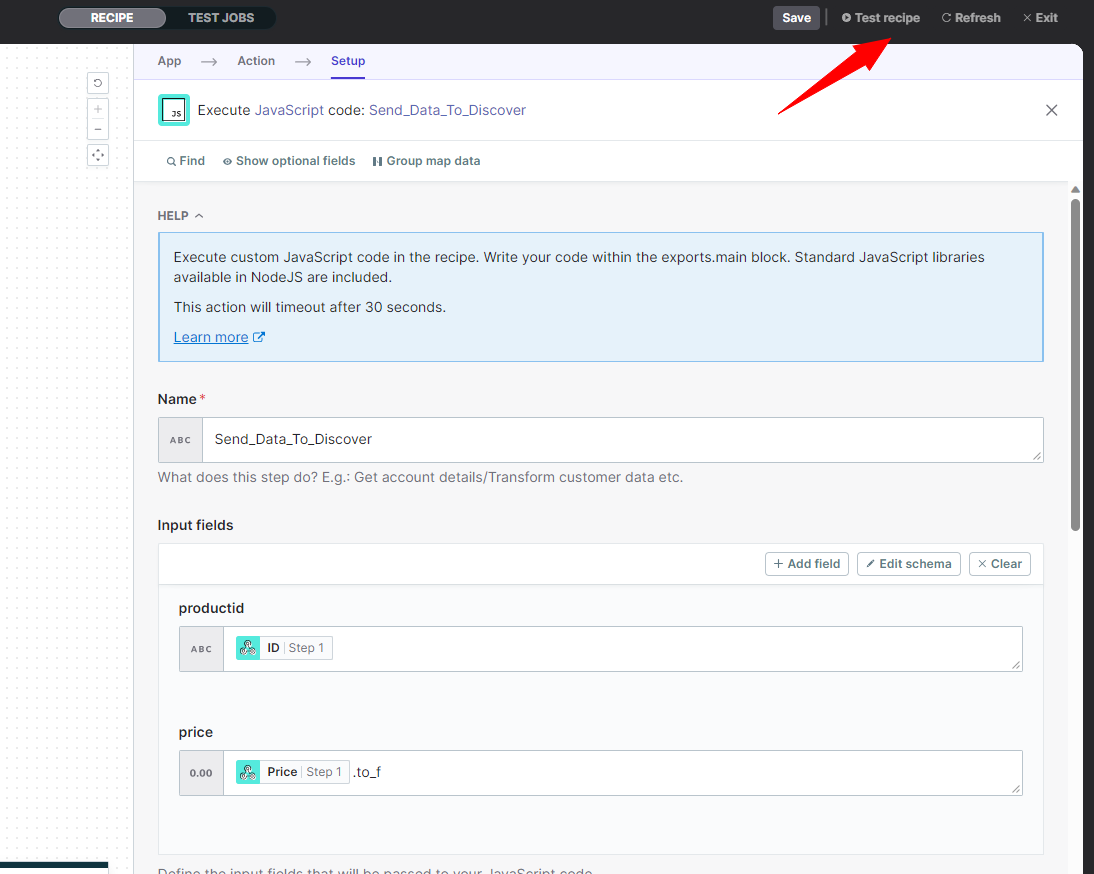
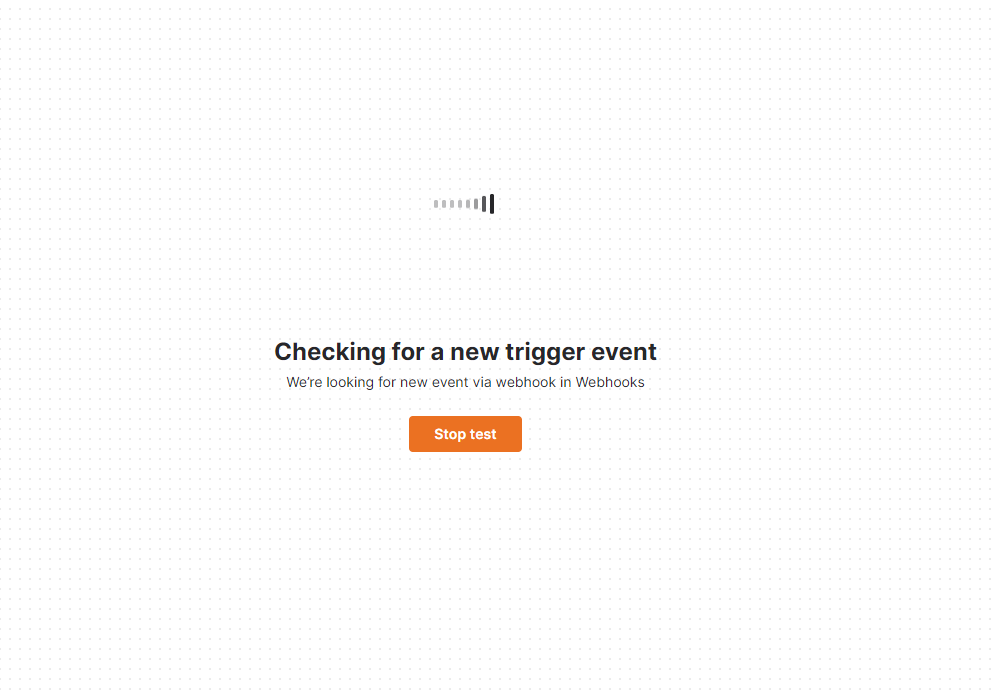
The screen will show that it is waiting for the trigger event.
Navigate to the OrderCloud portal and send a PATCH Partially update a price schedule.
Sitecore Connect will receive the trigger and will also post it to Sitecore Discover.
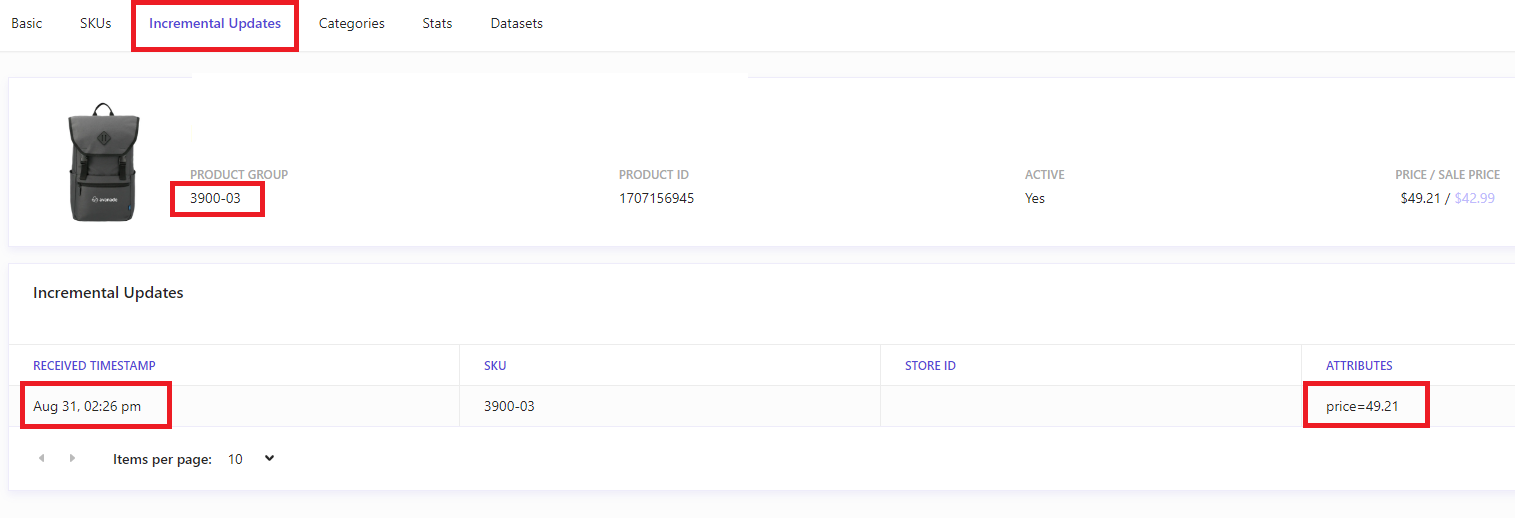
Verify the results in Sitecore Discover portal.
3.7 – Send an email confirmation (Optional)
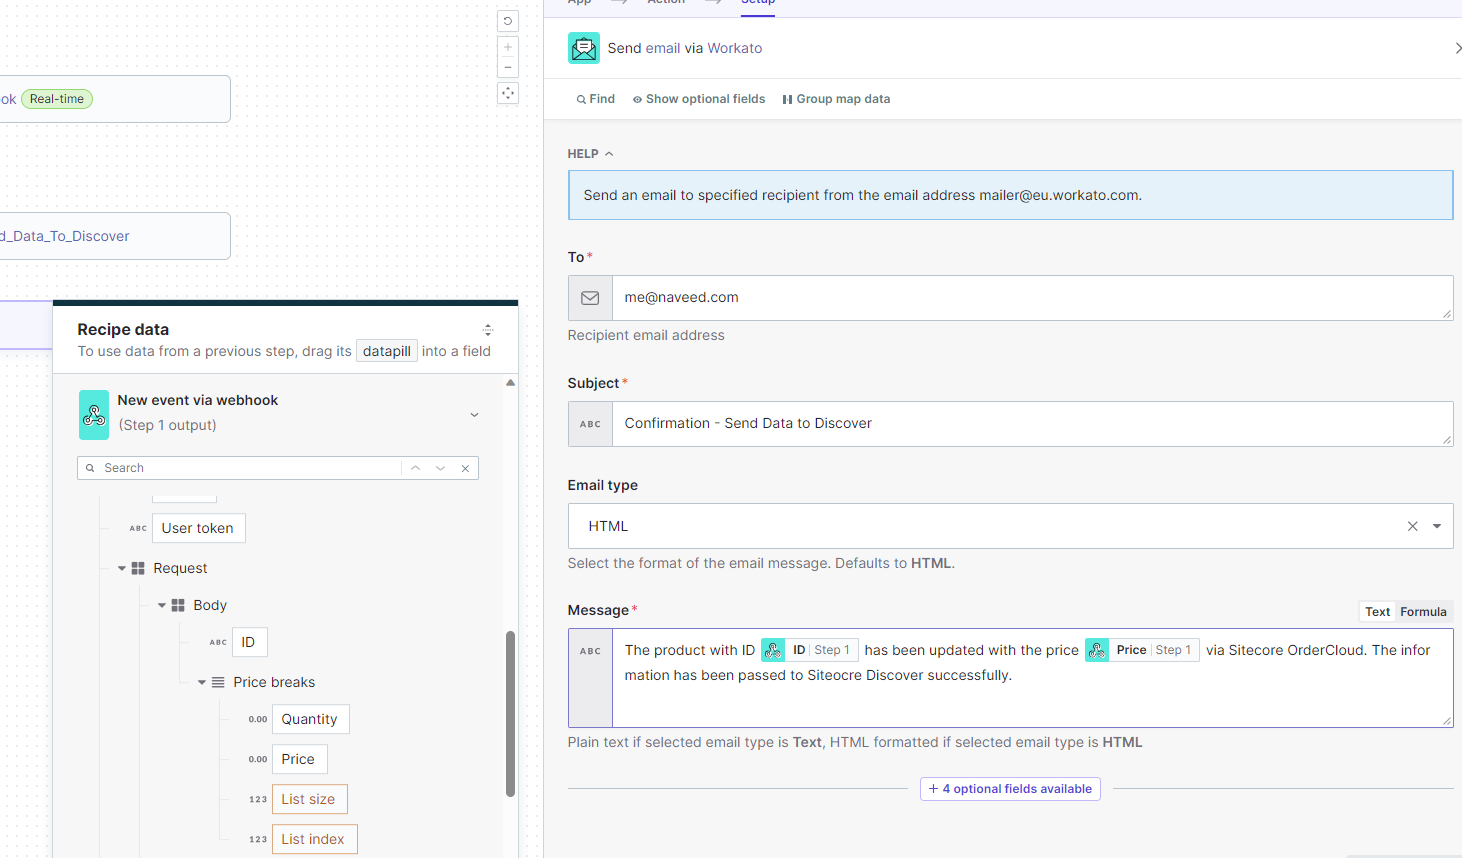
It would be nice for the system to send a confirmation email, wouldn’t it? Let’s add another action as ‘Email by Workato‘.
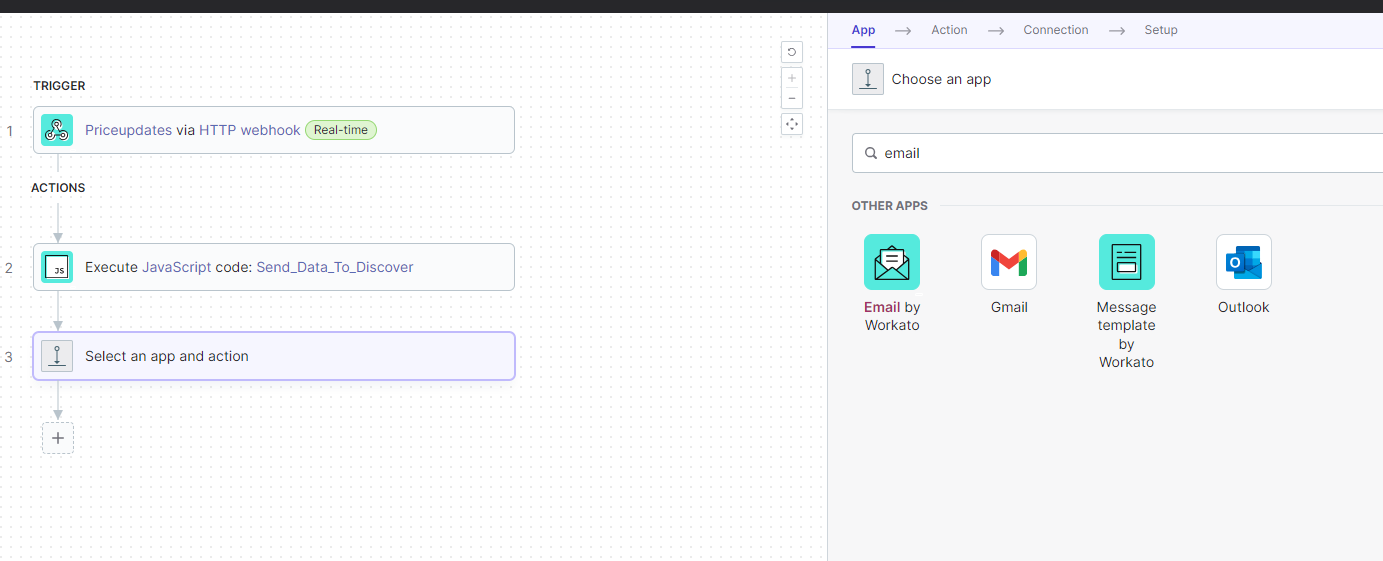
Click on the ‘Email by Workato‘ and fill out basic values. You can make your message dynamic by adding ID and Price value in the message body
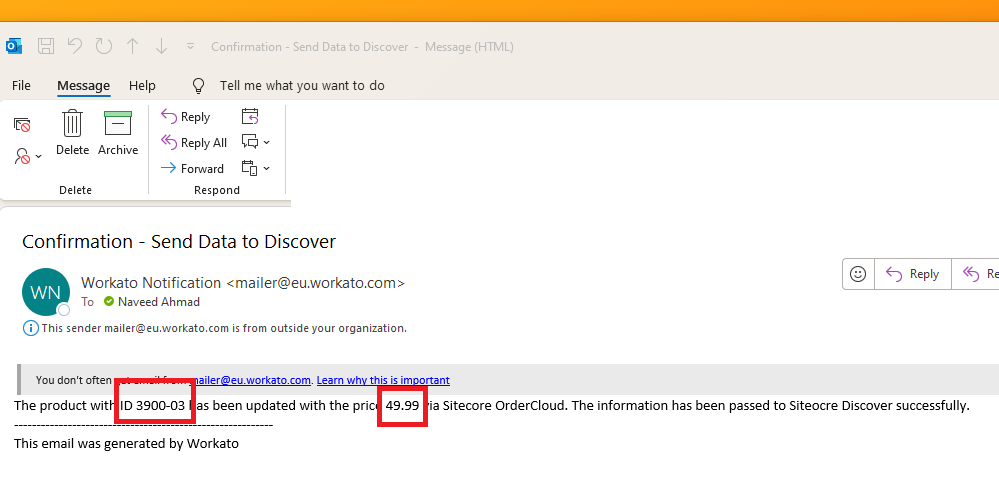
Testing the recipe again, I go t the email notification:
Save the recipe once again and add a stop action.
Everything is now fully set up, and we are ready for our final test. Watch this video with my commentary to see complete end-to-end testing!
Summary
In this blog, we explored how Sitecore Connect can be utilized to integrate different technologies with low code efforts. We were successfully able to send data from Sitecore Order to Sitecore Discover via Sitecore Connect. Composable DXP products are a game changer.
References
- https://www.sitecore.com/products/ordercloud
- https://www.sitecore.com/products/discover
- https://www.sitecore.com/products/connect
- https://www.workato.com/
- https://portal.ordercloud.io/login
- https://doc.sitecore.com/discover/en/users/discover-user-guide/log-in-to-the-cec.html
- https://doc.sitecore.com/discover/en/developers/discover-developer-guide/product-data-feed-specifications.html
- https://ordercloud.io/api-reference/product-catalogs/price-schedules
- https://ordercloud.io/knowledge-base/using-webhooks
- https://doc.sitecore.com/send/en/users/sitecore-send/integrate-with-other-applications-using-sitecore-connect.html
- https://doc.sitecore.com/discover/en/developers/discover-developer-guide/keep-product-data-up-to-date-using-the-incremental-feed-api.html
- https://ordercloud.io/api-reference/seller/webhooks
- https://naveed-ahmad.com/2023/08/07/enable-incremental-feed-api-for-sitecore-discover/
