This is part 7 of the blog series. Previously, we have installed a local instance of the Sitecore site, configured VS project, configured TDS, configured Sitecore Glass added our project to source control and congured DB and QA servers.
I am assuming that you have gone through the previous 6 parts and completed them as this blog post will depend upon them. I am also assuming that you have a brand new CI server with following applications installed:
- TeamCity latest stable version
- Visual Studio Community Edition
- Team Development Server for Sitecore (TDS)
- Chocolaty
- Git
This is a pretty lengthy blog and contains with lots of screen shots for every step of the TeamCity server configuration. If you get stuck at any point please look at the CI build logs, QA server logs and utilize Google to resolve your errors/issues.
The blog series is aimed at newer audience and developers who are setting up CI for the first time.
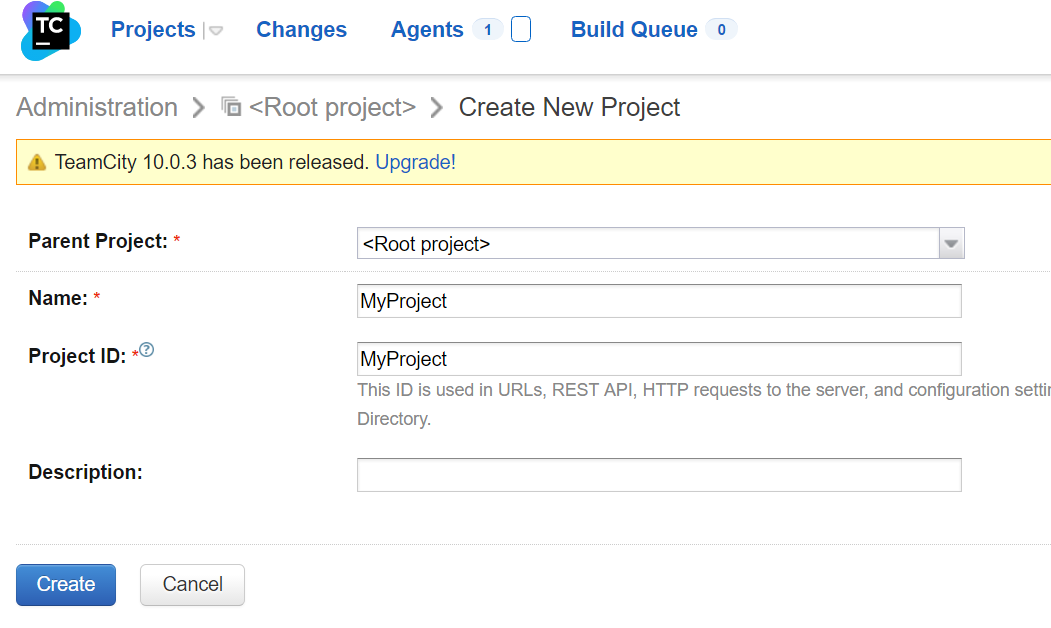
Step 1: Create TeamCity Project
Once TeamCity is installed, create your TeamCity project:
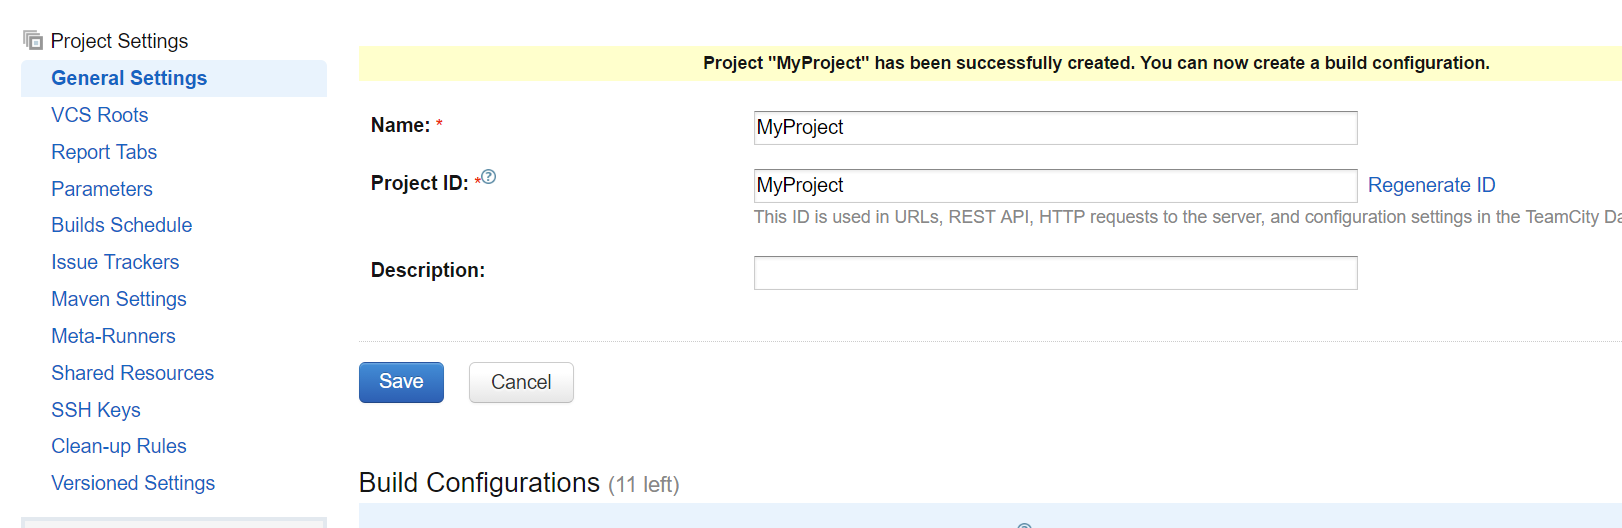
Once the project is created, you will have the ability to configure it with your source control:
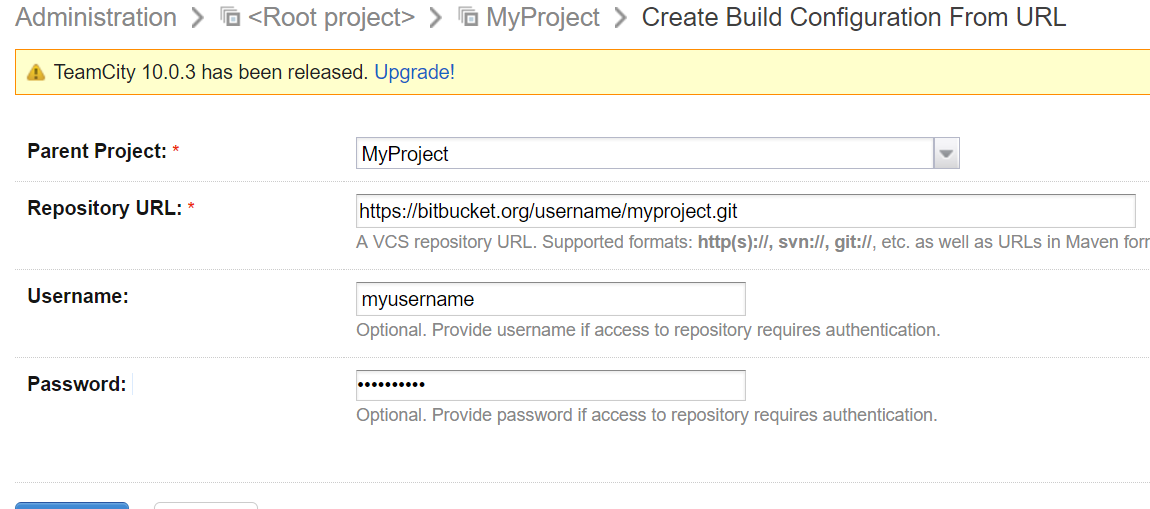
Step 2: Configure with Source Control
Select ‘Create build configuration from URL‘ and give the source control URL of your project along with login details.
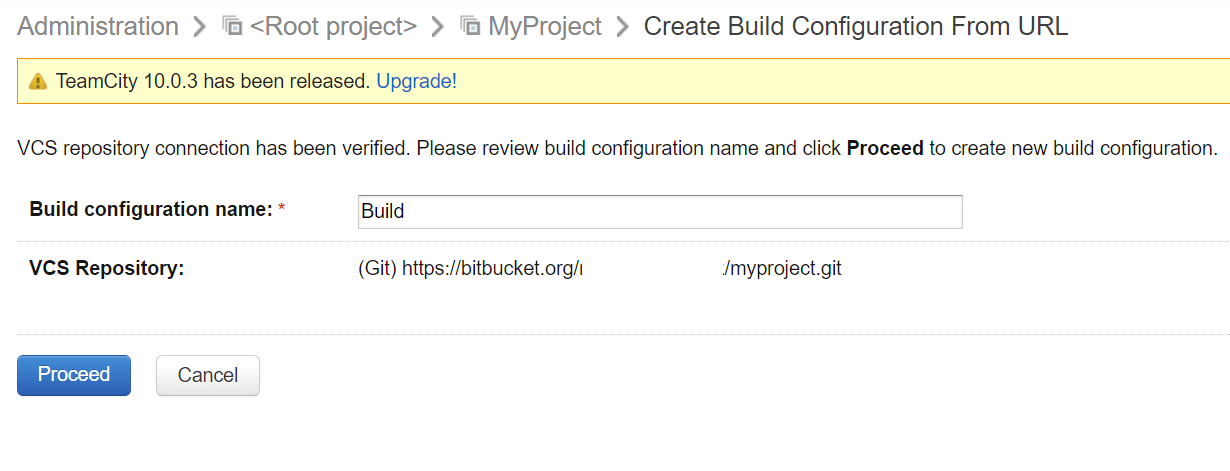
If your connection details are correct, you will see the confirmation screen like below:
Step 3:Configure Build Steps
Now its time to configure your build steps. The TeamCity will try to auto-detect your build steps:
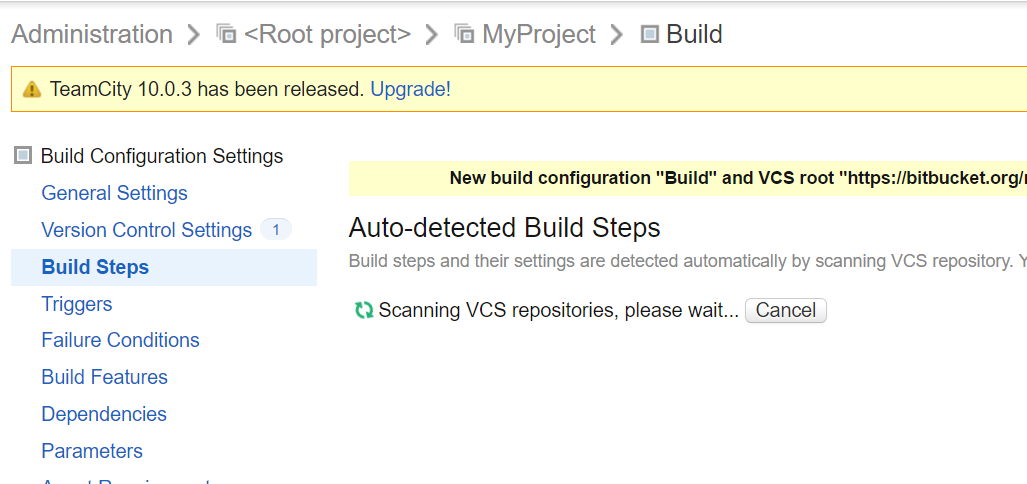
If everything on the server has been configured correctly, it will configure the VS build step:

Step 4: Configure NuGet step and re-order
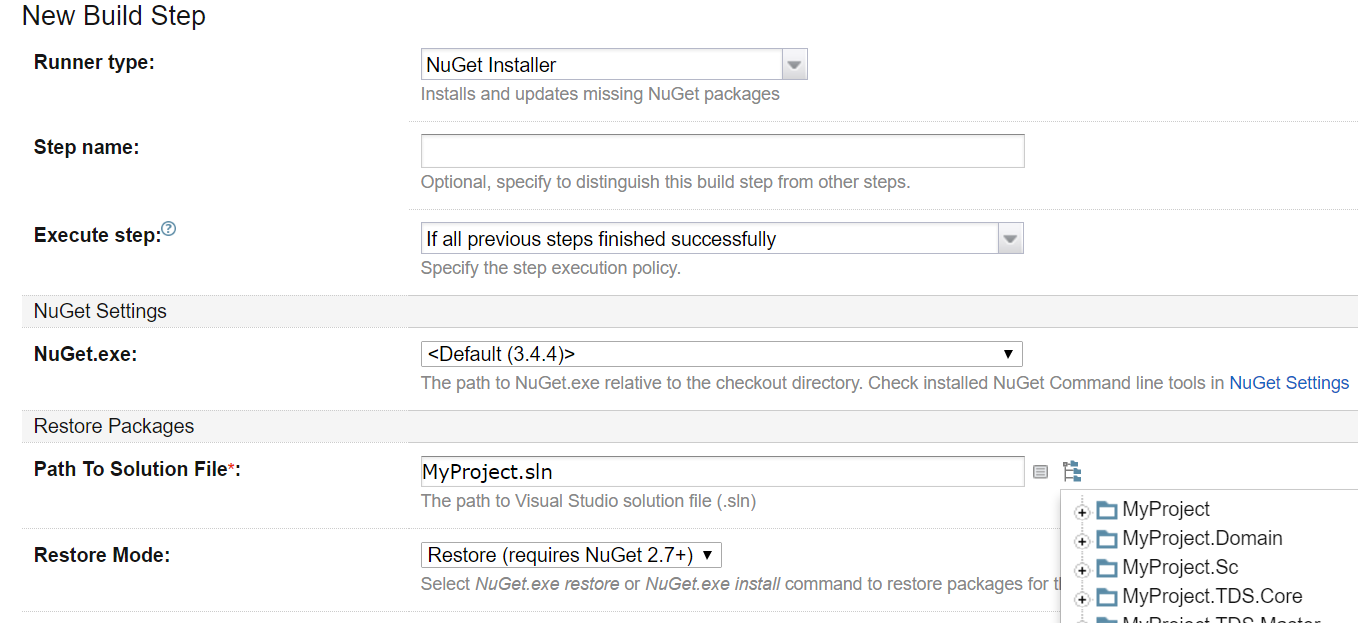
Create a new step by clicking on ‘Add build step’ and add a ‘NuGet Installer’ step type. Specify the path to the solution:
The build steps will be executed in the sequence they are ordered, so you need to re-order them. Click on ‘Reorder build steps‘ and put NuGet installer step before the VS build step:

If you are using any front-end frameworks, like Gulp or Grunt, you can also add a step for them using Node.Js as runner type.
Step 5: Configure Parameters
As we have added 2 steps, at this point we should test our CI server with only these 2 steps and try to fix any errors before proceeding further. Before we run the build, we need add some configuration parameters and tell TeamCity to use our QA publish profile so it can correctly transform the config files. The configuration parameters can be added in-line within the build steps but a better way is to add them as system parameters. Navigate to the ‘parameter‘ section to add parameters:
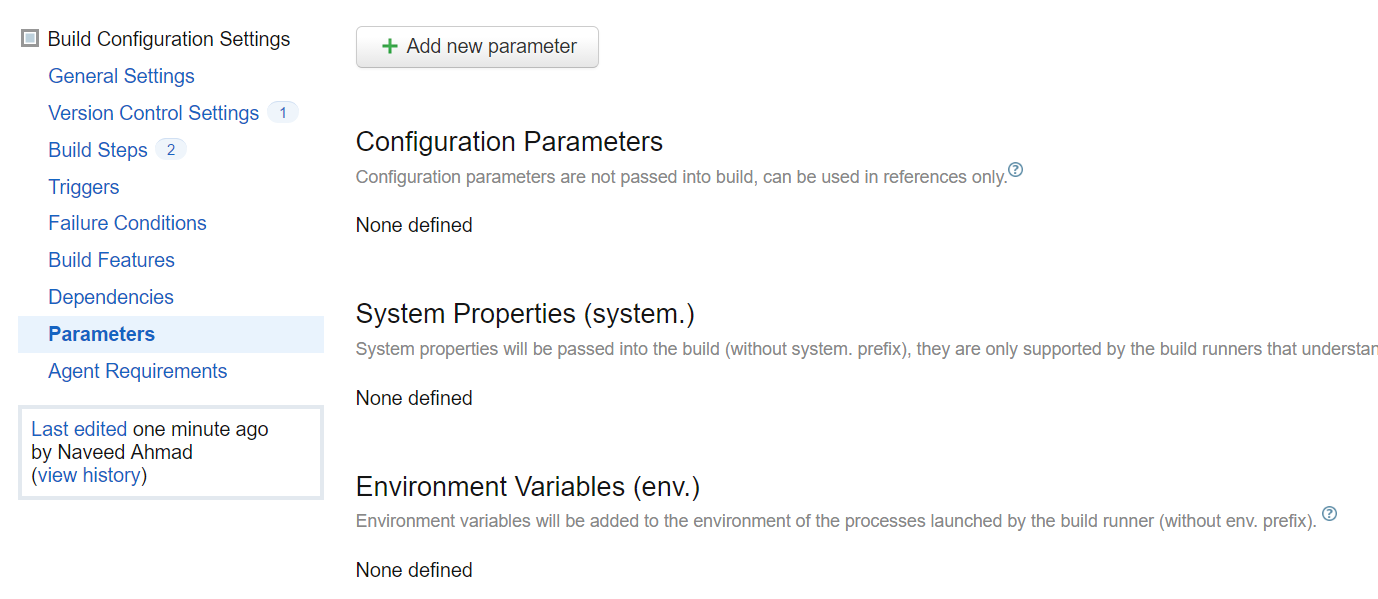
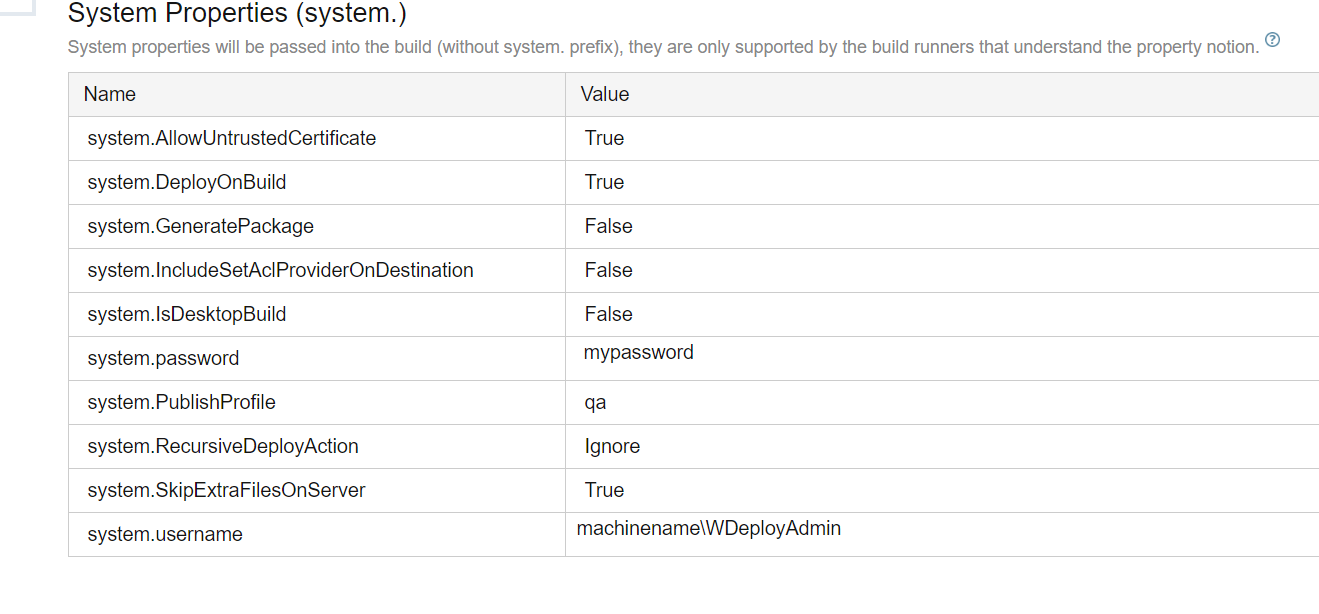
By clicking ‘add new parameters‘ a dialog box will show up, you can then add ‘System‘ parameters for your build as shown:
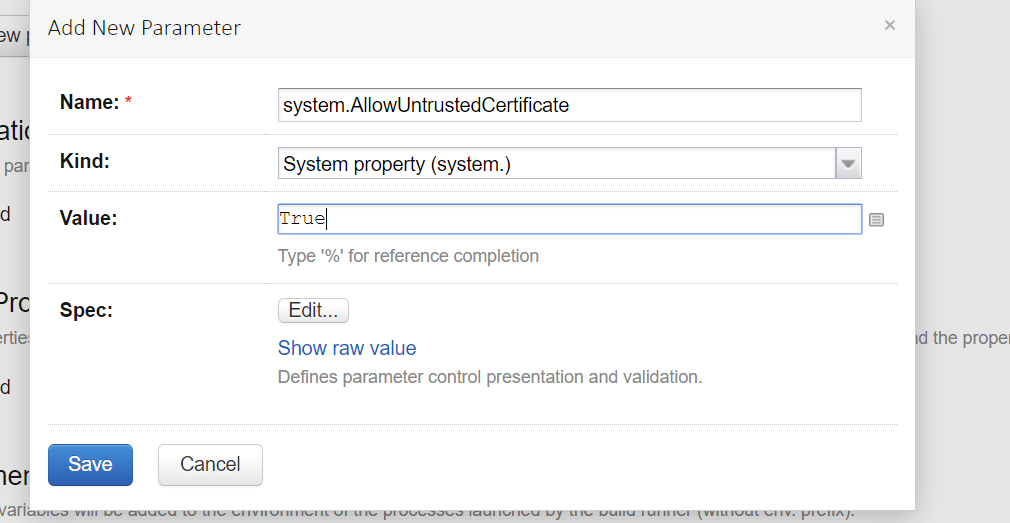
Repeat the process of adding new parameters and add all of the following parameters for your initial build. Update the system.username and system.password values relevant to your CI server. The system.PublishProfile should also be updated as per your VS project’s publish profile name:
Step 6: Run a Test Build
Click on the ‘Run’ button and test your build for the 2 steps that you have added:
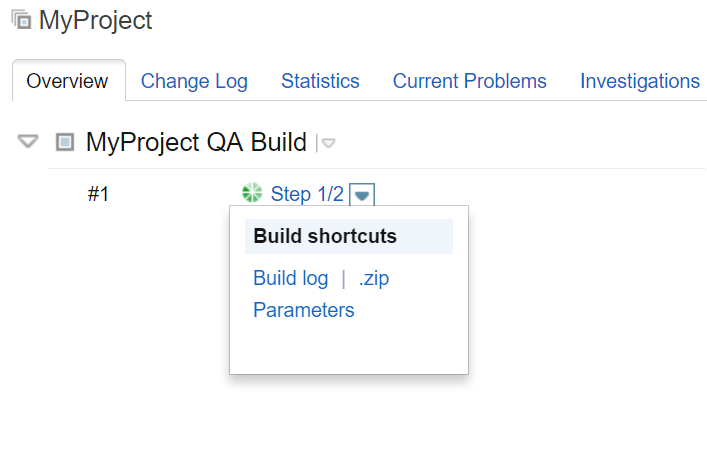
I only had 2 steps, but I still got some errors on the first build which I resolved by looking at the ‘Build log‘ (like I missed a file to push to bitbucket and then my password was incorrect). After few attempts, I saw the green tick which was very re-assuring. So if your build fails for the first time, it’s OK, work through the build log and remove errors:
Step 7: Configure Sitecore.Ship
As of now, we were only deploying code files from VS with our 2 steps. But we also want to deploy our Sitecore Items generated through TDS update packages. By default, you can use TDS to deploy .update packages, however, there are other alternatives too. I am going to use an open-source module Sitecore.Ship which deploys update packages over http requests. The module should be configured as NuGet package with you main web project:
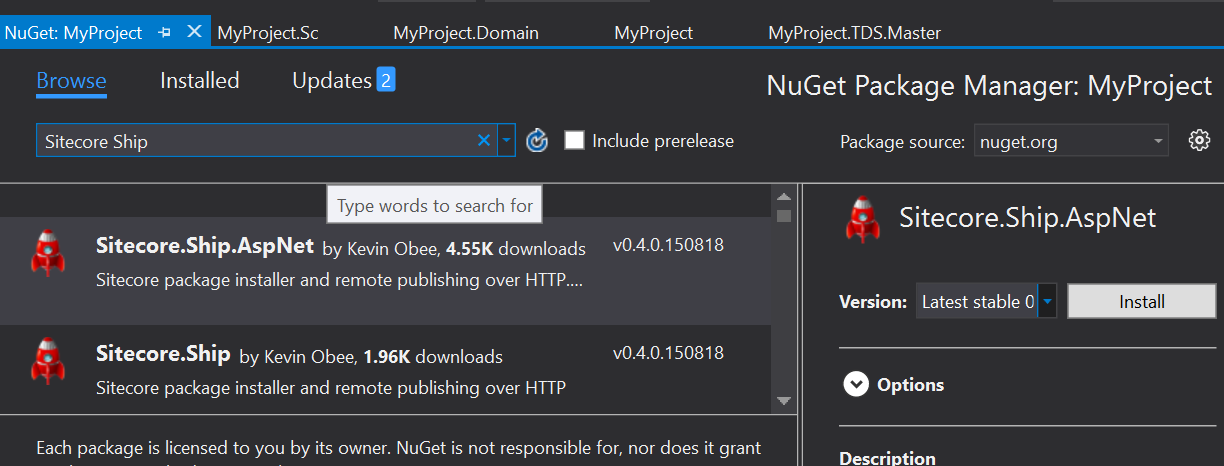
Once you install this, you will notice that there are some changes in your web.config files as well, check-in all of your changes and push them to the server.
Step 8: Configure TDS.Master
The next step is to configure TDS.Master to generate an update package. Navigate to MyProject.TDS.Master project’s properties, make sure the build mode is ‘Release‘ and update the settings as shown below:
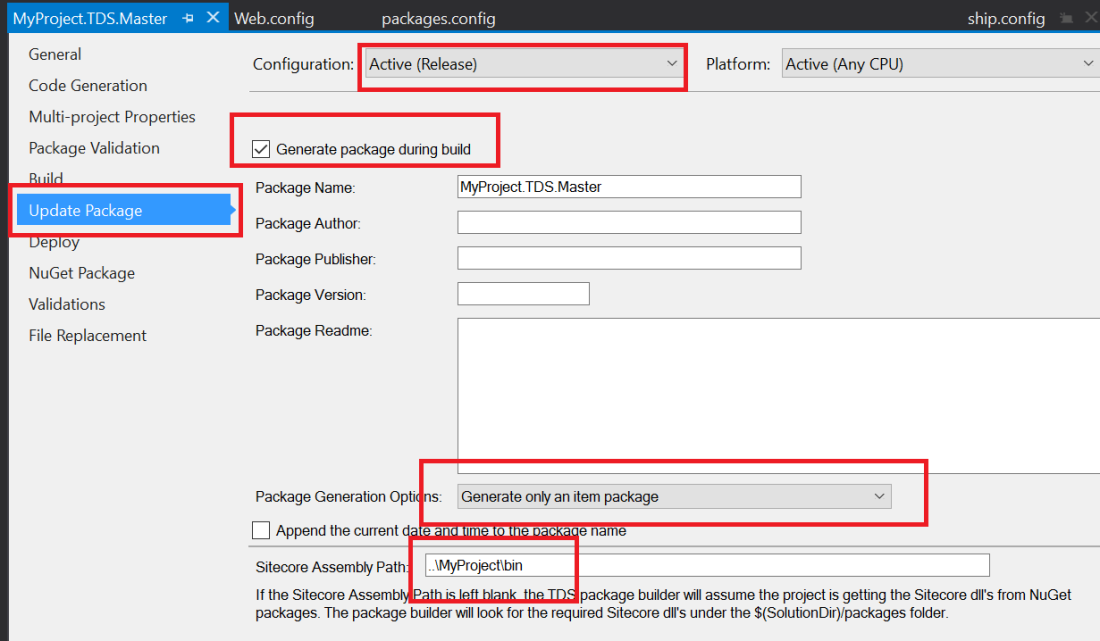
Once you will build this, it will generate an .update package at a location bin/package_release
Step 9: Add a build step for TDS Master
An update package has been generated, now we want to deploy and publish this package along with our code to the QA server. We will be using curl to post HTTP request for update packages. Chocolatey is a package manager which can give us access to curl through its command line.
The deploy and publish step depends upon some configuration parameters. Navigate to parameters section and add the following configuration parameters:
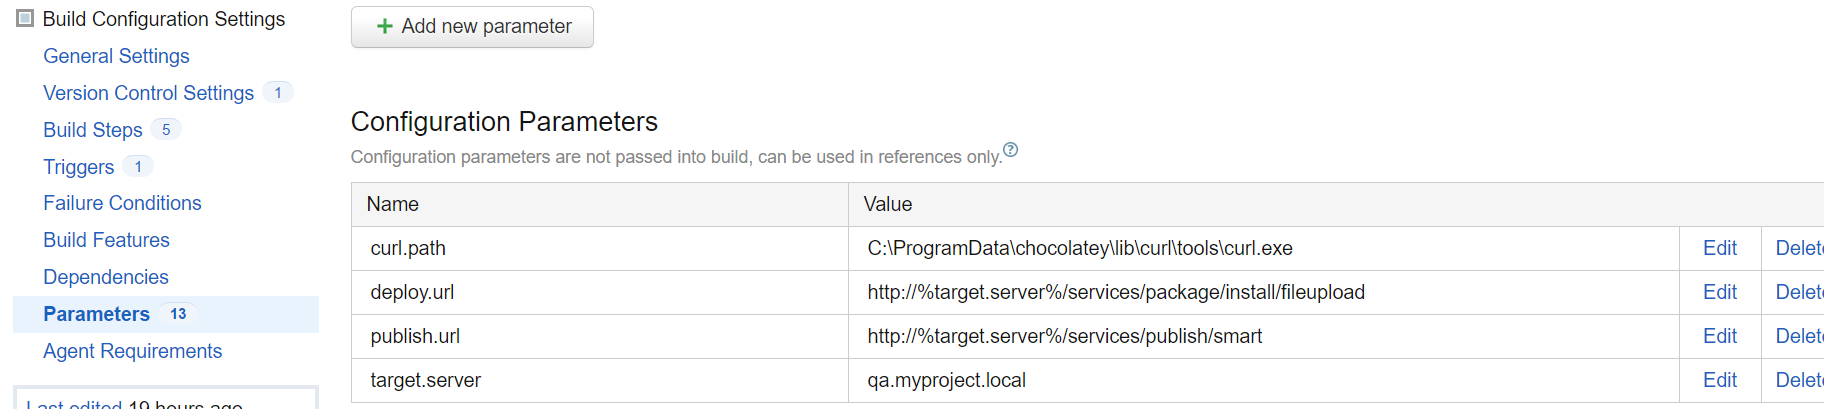
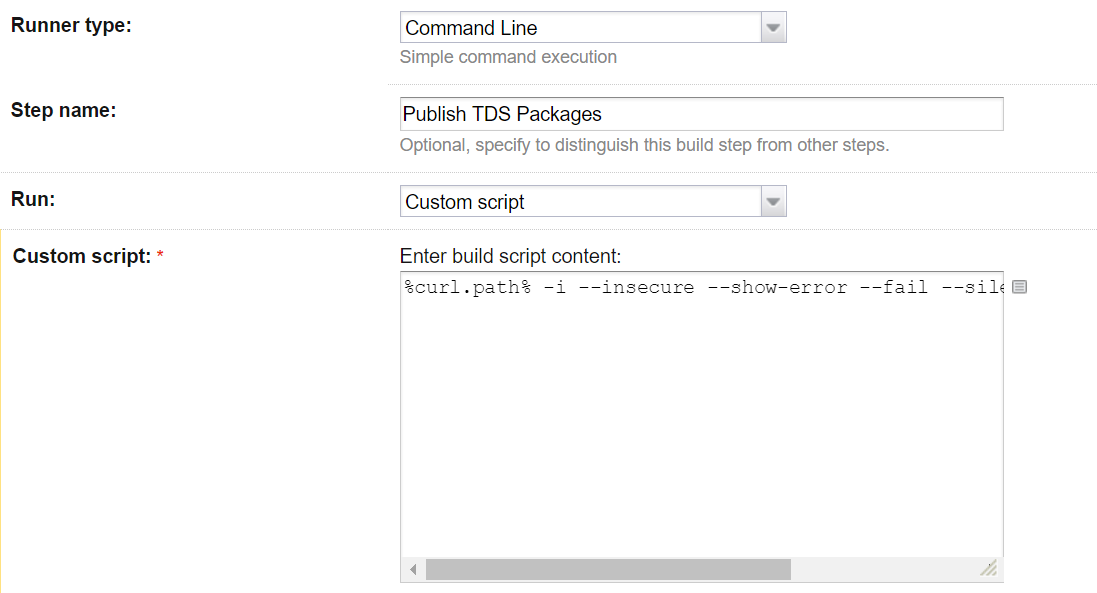
Navigate to the build step section add a ‘command line‘ build step for TDS Master pacakges and enter the value for custom script as shown below: (update the project path relevant to your project)
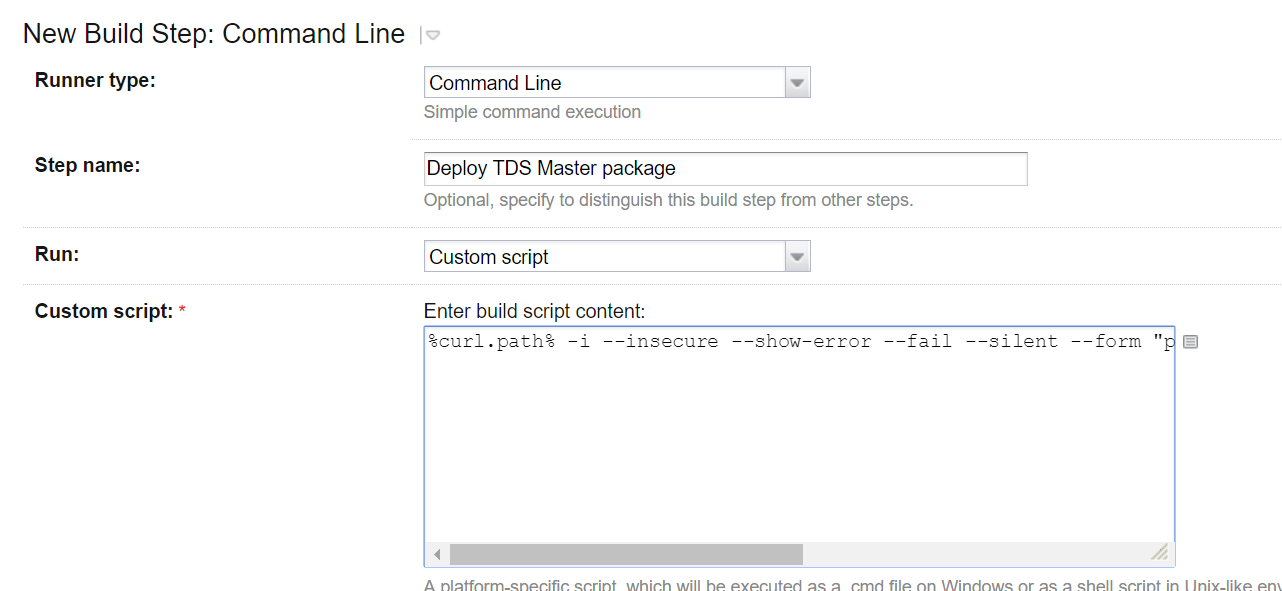
Custom Script:
%curl.path% -i --insecure --show-error --fail --silent --form "[email protected]\bin\Package_Release\MyProject.TDS.Master.update" %deploy.url%
Step 10: Run a test build for TDS.Master
There were few tools and configuration were settings introduced in the previous steps and to make sure everything works as expected perform a test build. If it fails, look through the logs and try to resolve issues. Some places where you also want to look are Sitecore Logs (in the data folder) on the QA server and website/temp folder on the QA server.
When I ran the first build, I got 500 error in the TeamCity build log for the TDS.Master deploy step. The error messages within the build log for Sitecore.Ship are not exact messages and may be misleading, you need to check the logs on the QA server for correct messages.
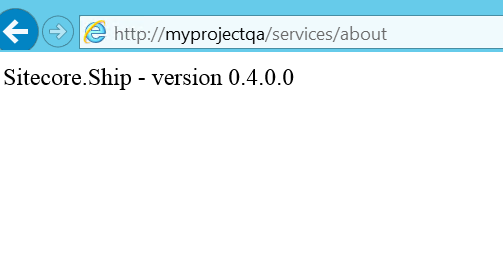
When I checked if Sitecore.Ship is installed and accessible fromm the CI server, I was getting 401 error:
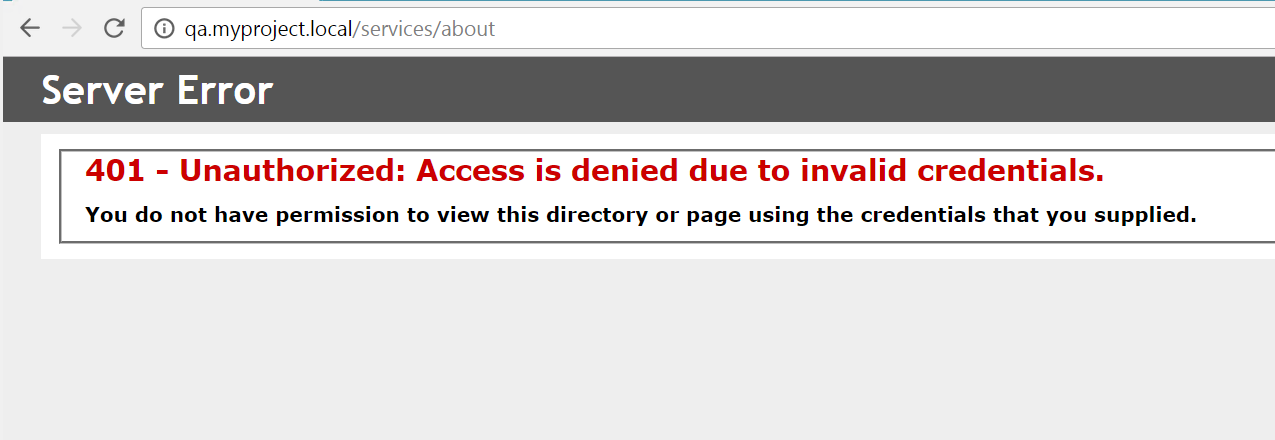
and when I checked this from the QA server, I was getting everything is OK
When I checked the Sitecore logs on QA server, I got the following message

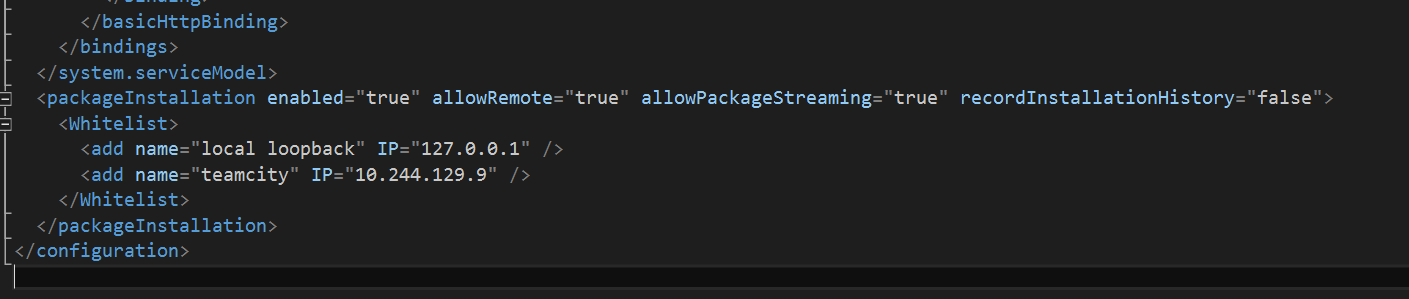
Which meant that I have to update the ‘allowRemote’ settings to ‘true’ in the web.config to allow remote package installation. The feature is disabled by default for security reasons. I also added IP address of the TeamCity server to the whitelist section and made my remote deployments IP protected:
Once checked-in and pushed to the server, I got some more errors related to missing folders and permissions. I was able to resolve them by checking the logs and giving NETWORK SERVICE permissions to the folders.
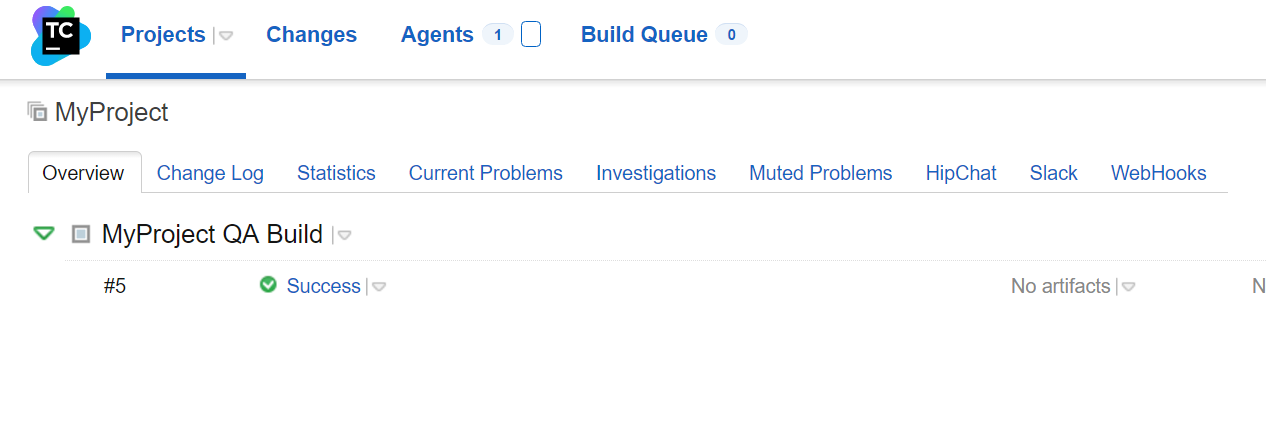
Eventually, the deploy step succeeded and I was able to see Sitecore.Ship posting my entries from the CI server to the QA server:

This is great news, it means that when I check-in TDS items and related code, I do not need a package to update the QA server ‘manually’. I can just run the build and it will pick up the latest changes and deploy them.
Step 11: Configure a TDS publish step
The previous step has only deployed our update package. We also want to publish our package post deployment. We can configure a publish step through curl and Sitecore.Ship
Navigate to the ‘Build Steps‘ section and add another ‘Command Line‘ step for publishing. Add the custom script as shown below:
Custom Script:
%curl.path% -i --insecure --show-error --fail --silent --data '' %publish.url%
Run a test build to confirm it is working as expected.
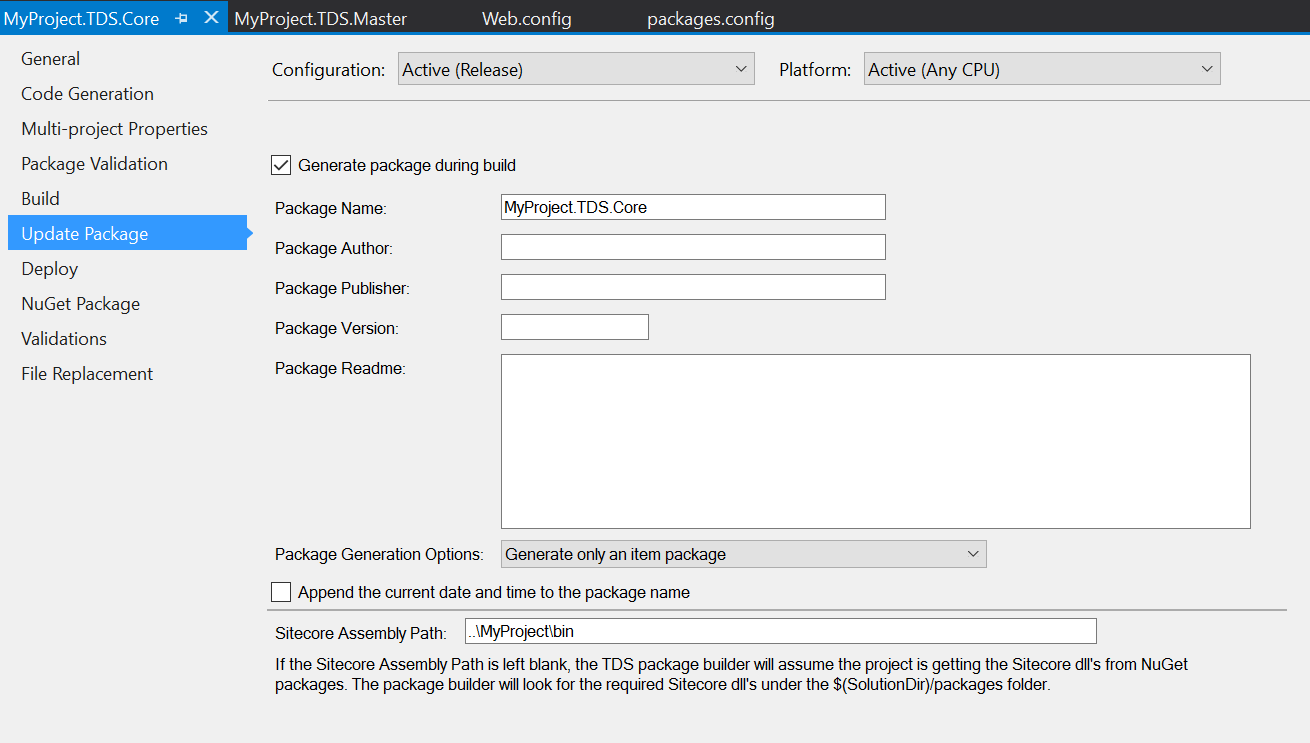
Step 12: Configure TDS.Core and its build Step
One more step is to configure TDS.Core project with TeamCity server. We want our TDS project to generate an .update package for the TDS.Core project.
Navigate to MyProject.TDS.Core project’s properties and update settings as shown below:
Then add a ‘command line‘ step in Team City similar to the TDS.Master deploy step with following script (which only changes the path variable)
%curl.path% -i --insecure --show-error --fail --silent --form "[email protected]\bin\Package_Release\MyProject.TDS.Core.update" %deploy.url%
Re-order the steps so you have core packages deploying before the master packages. Your build steps should look like below:
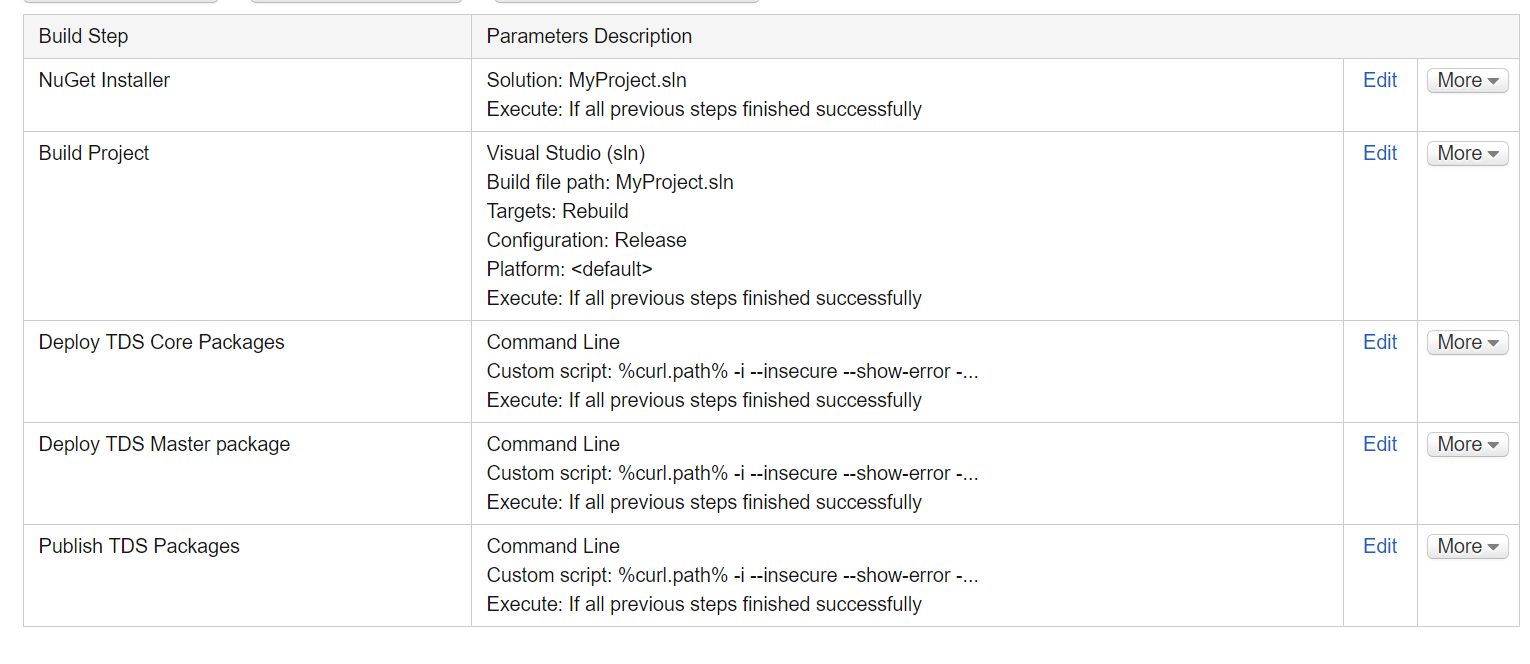
Depending upon your project and business requirements, you may want to add more steps like ‘Unit Testing’ or ‘Integration Test’ or other steps.
Step 13: Configure Triggers (Optional)
One optional thing to do is to configure trigger for the QA server, so that every time someone pushes the code to the source control, an automated build is started:
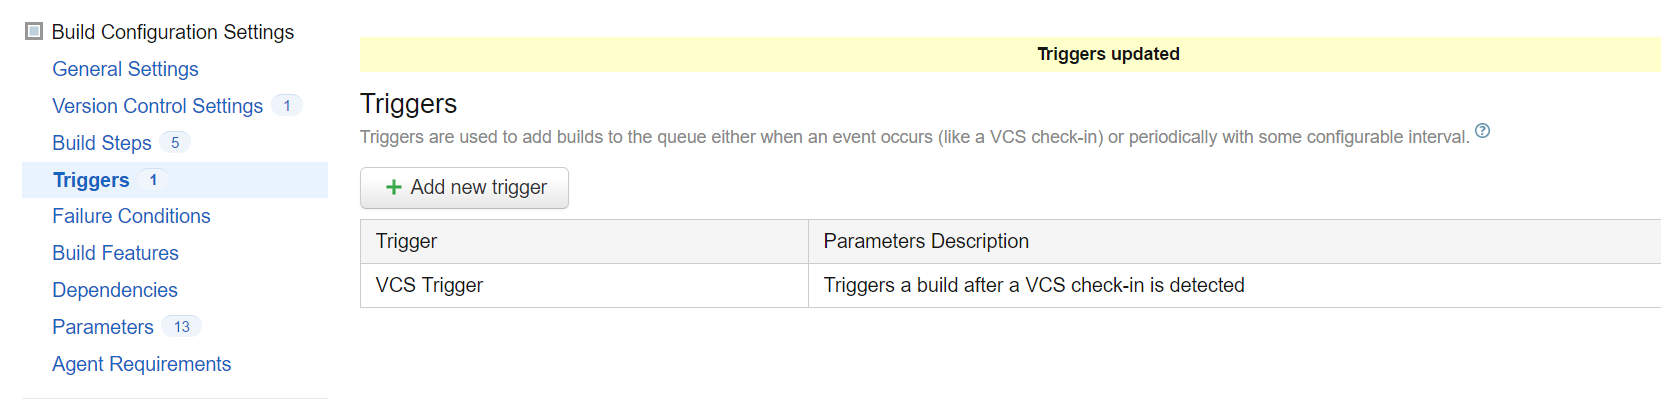
This is optional and you shouldn’t be configuring this step for the production environments
More Environments
The blog post only showed how to add build steps for the QA environment, but you may have a UAT environment, a staging environment and a production environment. You can repeat the build configuration process and add more automated deployments for each of your environment.
The steps mentioned here are only an example and meant to provide the basics of setting up CI integrations. Once you get comfortable, you can enhance number of steps and/or use different deployment strategies.
Final Thoughts
As you have seen, it took few blog posts to get the Continuous integration working, but once it is established, it will save you tons of time during the application development and even post-launch. If your organizations sets up projects frequently, the time to setup QA, DB and CI servers and local environments can be further reduced by using standard PowerShell scripts.
One final optional blog post about Slack notifications is coming up next few days and then it will be a wrap.
Thanks.
Related Blogs
- Part 1 – Continuous Integration – Why your Sitecore project deployments must be automated ?
- Part 2 – Setup and Configure Visual Studio Sitecore Project
- Part 3 – Setup and Configure TDS
- Part 4 – Setup Sitecore Glass
- Part 5 – Setup Source Control (Git)
- Part 6 – Setup QA Server, DB server and CI server
- Part 7 – Setup Continuous Integration using Team City
- Part 8 – Setup Slack Notifications with TeamCity and Bitbucket
