I have recently worked on a project using standard out-of-box EPiServer Relate+ website and templates. As every module is very well written and integrated, the only missing piece was the video upload settings.
It took me a while to find out how to get these settings and update the site so that end user can upload video. I thought it will be a good idea to write up a small blog for fellow developers.
Step 1. Navigate to http://world.episerver.com/System/Video-Service/ and login with your usual world.episerver account
Step 2. Select register account as shown below
Step 3. The next screen will show your information, make sure all the required fields are there and click ‘Next’ (I have removed my auto generated email address)
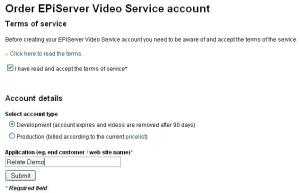
Step 4: Read and Check the ‘Terms & Condition’ box. As I am using it for demo purposes, I would select the development license.
Step 5: If your account is successfully created, you would be shown <cdnProvider> settings at the bottom of the page.
Step 6: Open your EPiServer Relate+ web.config and find the <cdnProvider> node and replace the accessKey and secretAccessKey values with the actual values generated at the end of the process.
Navigate to the actual site and try uploading any video. The video service modules converts all movies into flash format so it may take a while to upload your video and it will depend upon your system, network traffic and video file size.
Secondly, video files may not appear instantly on the page so just be patient.
Cheers


Hi! This is my first visit to your blog! We
are a group of volunteers and starting a new project in a community in the same niche.
Your blog provided us beneficial information to work on.
You have done a outstanding job!