In previous blog, I have shown one-click deployment of Sitecore on Microsoft Azure. In this blog, we will explore the topics of Azure Resource Management (ARM) templates and Sitecore Azure Toolkit to do our Microsoft Azure deployments.
Before we begin!
What are ARM templates anyway ?
If you have not heard about them before, you are not the only one.
Simply put, they are JSON files where you can define the structure and configuration values (just like web.config file but in json format) of what you want to deploy. For more information about ARM templates, please visit Microsoft documentation.
Sitecore Azure Toolkit streamlines your Microsoft Azure deployments using ARM templates and gives you out of the box integrations for Microsoft Application Insights, Microsoft Azure Redis Cache and Microsoft Azure Search. This toolkit is a great starting point if you are at beginner level.
Pre-requisites
In order to do Sitecore deployments, there are some prerequisites that you will need to install on your machine as mentioned in the documentation.
As of today, you will need the following tools and packages:
- .NET Framework 4.6
- PowerShell 4.0 or above
- Microsoft Azure PowerShell 2.0.1 or above
- Microsoft Azure Storage Explorer
- Sitecore Azure Toolkit .zip package
- Sitecore ARM Quick Start Templates
- Sitecore pre-built Web Deploy packages (XP/XP1/XM/XM1)
Once you have installed the tools and downloaded pre-built Web Deploy packages, you can follow the step by step guide below and do a Sitecore Azure PaaS deployment for XP1 configuration:
Step 1: Upload Web Deploy packages
The first step will be to upload the Web Deploy packages at a location which can be accessed over the internet during our installation process. Microsoft Azure provides storage accounts to store any kind of data that can be accessed over internet. Create a new storage account within the Azure portal using this guide and then upload the individual server role scwdp.zip packages. I am using Sitecore 8.2 up-3 and for XP1 configurations so I have uploaded the following packages:
- Sitecore 8.2 rev. 170407_cd.scwdp.zip
- Sitecore 8.2 rev. 170407_cd.scwdp.zip
- Sitecore 8.2 rev. 170407_prc.scwdp.zip
- Sitecore 8.2 rev. 170407_rep.scwdp.zip

Once you have uploaded the packages, open ‘Microsoft Azure Storage Explorer’ and connect to your account. Generate a shared access signature URL for each of the packages and note it down for later use as shown below:
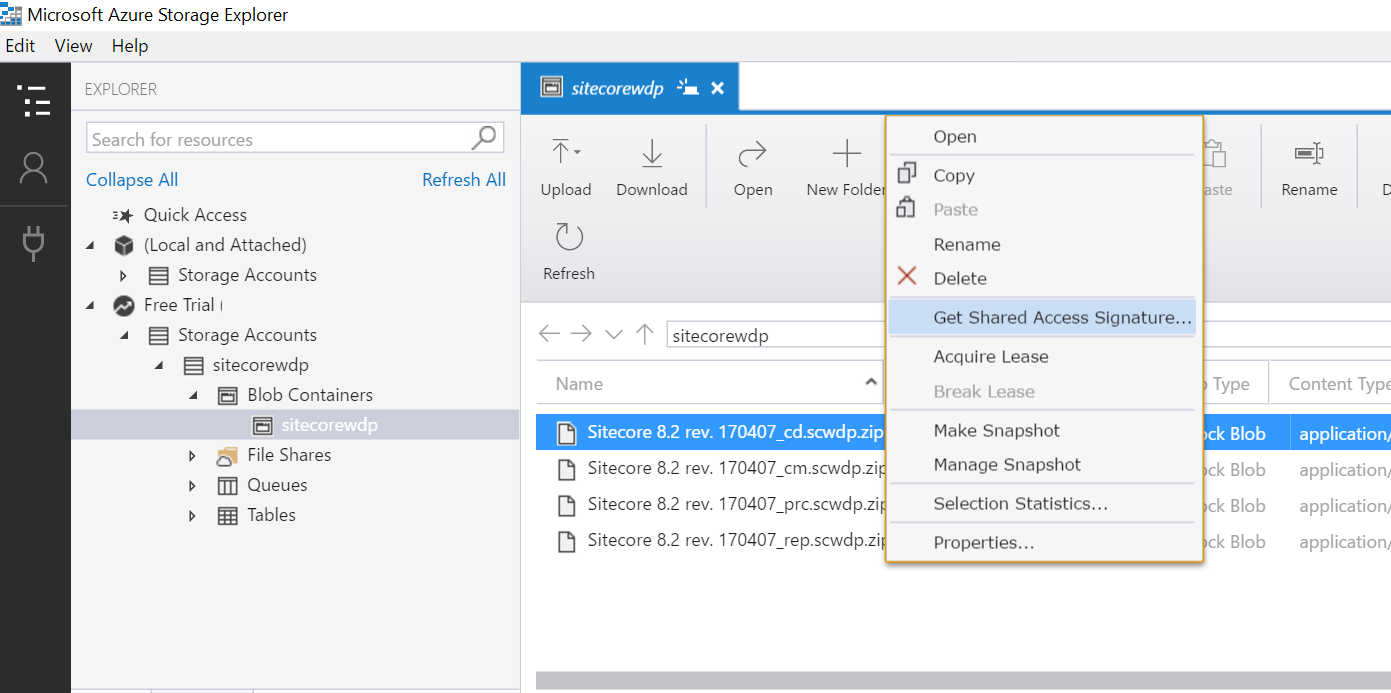
For example, one of the shared access URL will look like this
At the end, you should have 4 web deploy packages URL.
Step 2: Setup MongoDB collections for analytics
The next step will be to setup MongoDB for the deployment. You can either provision a new VM through Microsoft Azure and install MongoDB and then create your databases or you can use 500 MB of FREE MongoDB storage provided by mlab.com.
If you have never used mlab for Sitecore before, please follow this guide by Sitecore MVP David Peterson to create 4 individual MongoDB for your site.

Step 3: Update azure.parameters.json
Once you have noted down shared access URLs for web deploy packages and also got connection strings for MongoDBs, the next task is to update the azure.parameters.json file.
Assuming that you have downloaded the Sitecore Azure Quick Start ARM templates from GitHub , navigate to the ‘xp’ folder and update the azure.parameters.json file with the parameters that you have recorded earlier.
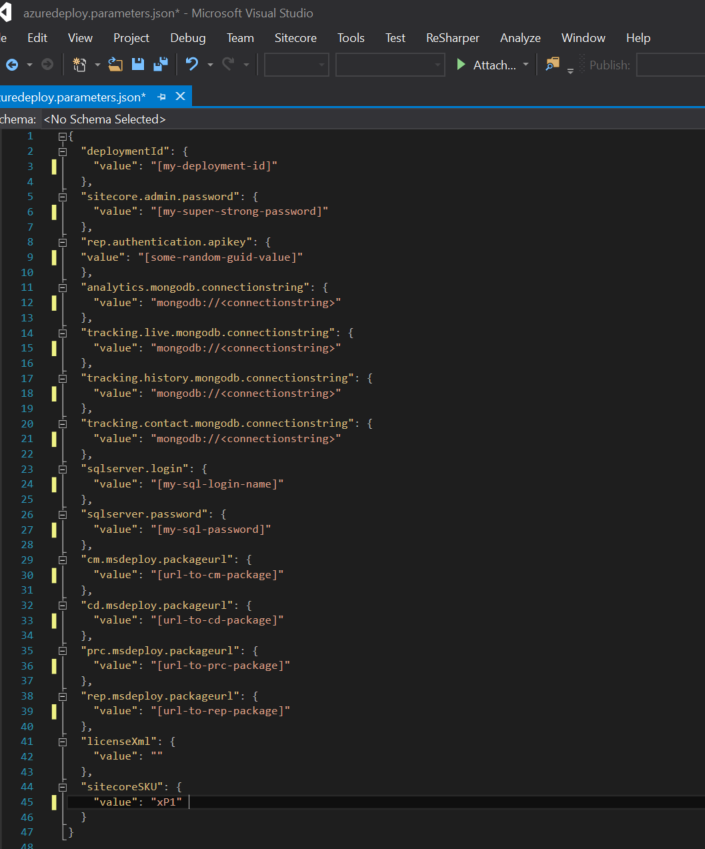
You can leave licenseXml value as blank as it will be passed through the command line.
Step 4: Setup Sitecore Azure Toolkit folder
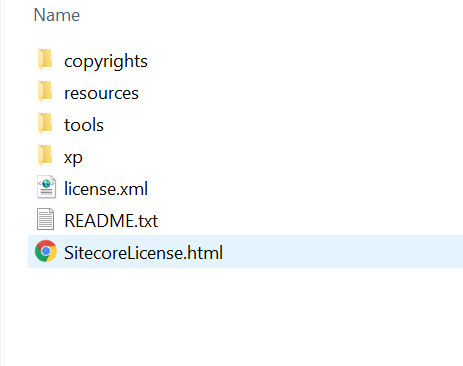
I downloaded the Sitecore Azure Toolkit zip package and copied to a location C:\azure\sitecore-azure on my local machine. Then I copied the Sitecore license file and the ‘xp‘ folder that I modified in the previous step in the same folder location. This will make sure that I do not make any path related errors while I am running the PowerShell commands
Step 5: Run PowerShell Commands
Okay, the moment of truth has arrived.
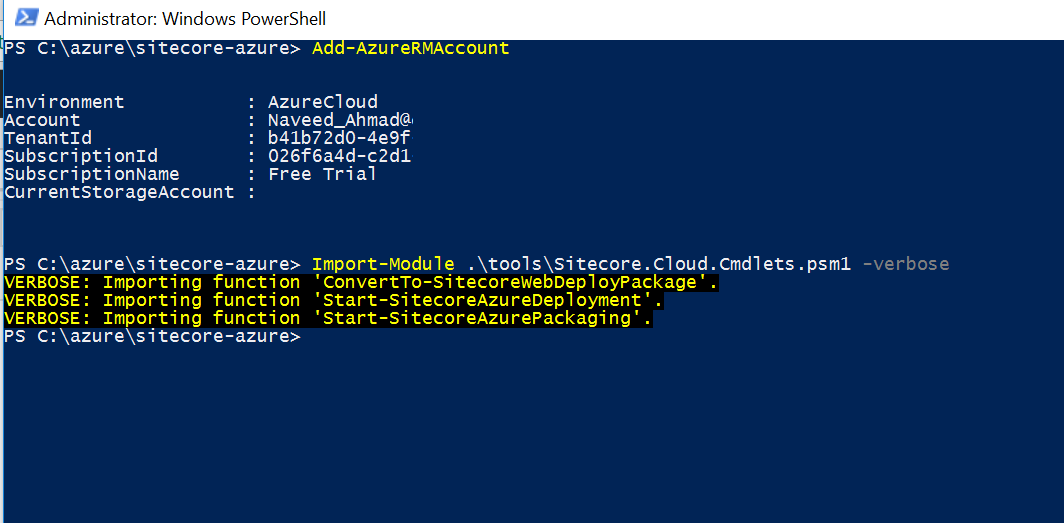
Open PowerShell in administrative mode and navigate to the Sitecore Azure Toolkit folder. In my case it will be ‘C:\azure\sitecore-azure‘ and then run the following 2 commands to setup PowerShell:
- Add-AzureRMAccount – this will show a pop-up to login to your Azure account
- Import-Module .\tools\Sitecore.Cloud.Cmdlets.psm1 -verbose – this will load the Sitecore specific Azure commands into the session.
Now we are ready to provision our environment with just one command. If you have followed the steps as above and have entered values in your parameters.json, just entered the following command:
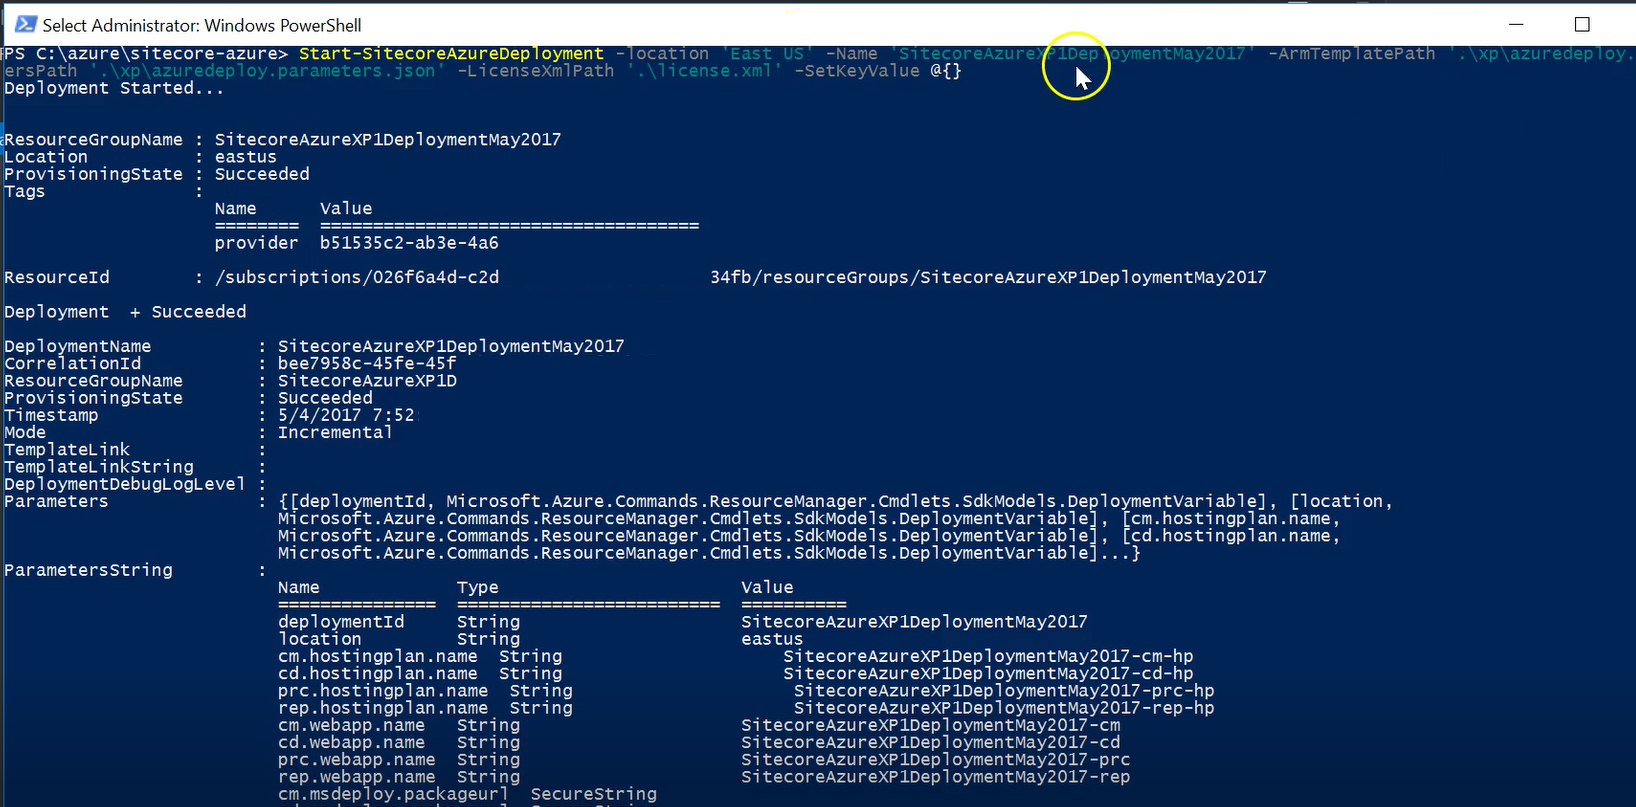
Start-SitecoreAzureDeployment -location ‘East US’ -Name ‘SitecoreAzureXP1DeploymentMay2017’ -ArmTemplatePath ‘.\xp\azuredeploy.json’ -ArmParametersPath ‘.\xp\azuredeploy.parameters.json’ -LicenseXmlPath ‘.\license.xml’ -SetKeyValue @{}
This will show a message that deployment has started:

Then you can go and make yourself a cup of coffee as you have to wait for another 15-20 minutes before the deployment will be completed and you see a success message.
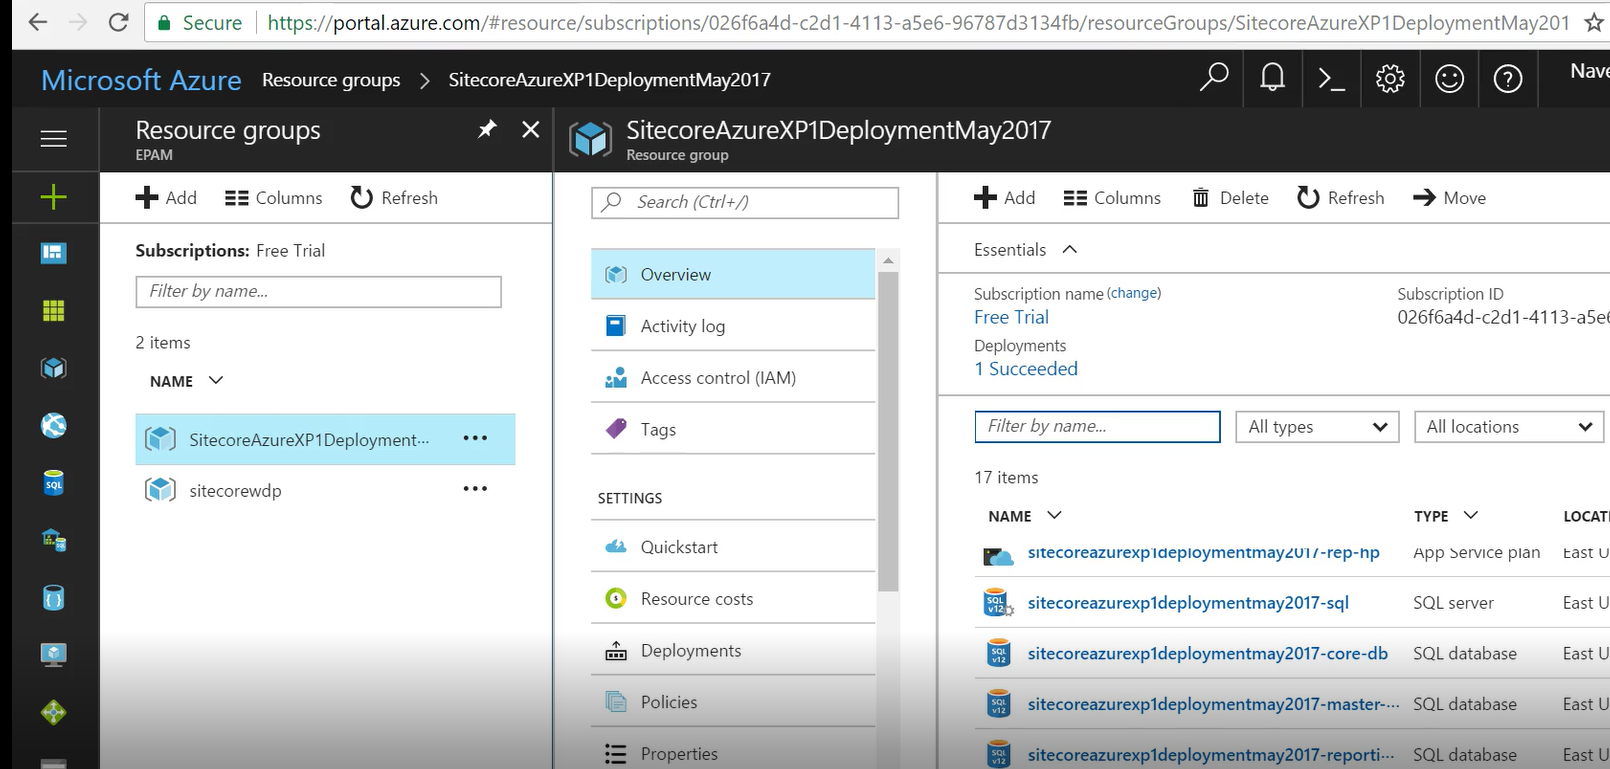
Navigate to to your dashboard portal and you should see all of your services running for the deployment!
 I
I
Video
I think the topic is complicated enough and a simple video can give a better overview:
Overview of XP1 Architecture
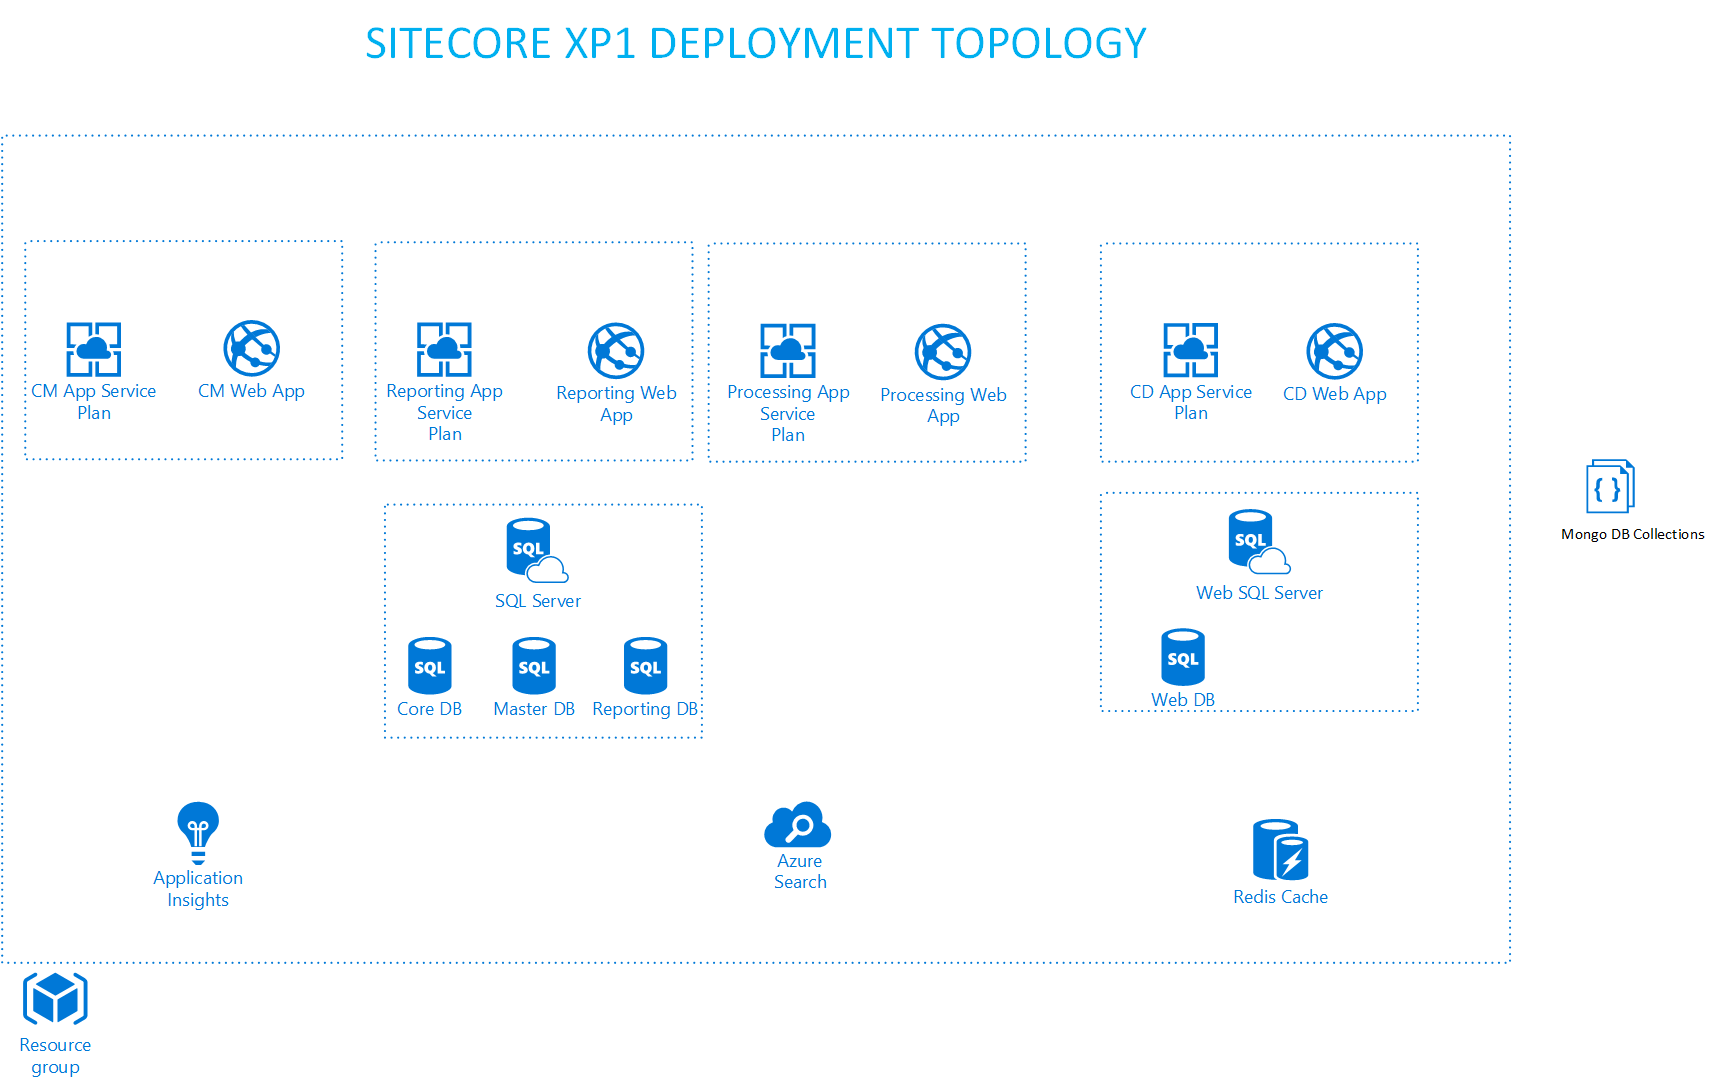
When you deploy Sitecore with XP1 configuration using quick start templates and Sitecore Azure Toolkit, you get the following services:
- CM App Service Plan & CM Web App
- CD App Service Plan & CD Web App
- Reporting App Service Plan & Reporting Web App
- Processing App Service Plan & Processing Web App
- SQL Server with Core, Master and Reporting DB
- SQL Server with Web DB
- Application Insights (used for logging exceptions and much more)
- Azure Search
- Redis Cache
In order to understand it better, you can see the following topology diagram.
That’s it, Sitecore Azure Toolkit really makes it easy to do customized your Microsoft Azure PaaS deployments. It is a great tool and you should really check it out!
Thanks
Naveed.
