Sitecore Email Experience Manager or EXM has become part of the main installation package since v9 update 1 (just like Sitecore Forms). The overall purpose of EXM is very much similar to any other Email marketing client, and that is, sending emails to your subscribers or members. In addition to sending out millions of emails, EXM can do A/B testing, supports multi-lingual campaigns, shows detailed reports and analysis of your emails and much more fun stuff. Check out a sample report below:
If you have been in digital world as a marketer or as a developer, I can assume that you would have worked in some sort of email campaign either during the strategy process or during development process. For any email campaign, you would recognize that the 2 main things that you will need are:
- Subscribers list
- Email content
This post is for any one who wants to know how to create a subscribers list and start sending email content with EXM.
Installation:
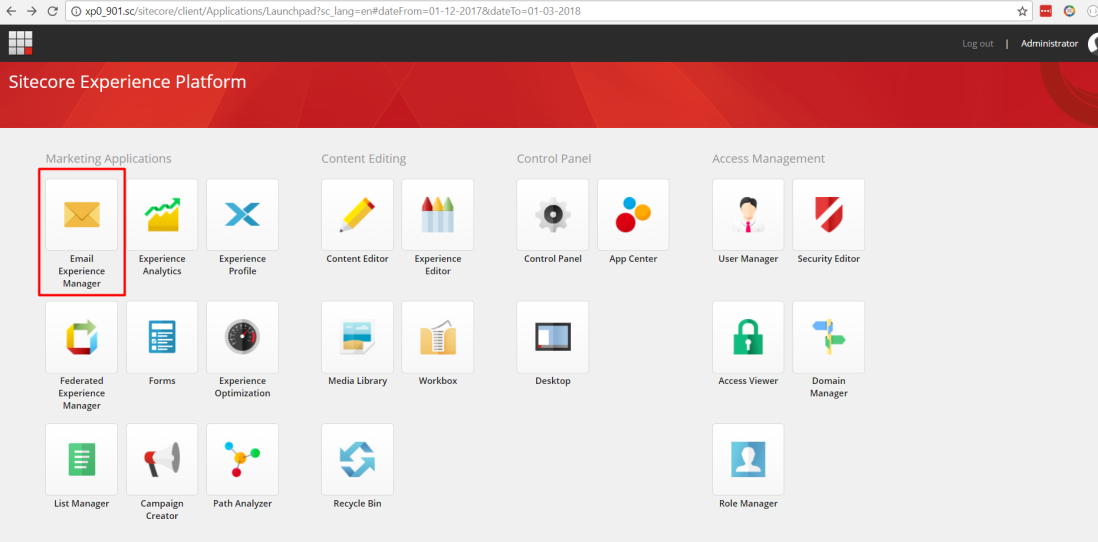
As mentioned earlier, EXM will be installed as part of Sitecore 9 update 1 process. When you login to the Sitecore Dashboard, you can navigate to it via by clicking ‘Email Experience Manager‘ as shown below:
EXM Dashbaord:
The EXM dashboard uses the main area for showing detailed reports of previous campaigns as default, while the left hand column shows menu links to different functionality available within EXM dashboard:
For more details you can always refer to the official documentation. So lets begin the fun and see how can we use EXM in our to send out newsletters!.
Step 1: Create Subscribers List:
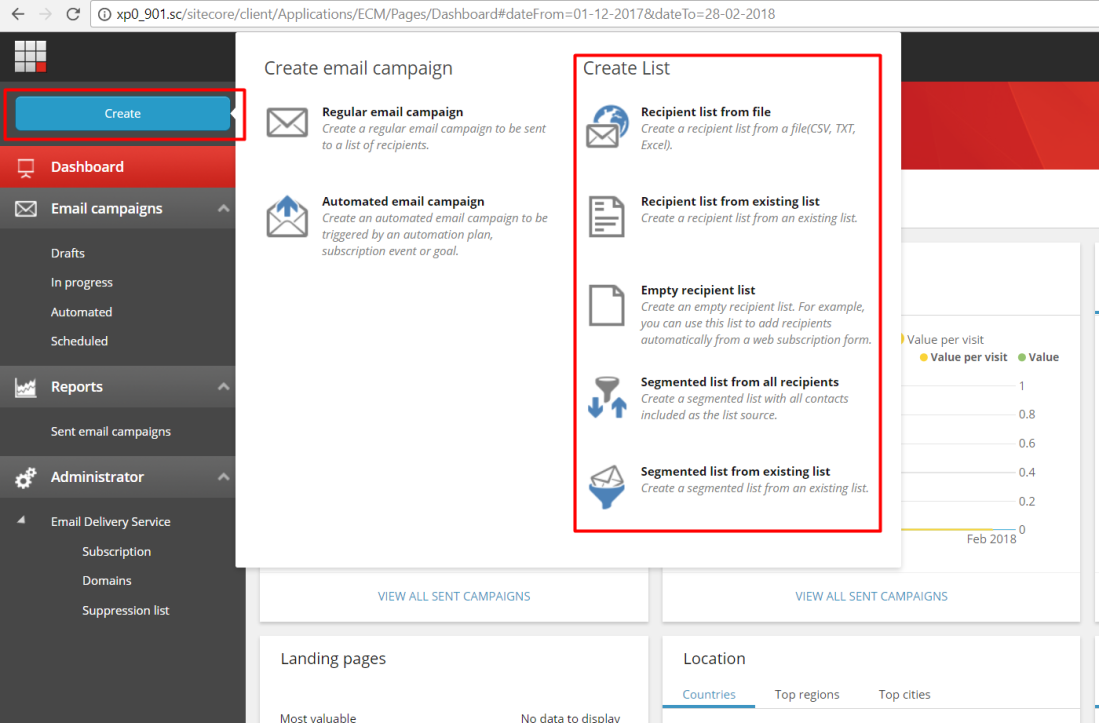
Once inside EXM, there are various options to create a subscribers list as shown below:
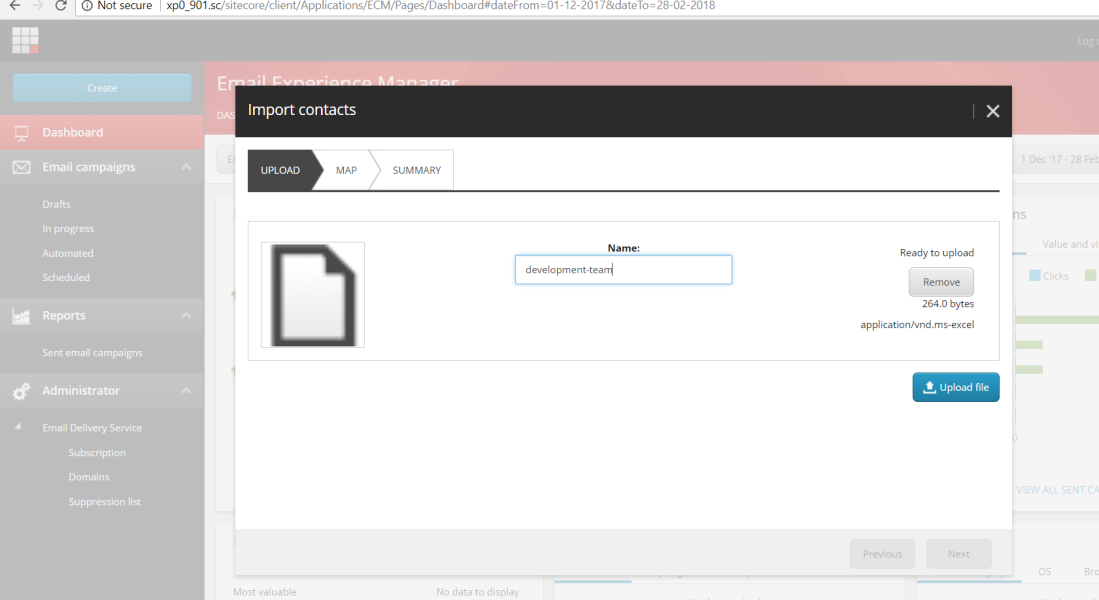
For demo purposes, lets assume we want to create a list from a file. Clicking on the ‘Recipient list from file‘ will open up a modal asking to upload a CSV file. The file should contain names and email addresses of recipients (a common practice in email marketing) :
For demo purposes, I uploaded a CSV file with 3 fields in this order: First Name, Last Name, Email:
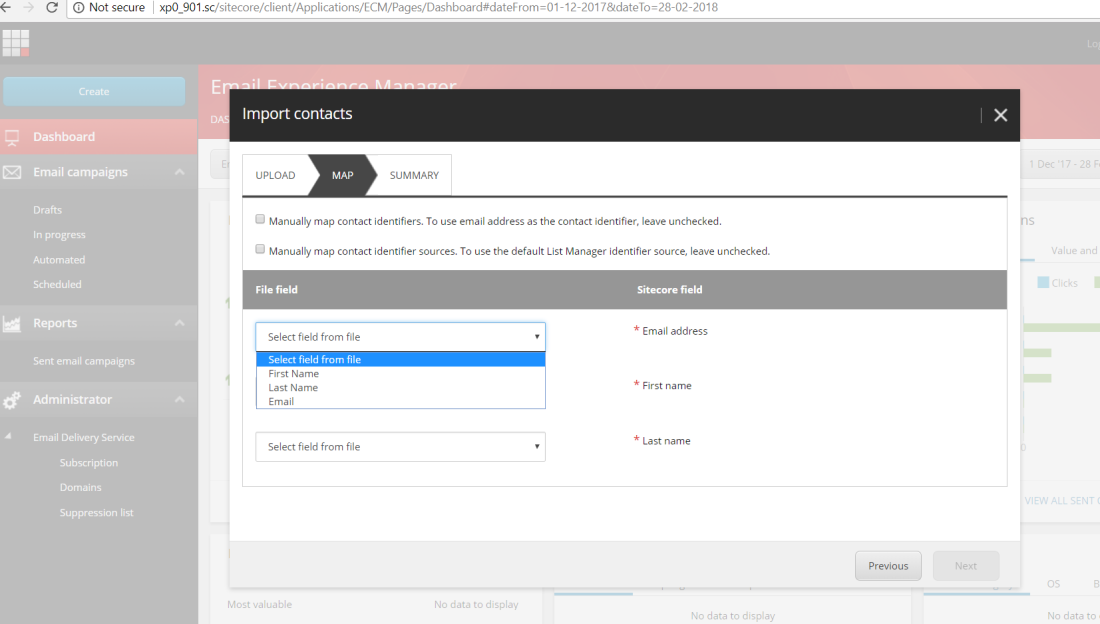
The next step asked me to map the fields from my CSV file. As my CSV file had different order of fields, I mapped them through drop-downs provided in the modal box:
After mapping the field, the modal should look like this:

Once the fields are mapped, I clicked Next and EXM started to import my recipients:
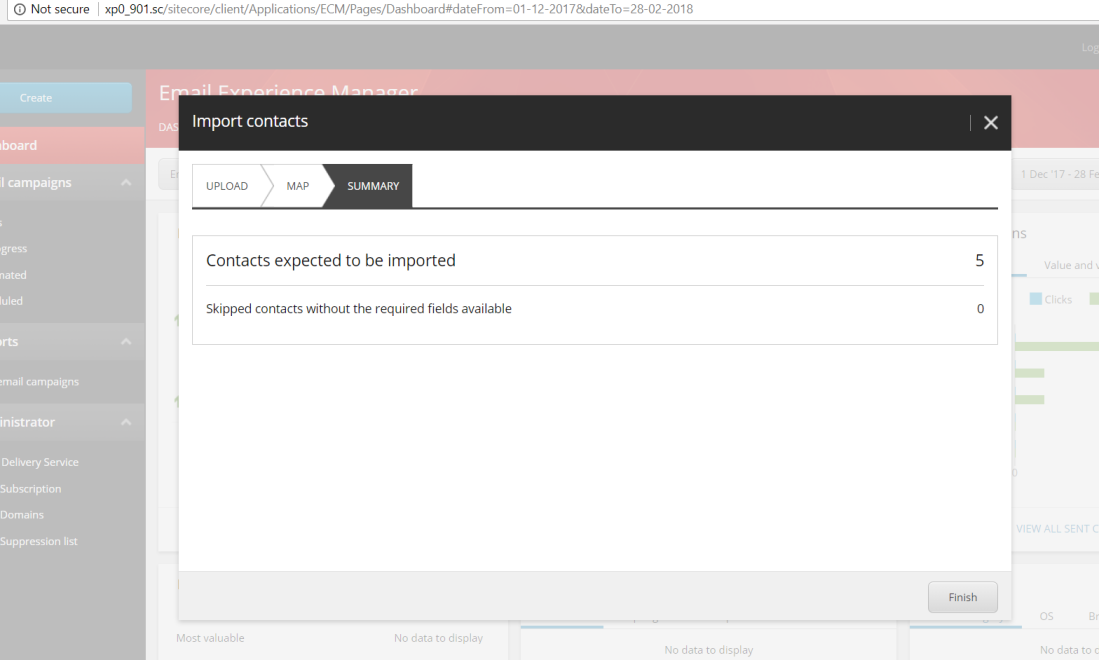
Once my our subscribers list was imported, I was ready to create a my email campaign.
Step 2 – Email Campaign:
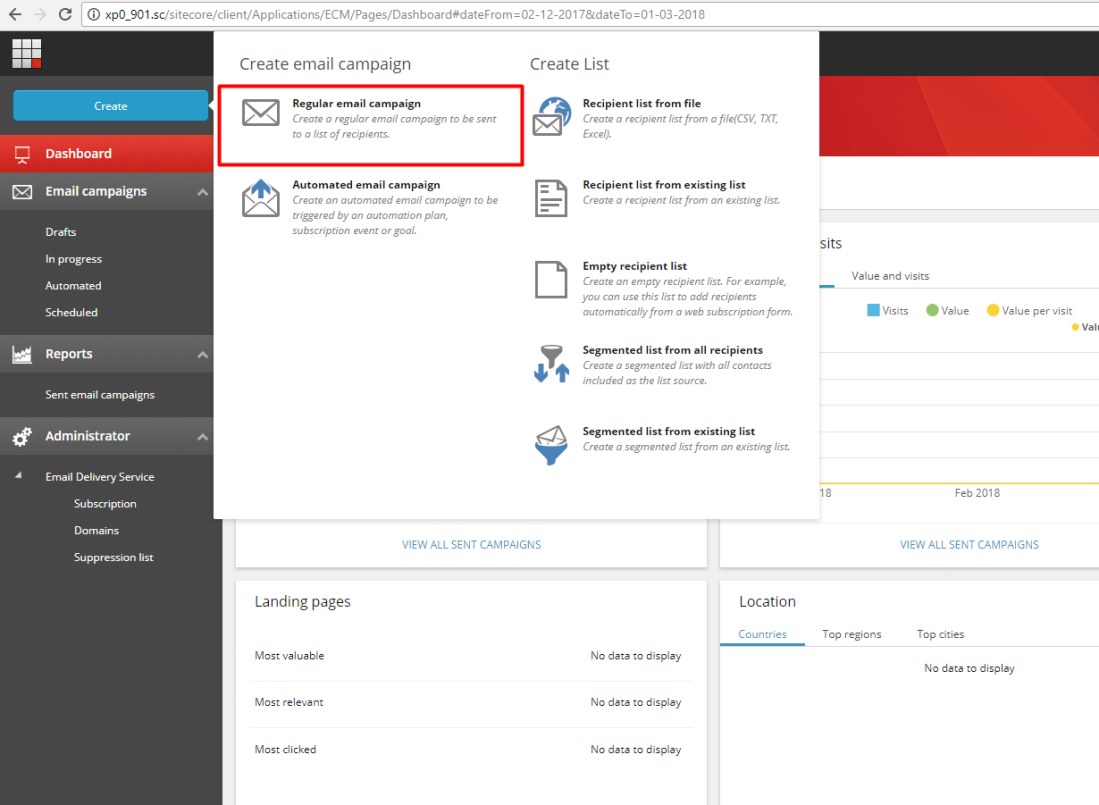
To start creating my email HTML copy, I clicked on the ‘Create‘ button again and selected ‘Regular email campaign‘ as shown below:
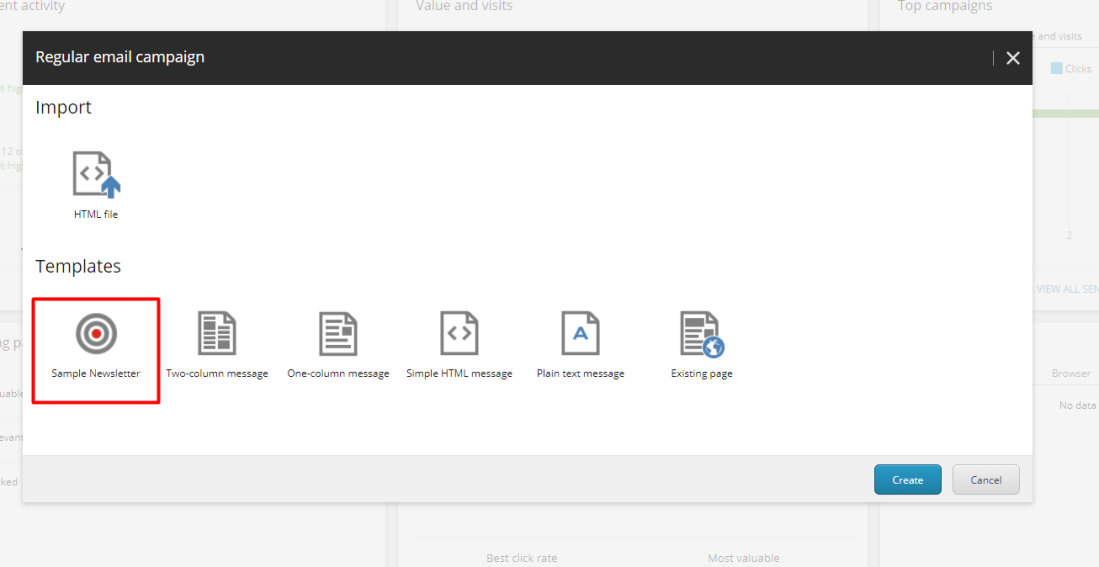
For demo purposes, I choose ‘Sample Newsletter‘ template. You can also choose any other templates type or import static HTML.
I entered the name ‘demo newsletter‘ and clicked ‘create‘ button:
The newsletter was created and I was presented with different options to enter information about the campaign:
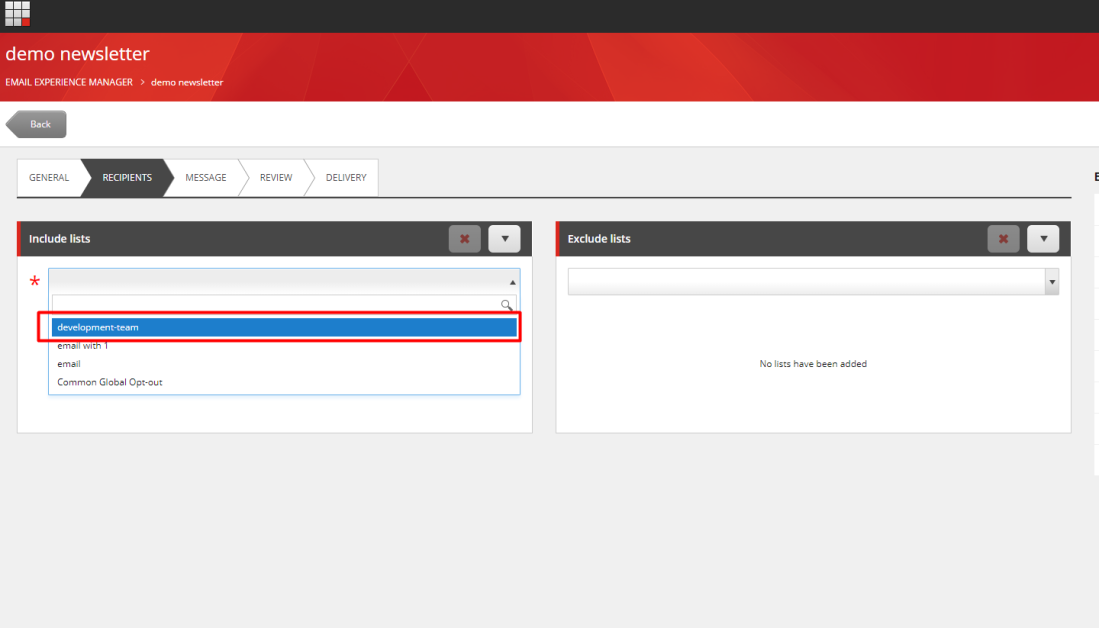
I clicked on the ‘Recipients‘ tabs and selected the list that I have just uploaded:
Note: You can select more that 1 subscribers list in production environments
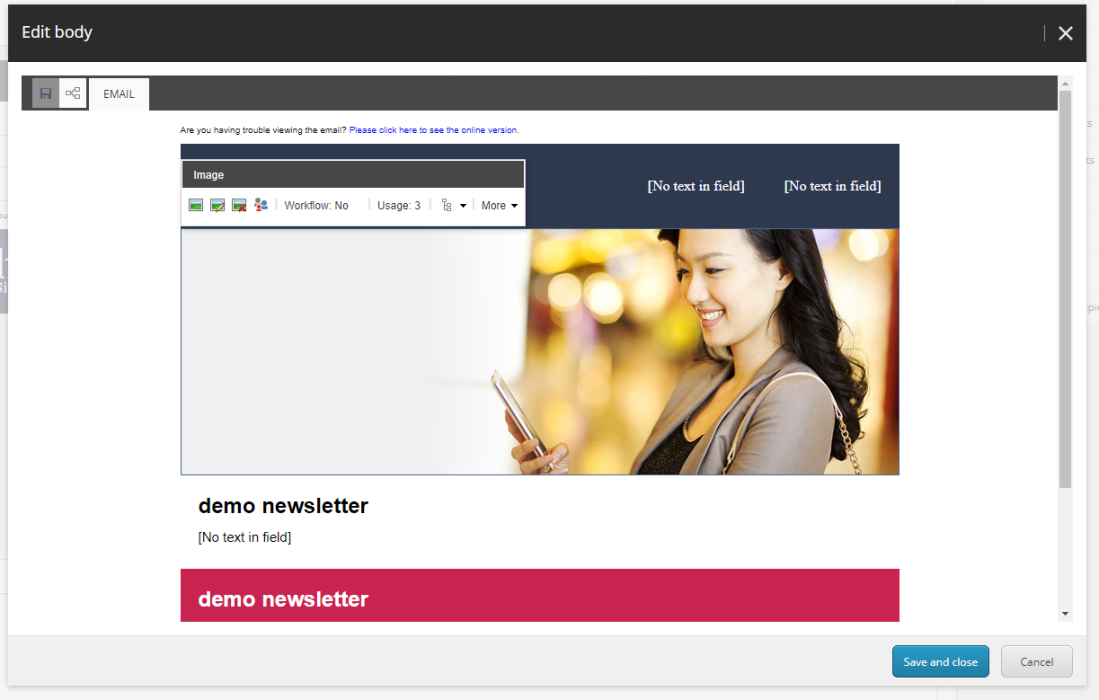
On the ‘Message‘ tab, I clicked on the main body area to update the body of sample news letter. It presented me with very familiar experience editor mode to update the content:
I added the very popular Sitecore sample image to my newsletter and clicked Save and close:
On the ‘Review’ tab, I wanted to make sure that everything I have entered is coming out correctly. So I entered my Gmail address and clicked Send button:
Boom! I got the email (Note: At this point I have already configured my SMTP settings as I will be explaining in step 3)
I also tested in an outlook client and it looked perfect!
The last step int the email campaign process is about the ‘Delivery‘, I can either click Send Message now or scheduled it at for a later stage:
That’s it, my email newsletter was ready to send to my subscribers!
Step 3 – Configuration Settings:
To configure email delivery for EXM, open web.config and look for settings “eds:define“. This could be either CustomSmtp or EmailCloud as shown below:
If you are in development, you may want to use your internal company SMTP server (like smtp.yourcompany.com). You also have the option to choose Gmail or SendGrid as they both will provide enough quotas to send your testing emails. For production purposes, it is highly recommended to use the Sitecore Email Cloud Service provided by Sitecore to comprehensively manage your email campaign. A comparison between custom smtp or Sitecore Email Cloud is given here.
Any ways back to configuration, open Website\App_Config\Sitecore\EmailExperience\Sitecore.EDS.Providers.CustomSMTP.config file and update the <smtpSettings> block as you wish. If you choose to use Gmail, your settings should look like this:
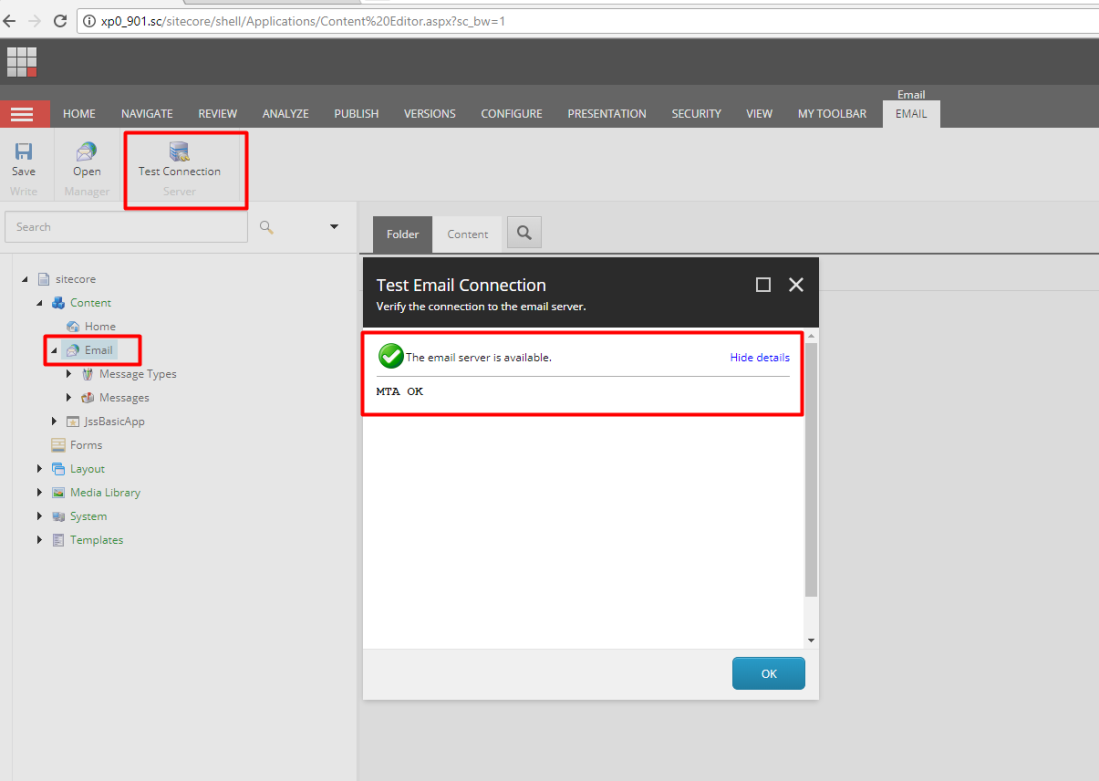
Once you have configured your settings, make sure to test them. Open content editor and navigate to /sitecore/content/email item and click on test connection. If everything has been configured correctly, you will get the OK message:
If you don’t get the OK message, check the logs for Eds.* .txt and Exm.*.txt in the Data folder.
That’s it for now! Hope you liked it and will start using it for future projects.
Thanks
Naveed.









Very well explained and work like a charm.
Thank you