This is going to be a fun post and will show the real power of Sitecore Experience Commerce 9 combined with SxA Storefront components in “powerful ways”.
We are going to create a landing page for our brand new model of a laptop. If you manage a commerce website, this is a very common scenario. As a company, you would be interested in creating a special landing page for promotional purposes. The blog is based on Sitecore Experience Commerce 9 initial release and the default Storefront, so lets start!
Step 1 – Create a ‘Default Commerce Page’
Open content editor, right-click on the Home item and create a new ‘Default Commerce Page’
Step 2 – Open up ‘Experience Editor’
Right-click the newly created page and open up ‘Experience Editor’
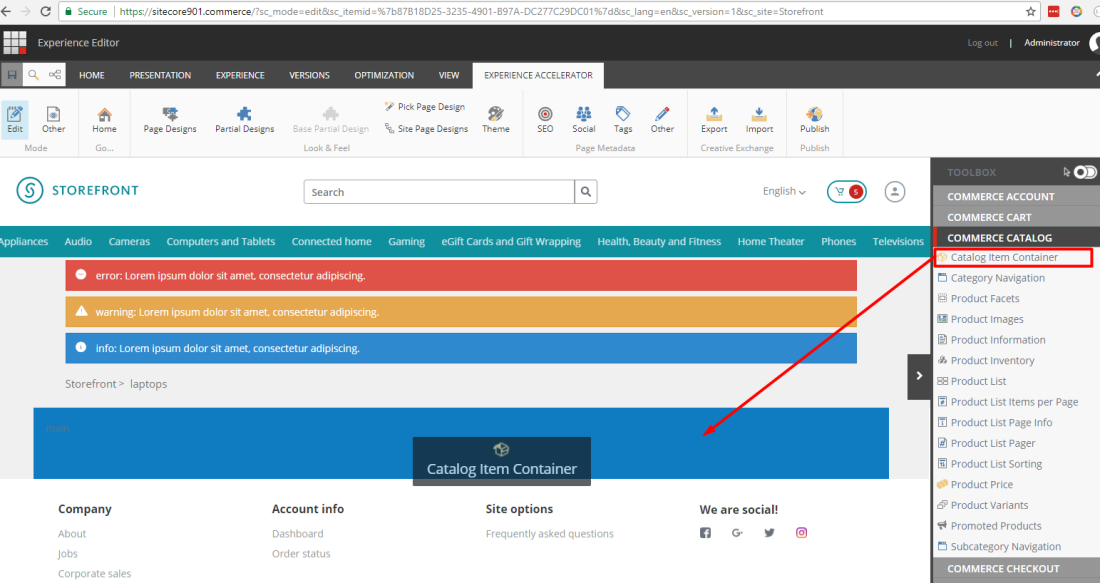
Step 3- Drag and Drop Catalog Item Container’ component
In the middle part of the page, drag and drop ‘Catalog Item Container’ component. This is a special type of component which will serve as a ‘current context’ for all of the child components within this component.
Set the data source for the product:
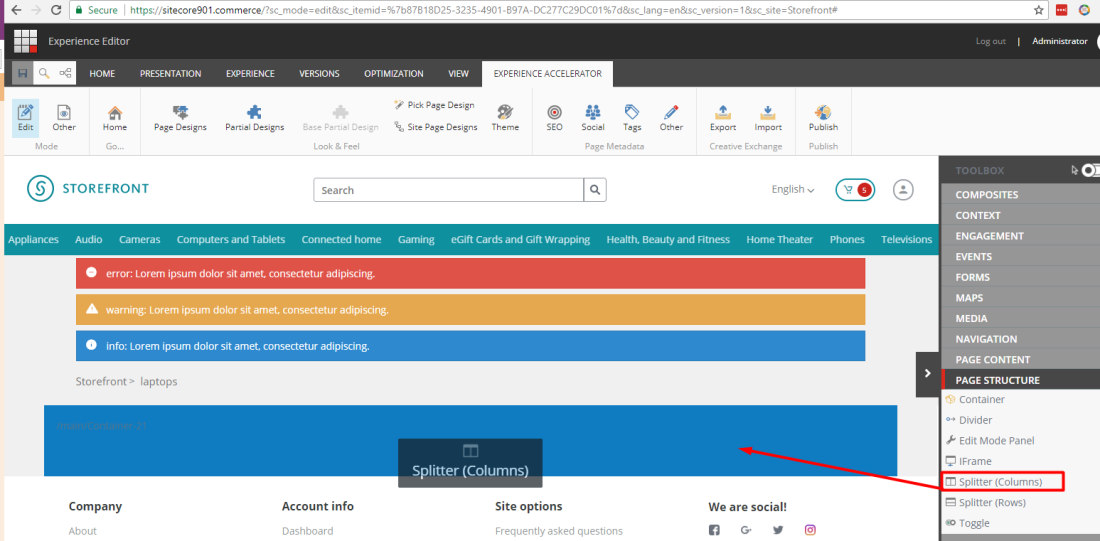
Step 4- Drag and Drop ‘Column Splitter’
Drag and drop ‘Column Splitter’ inside ‘Catalog Item Container’. Column splitter is a powerful component which can create bootstrap like columns for any given placeholder. Right now we are only interested in 2 columns so we will leave it at as is:
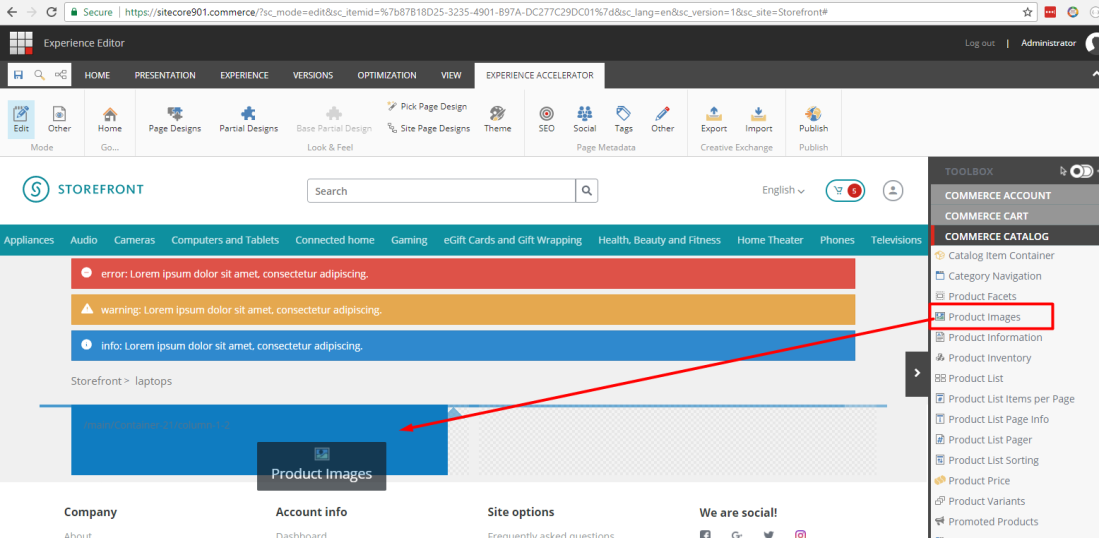
Step 5- Drag and Drop ‘Product Images’
Drag and drop ‘Product Images’ component. This will take the context of the product from ‘Catalog Item Container’ component and the images will show up.
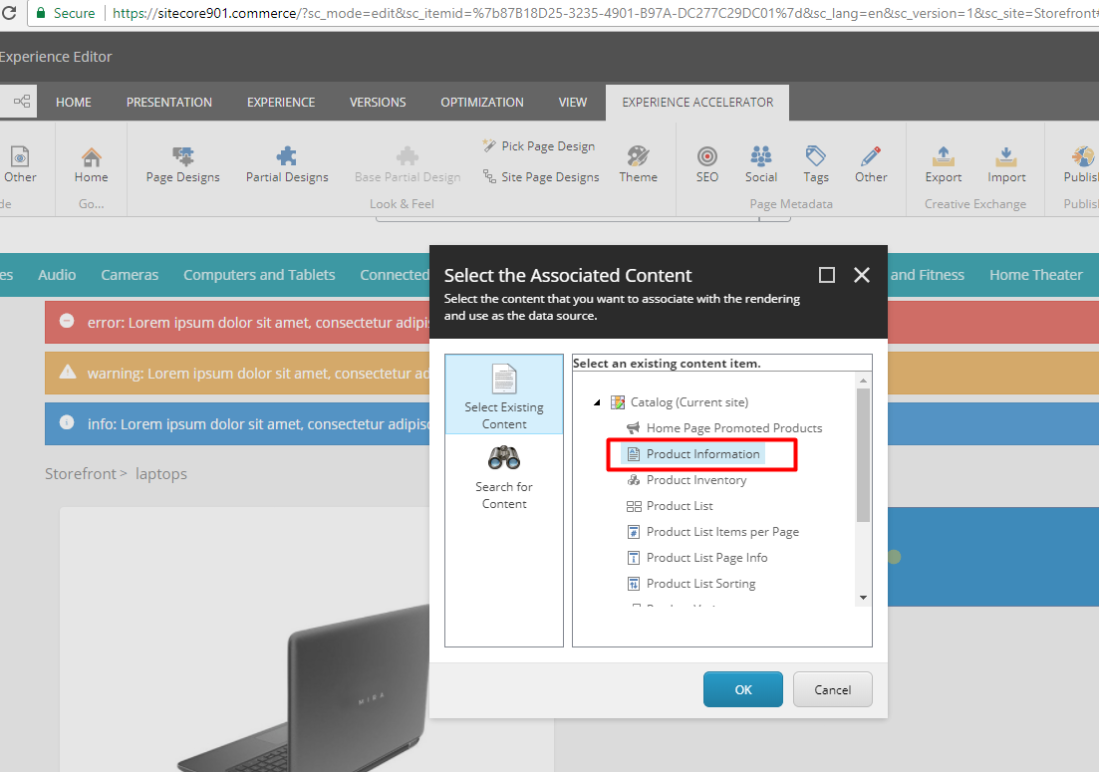
Step 6- Drag and Drop ‘Product Information’
Drag and drop ‘Product Information’ component. This will take the context of the product from ‘Catalog Item Container’ component and information will show up.
Set associated content item (there is one predefined)
Step 7- Drag and Drop ‘Product Inventory’ component
Drag and drop ‘Product Inventory’ component. This will take the context of the product from ‘Catalog Item Container’ component.
Set associated content item (there is one predefined)
Step 8- Drag and Drop ‘Product Price’ component
Drag and drop ‘Product Price’ component. This will take the context of the product from ‘Catalog Item Container’ component.
Step 9-Drag and Drop ‘Product Variant’ component
Drag and drop ‘product variant’ component and select pre-defined associated content.
Step 10- Drag and Drop ‘Add to Cart’ component
Drag and drop ‘Add to Cart’ component.
Save and Preview the page.
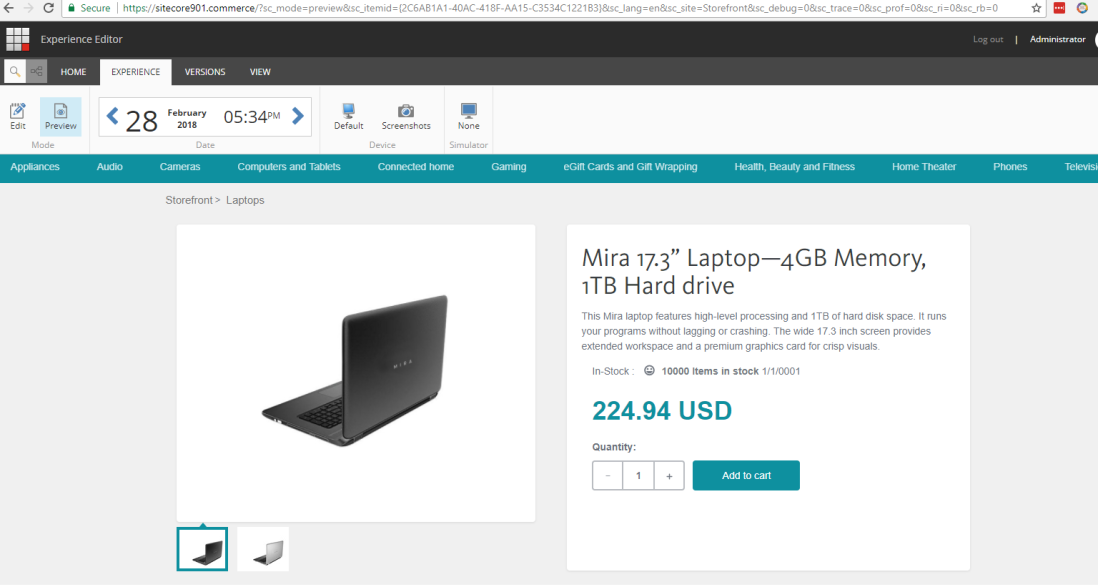
That’s it, all done. Click save and preview the page. It should look something like this:
Final output the page
Publish the page and you are all set to rock the world!
Summary:
As you see, within 5 minutes I was able to setup a landing page for one of the product with help of some powerful components. I had the full flexibility over the page structure and design. Now that is the real power of Sitecore Experience Commerce with SxA Storefront components. Go check it out!
Thanks
Naveed
Updated March 5, 2018 with Video
The video actually takes 3 minutes! There is no voice as it is self explanatory.
Reference: https://doc.sitecore.net/sxa_storefront/commerce_renderings_for_sxa/commerce_catalog_renderings







Very good!
Hopefully you can provide more resources or examples of Sitecore XC9.
Definitely, working on them.
Thanks
Can you provide an example of how I can add an attribute to a product to display the complete process on the interface?
Can you email me?I want to check with you by email.
My email address is [email protected]
I am sorry, I couldn’t understand your question. I will send you an email