This is the second part of the Sitecore DevOp Series. In this blog post, we will setup a Visual Studio project for a brand new Sitecore, create a local publish profile and add XML config transforms. The blog series is aimed at newer audience and developers who are setting up CI for the first time.
Step 1 : Create Visual Studios Project
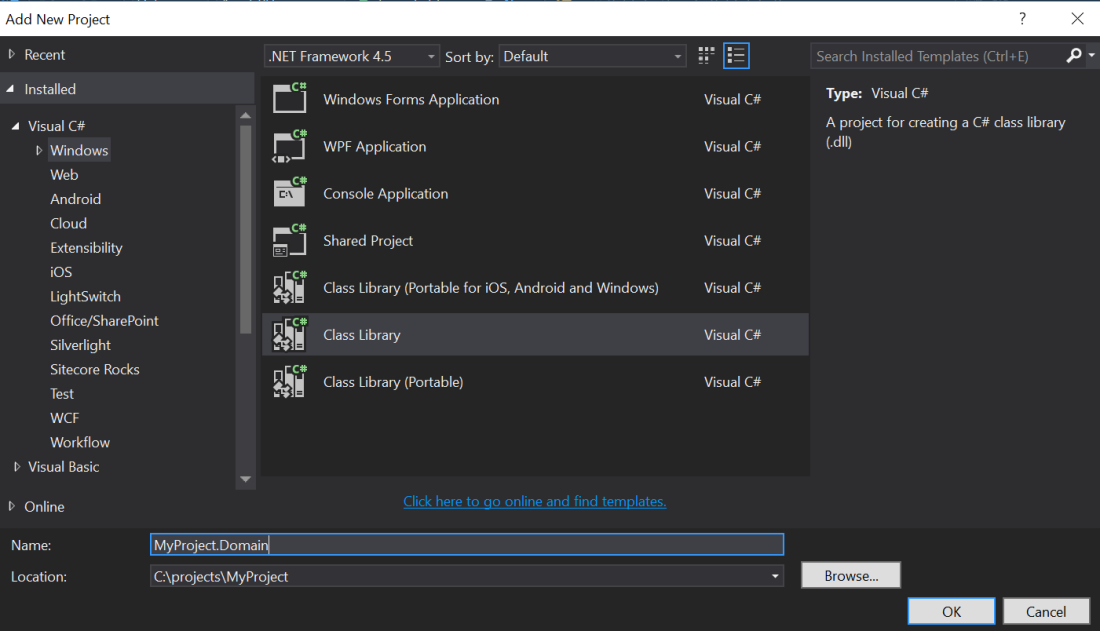
At the time of writing this blog post, I have used VS 2015. Open Visual Studio, navigate to File > New > Project and within templates select Templates > Visual C# > Web > ASP.NET Web Application project. Make sure the .NET Framework is set to 4.5.2 or above. Optionally you can un-tick the ‘Application Insights’ box if you are not using it:
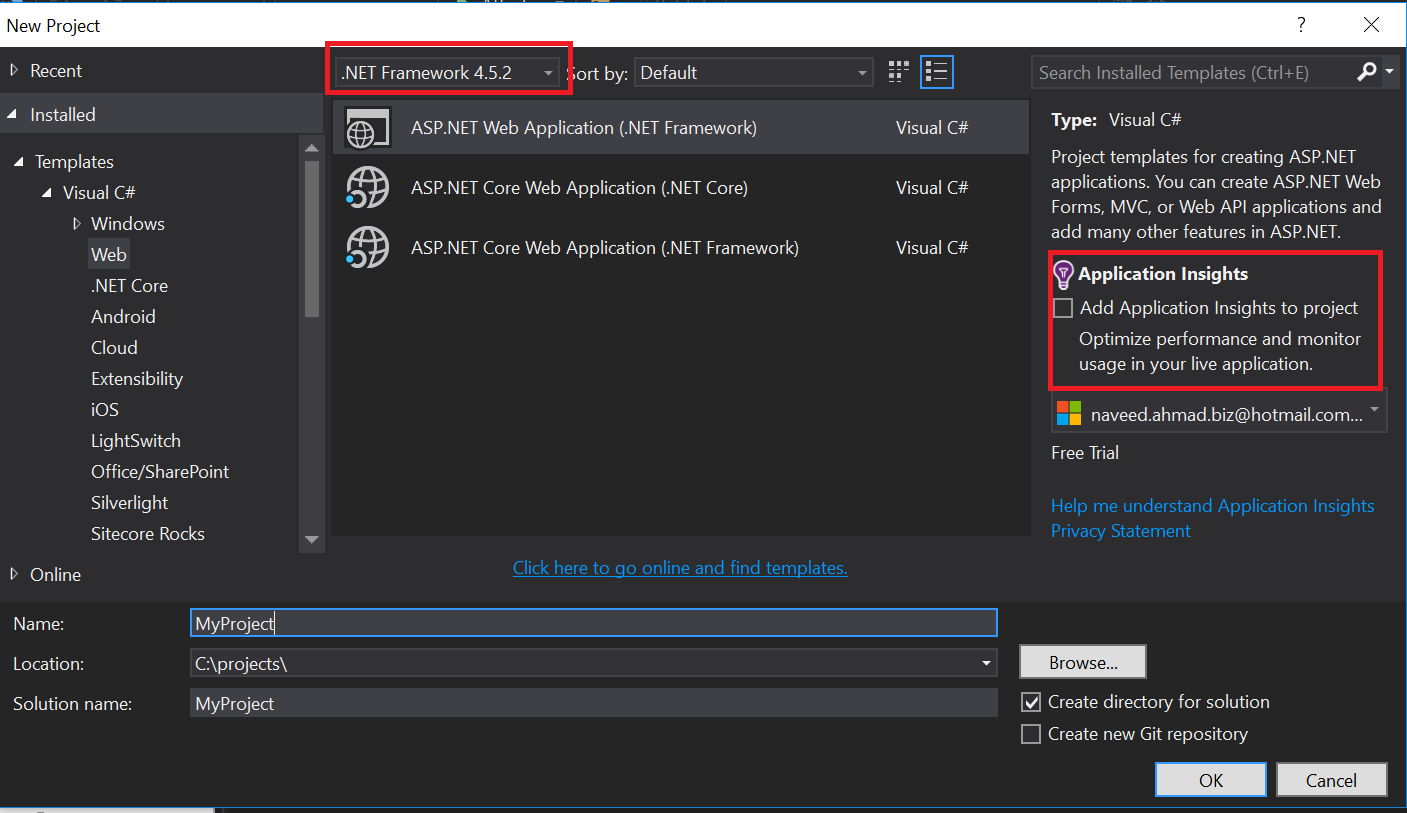
The VS project physical location should be setup somewhere other than the installed instance of Sitecore. For the purpose of the blog, it will be at C:\projects\MyProject where as the installed Sitecore instance will be at C:\inetpub\wwwroot\myproject\website. If you are not sure which version of .NET to use with your Sitecore instance, please check out the compatibility matrix.
Step 2 : VS Project Type
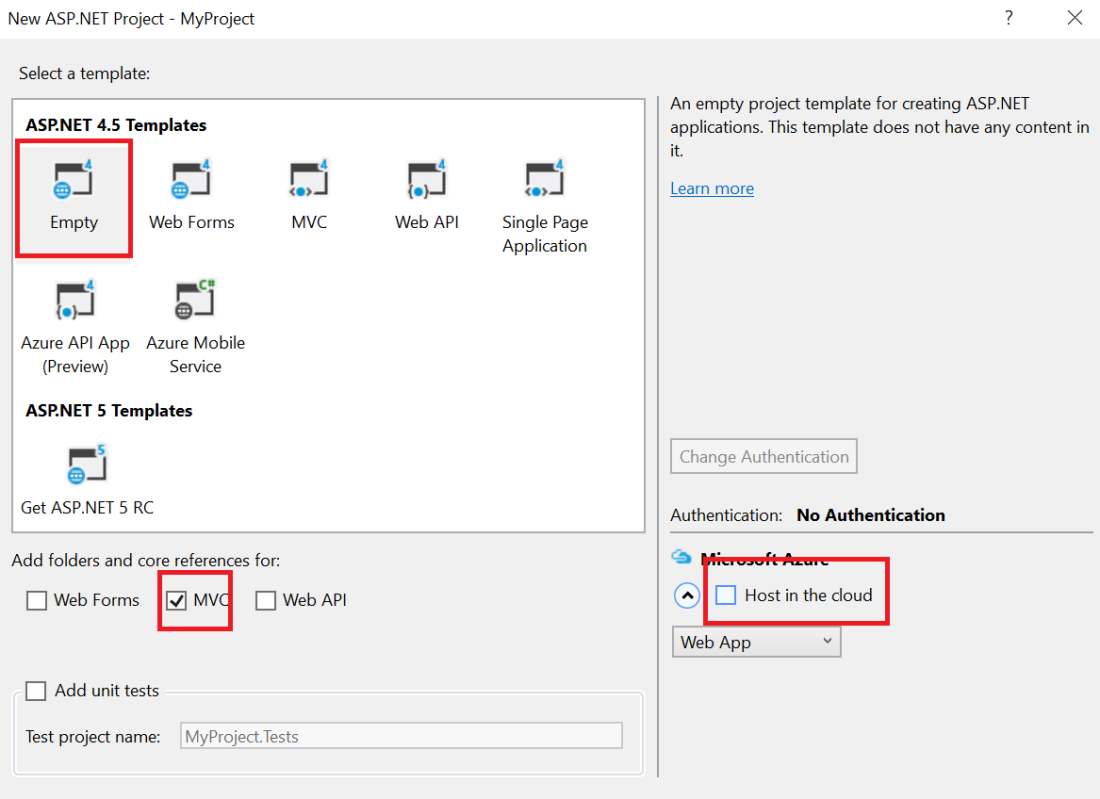
Select ‘Empty’ template project but tick the ‘MVC’ box under the core references. If you are not using Azure, un-tick host in the cloud option as shown below:
Step 3 : Exclude and Delete Files
Once the project is created by the wizard, it will also installed some standard configuration files which we will overwrite in the next step. For now, please exclude the following files from the project and also delete their physical version:
- Global.asax
- Global.asax.cs
- Web.Config
- Web.Config.Debug
- Web.Config.Release
Step 4 : Copy and Include Files
Navigate to the installed directory that was created automatically by the Sitecore Installer. In this case it will be C:\inetpub\wwwroot\MyProject\Website and copy the following files into current project:
- Default.aspx
- Default.css
- Default.js
- Global.asax
- Web.config
- Webedit.css
Include these files via the VS project ‘Include File’ options
Step 5 : Add Sitecore References
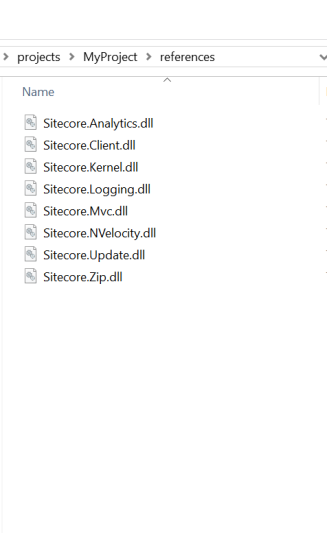
Navigate to the bin folder of the installed directory that was created automatically by the Sitecore Installer. In this case it will be C:\inetpub\wwwroot\MyProject\Website\bin and copy the following files in a folder called ‘references’ (or lib or another folder of your choice)
- Sitecore.Kernel
- Sitecore.Client
- Sitecore.Logging
- Sitecore.Mvc
- Sitecore.NVelocity
- Sitecore.Updated
- Sitecore.Zip
- Sitecore.Analytics
Reference these files via the VS project’s ‘Add Reference’ option
Recently, Sitecore has also released NuGet feed for distribution purposes, you may use that as well as per their documentation.
Step 6 : VS Custom Projects
Sitecore has recently released and recommended Helix Framework for overall design of Sitecore projects. It is strongly recommended for any future projects to be based around these design principles. However, for simplicity purposes and keeping in mind the target audience, we can just add the following class library projects:
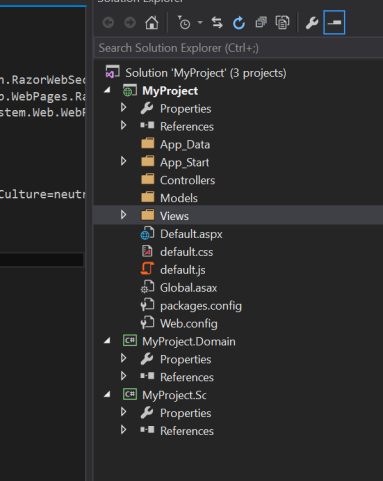
- MyProject.Domain (It can contain auto-generated data model for the templates and other models)
- MyProject.Sc (It can contain Sitecore specific customization code like workflow, pipelines etc)
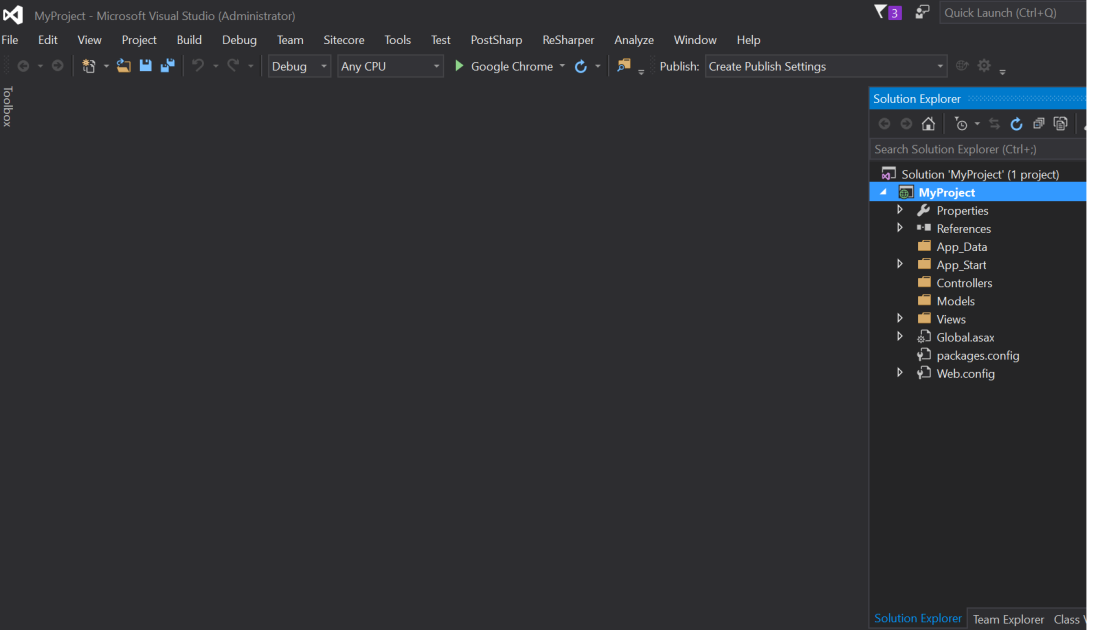
Once both projects are added, the overall VS project should look like below:
Step 7 : Setup Local publish profile
The next step will be to setup a local publish profile for the project, as the installed directory location was different then the VS project location.
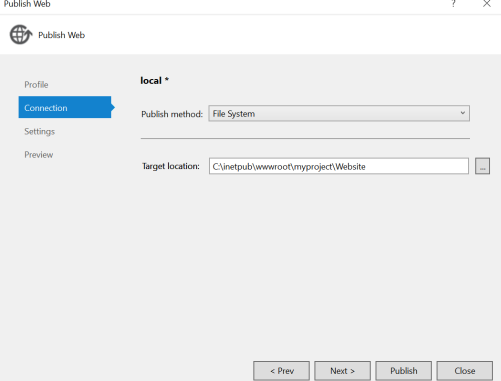
Create a new custom publish profile as ‘local’ from the ribbon option

Select ‘File System‘ for the publish method drop-down and select the target location of the installed directory as shown below:
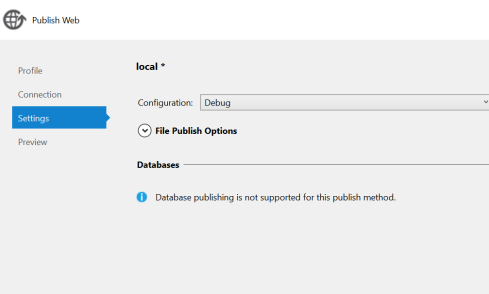
Select ‘Debug‘ option from the configurations drop-down so you can debug the code locally after deployments. This should only be chosen for local deployments, for QA and other environments, ‘Release‘ should be selected.
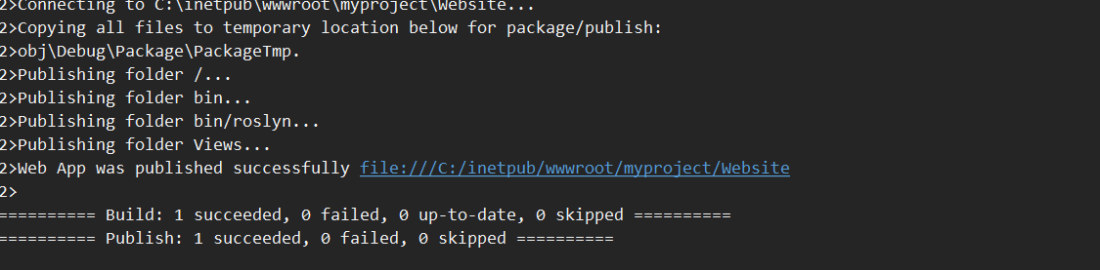
Preview all your settings and hit publish, upon successful publish you should see the following message:
Step 8 : XML config transforms
We need to create environment specific config files which we can then transform to correct config settings during the automated deployment.
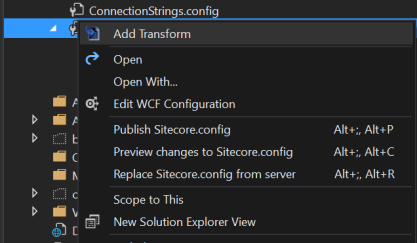
For this purpose, install VS SlowCheetah extensions and then you right-click to add any new configuration files. For example, after I right-click on the Sitecore.config I see the following options:
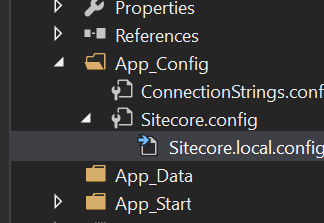
Once you click ‘Add Transform’ new config file (Sitecore.local.config) will be added in the project. This is where environment specific settings can be updated and upon publish they will be transformed. This alone will save you a lot of time of managing different config settings for different environments.
A sample XML transform file for replacing the dataFolder location could be:
<?xml version="1.0" encoding="utf-8" ?>
   <sitecore xmlns:xdt="http://schemas.microsoft.com/XML-Document-Transform">
       <sc.variable name="dataFolder" value="C:\Inetpub\wwwroot\myproject\Data\" xdt:Transform="Replace" xdt:Locator="Match(name)"/>
   </sitecore>
Although, you don’t need to specify this variable for local deployment, but you will when it comes to QA, UAT and production deployments. You may want to repeat the same process for connectionstrings.config file.
More information about XML transformation can be found on MSDN website
Once the initial setup project is done, we are ready to add configure TDS projects which will be discussed in the next post.
Stay tuned.
Thanks
Related Blogs
- Part 1 – Continuous Integration – Why your Sitecore project deployments must be automated ?
- Part 2 – Setup and Configure Visual Studio Sitecore Project
- Part 3 – Setup and Configure TDS
- Part 4 – Setup Sitecore Glass
- Part 5 – Setup Source Control (Git)
- Part 6 – Setup QA Server, DB server and CI server
- Part 7 – Setup Continuous Integration using Team City
- Part 8 – Setup Slack Notifications with TeamCity and Bitbucket

Hi Naveed,
Great series so far. I may be jumping ahead, but I just wanted to add that TDS will also support config transforms, if you choose to use it to do the file deployment as well (instead of One-Click Publish).
Then there isn’t a need for SlowCheetah because you can you this handy little trick for creating your transform files (http://www.teamdevelopmentforsitecore.com/Blog/config-transforms-config-files) and leave it up to TDS to perform the transform and deployment of the configs.
Anyway, loving these blog posts. Keep it up!
– Sean
Hi Sean,
Thanks for the feedback and little handy trick from TDS.
Naveed.